How to Make a House Shaped Magnetic Chalkboard for Cheap
Learn how to make a chalkboard shaped like a house for a kid’s playroom or bedroom.
*This House Shaped Magnetic Chalkboard post is sponsored by The Home Depot and contains affiliate links and I will be compensated if you make a purchase after clicking on my links.
So I have been taking my slow time in redesigning my home office. But in a way, it’s been good because it’s allowed me to see what would work in a combined space that I share with my toddler. One thing is for sure is she has to have a designated spot for her “work.” Lately, my daughter’s new thing is writing on the wall, or doors, or floors. She will pretty much write on anything. Also, she loves magnets. So channel all that creative energy I’m creating a place in my…our home office where she can freely express herself. So in this post, I’m going to show you how I made this chalkboard shaped like a tiny house that is also magnetic. Gone are the stickers… hello kiddie educational magnets.
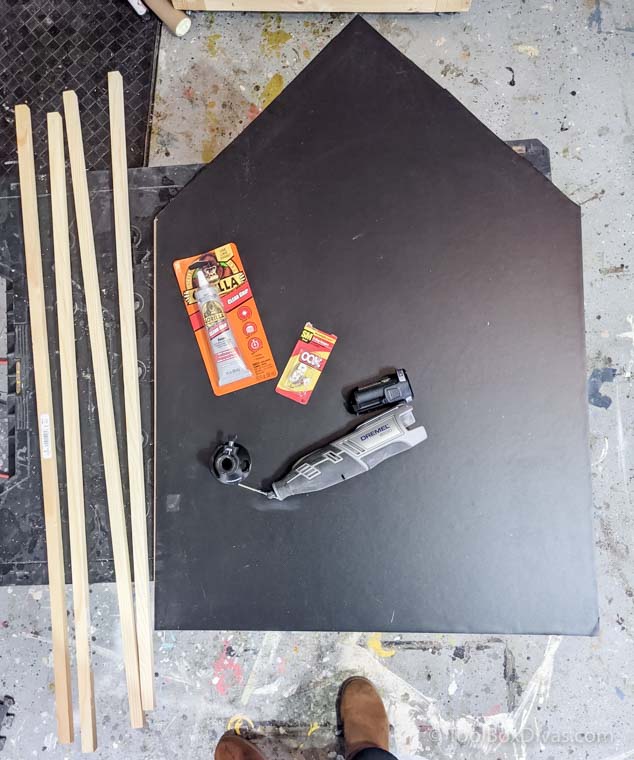
Here’s What You’ll Need
Materials
- 1/8 in. x 2 ft. x 4 ft. Tempered Hardboard
- 5/8 in. x 36 in. Poplar Square Dowel
- Magnetic Self-Adhesive Chalkboard Contact Paper
- Contact Adhesive
- ReadyScrew D-Ring Hanger
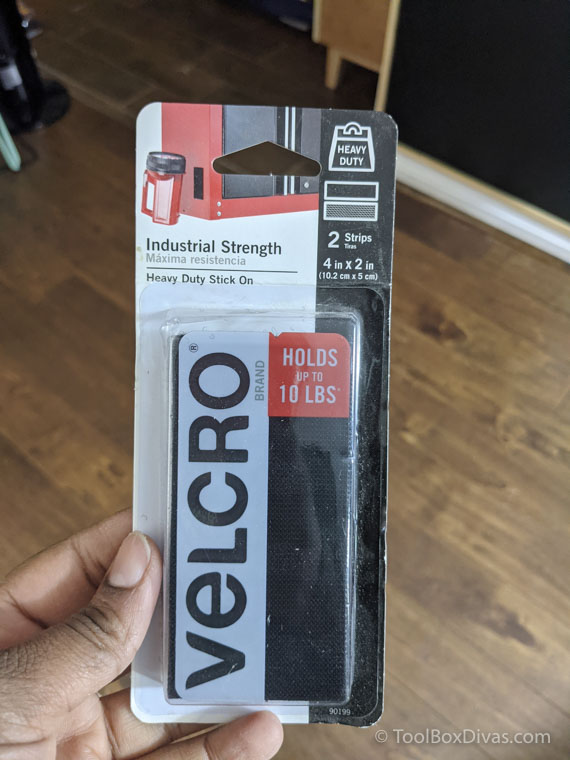
- VELCRO 4 in. x 2 in. Industrial Strength Strips
Tools
- Dremel 8220 Series Cordless Rotary Tool Kit
- Dremel 565 Cutting Kit
- Exacto Knife
- Jigsaw or Dremel Ultra-Saw 20V MAX Cordless Compact Saw Tool Kit
- 12 in. Carpenter Square
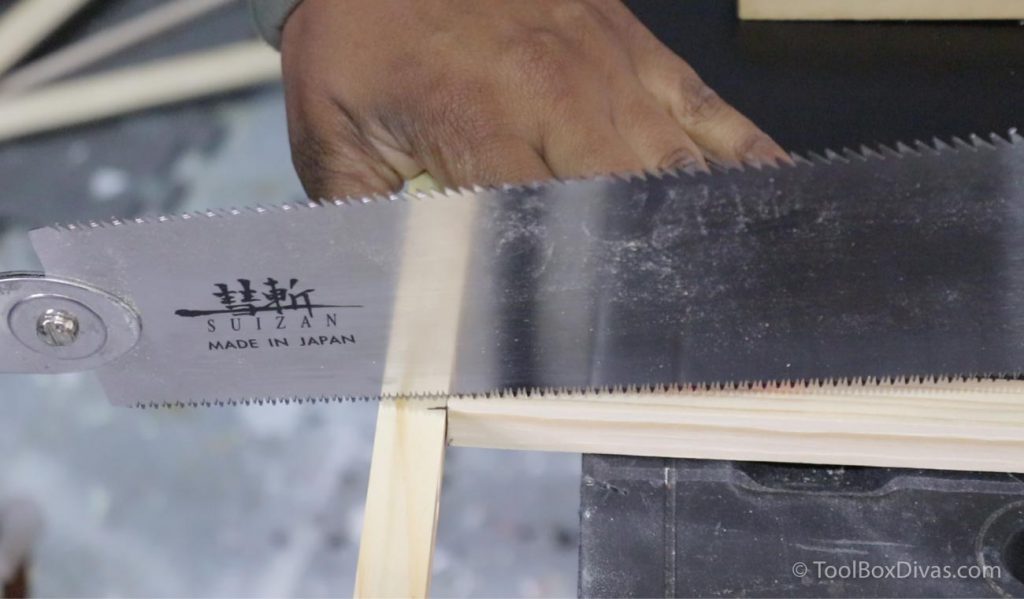
- Pull Saw
- Sander or Sanding Sponge
- Brad Nailer
OK, Let’s Get Dirty!
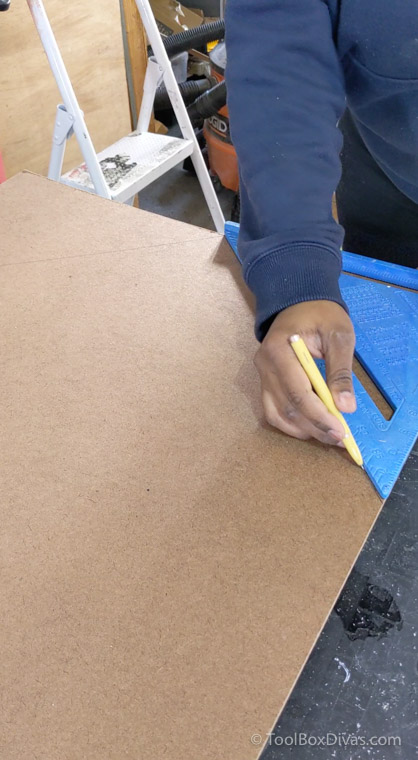
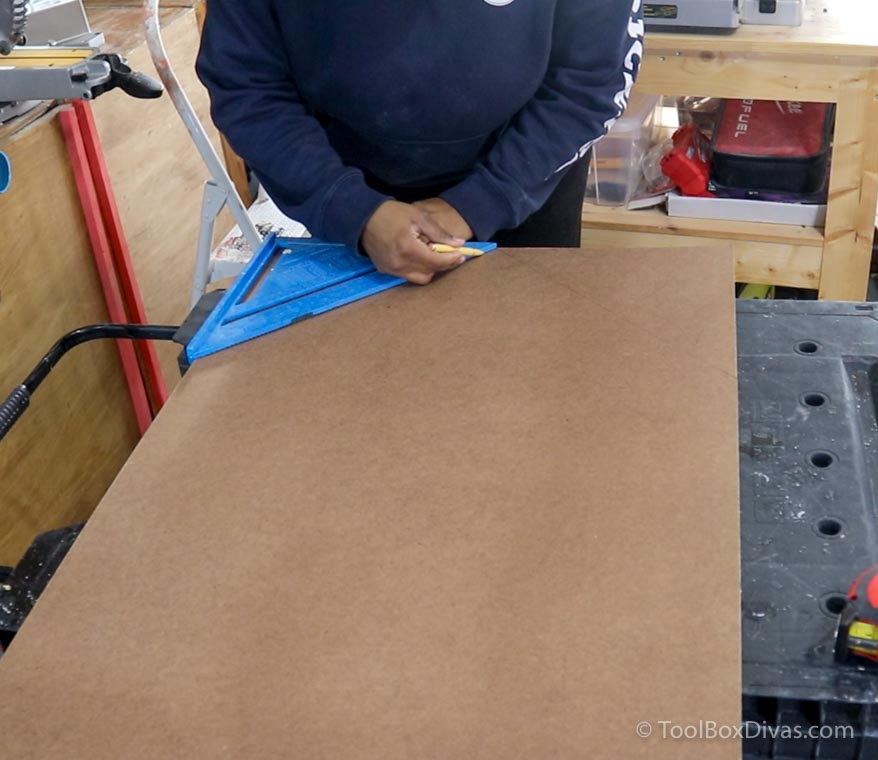
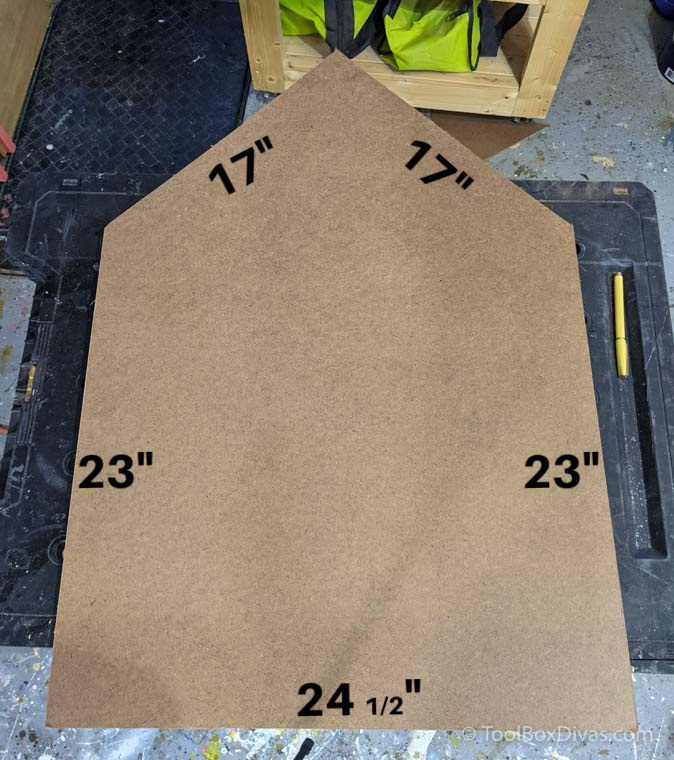
Step 1. Cut the tempered board down to size and create the house shape.
Cut the board down to 35.” The top of the house is easily traced using a 12in. carpenter square. It is exactly half the width of the board and allows you to trace out the pitch of the roof.

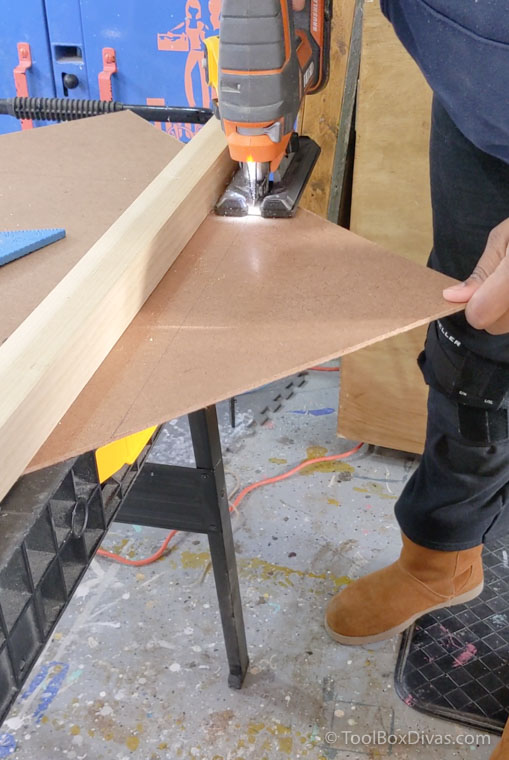
Next let’s cut the pitch of the roof for the house shape. Cut down the board using a jigsaw or the Dremel Ultra-Saw. Simply line up a board to use as an edge guard and clamp it to your work surface. Now the chalkboard is starting to look like a house.
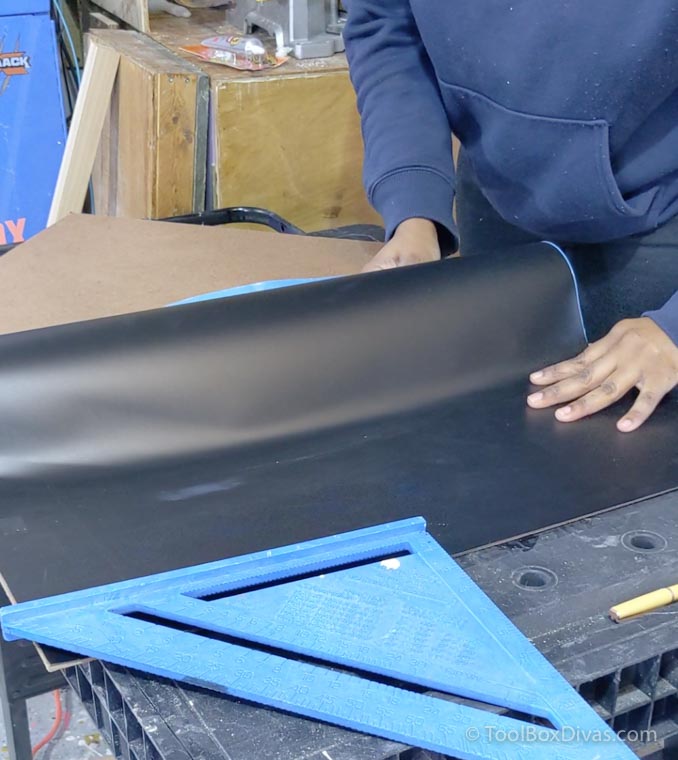
Step 2. Apply the magnetic chalkboard contact paper.
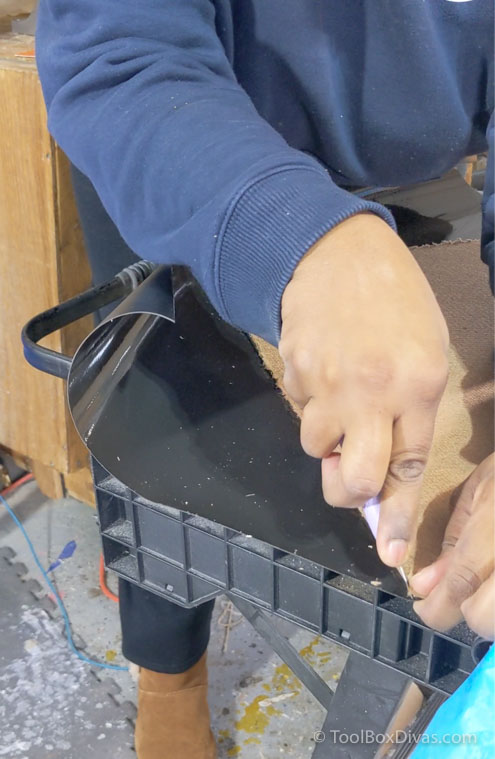
Now wipe down the surface of the tempered board with alcohol to remove any debris or dust. And starting from the bottom roll on the magnetic chalkboard contact sheet. Trim the top with a hobby knife.
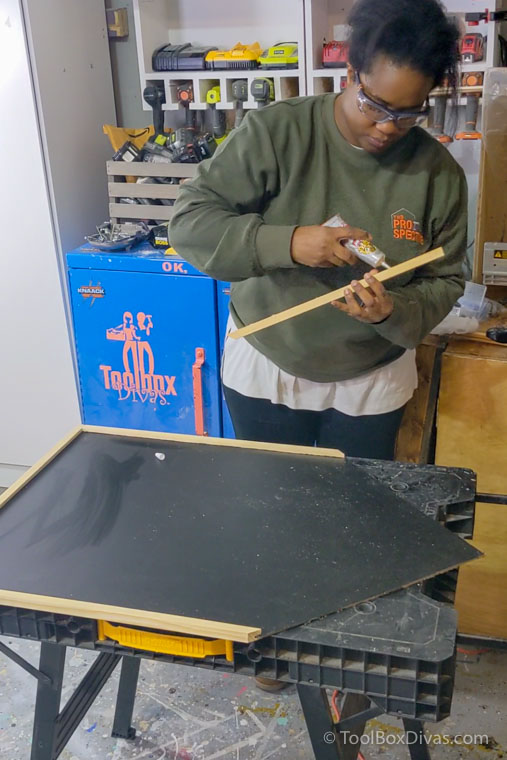
Step 3. Prepare the trim boards.
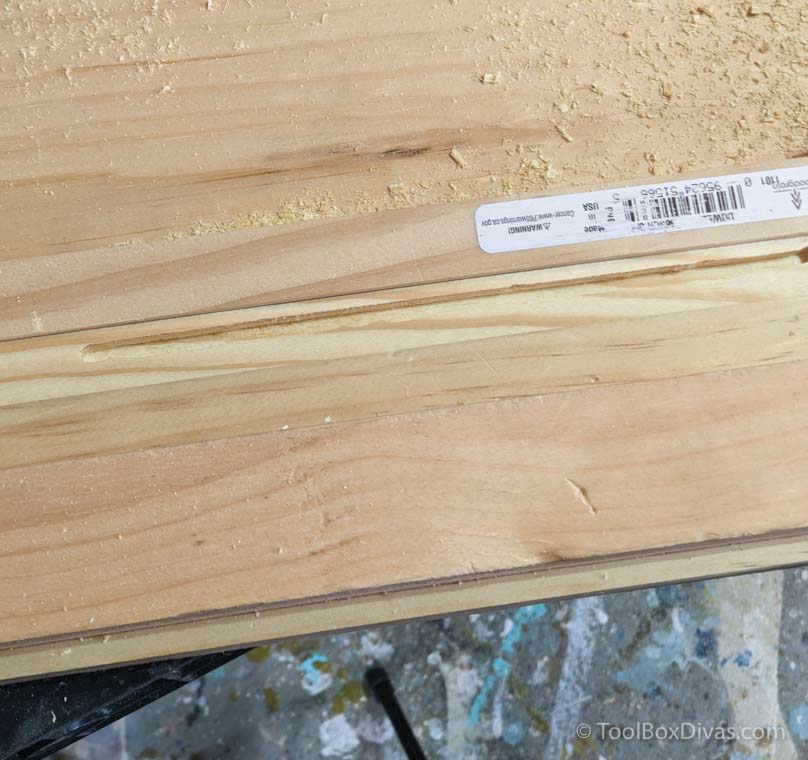
Now it’s time to trim out the chalkboard house. But before we do we need to prep the wooden dowels so that you can insert the tempered board into the trim. So we will create a routed slot using the Dremel 8220 Series Cordless Rotary Tool Kit and Dremel 565 Cutting Kit.
Using my Rotary Tool Router Jig, I insert the square dowels one by one and am able to route an opening in the middle of the square dowel. This is where I’ll slide the tempered board into the trim.
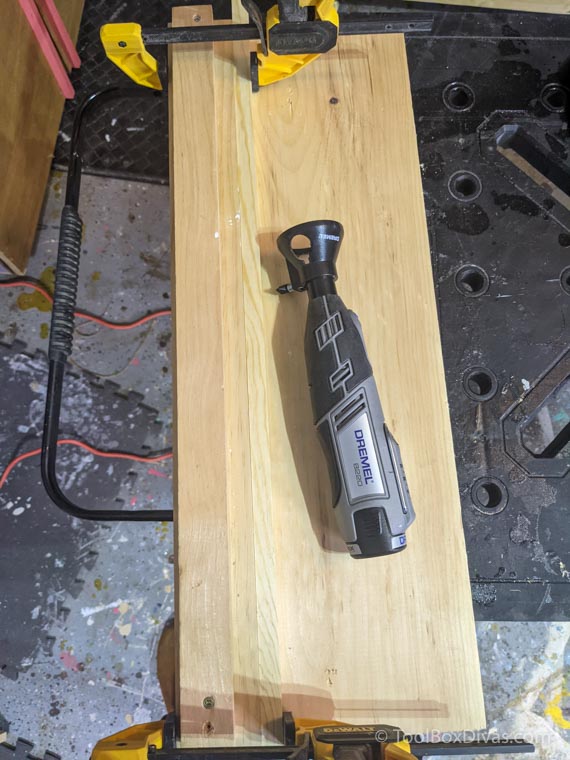
When using the Dremel 565 Cutting Kit the cutting adapter is very important. DO NOT use without the adapter.
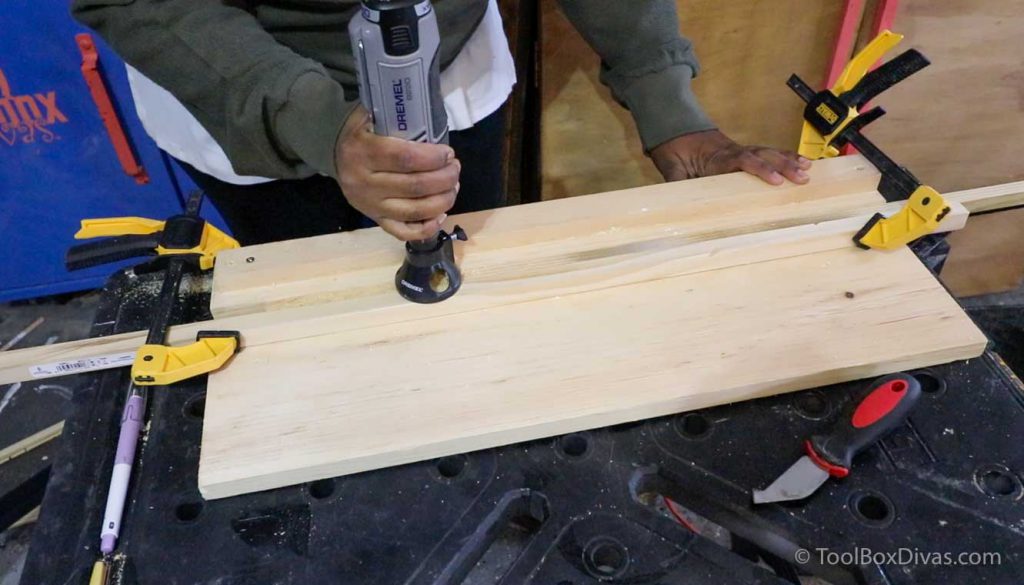
Move slowly and it’s very handy to have a vacuum near by to clear away the excess wood particulates as you go. The grove that you make fits the thickness of the 1/8 tempered board with contact paper perfectly.
Step 4. Cut the trim down to size.
Now cut the trim for the chalkboard down to size. All the angles the pitch of the roof of the house are 45 degrees. You can easily cut the trim with a pull saw and miter box or a miter saw.
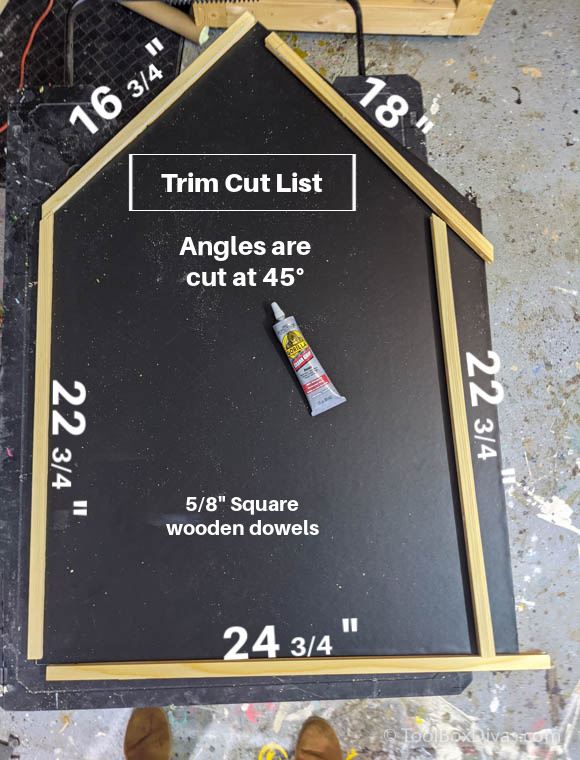
I preferred cutting the pieces with a pull saw. I also found it easier to the pieces as I went along and so a dry fitting to ensure all my cuts were accurate.
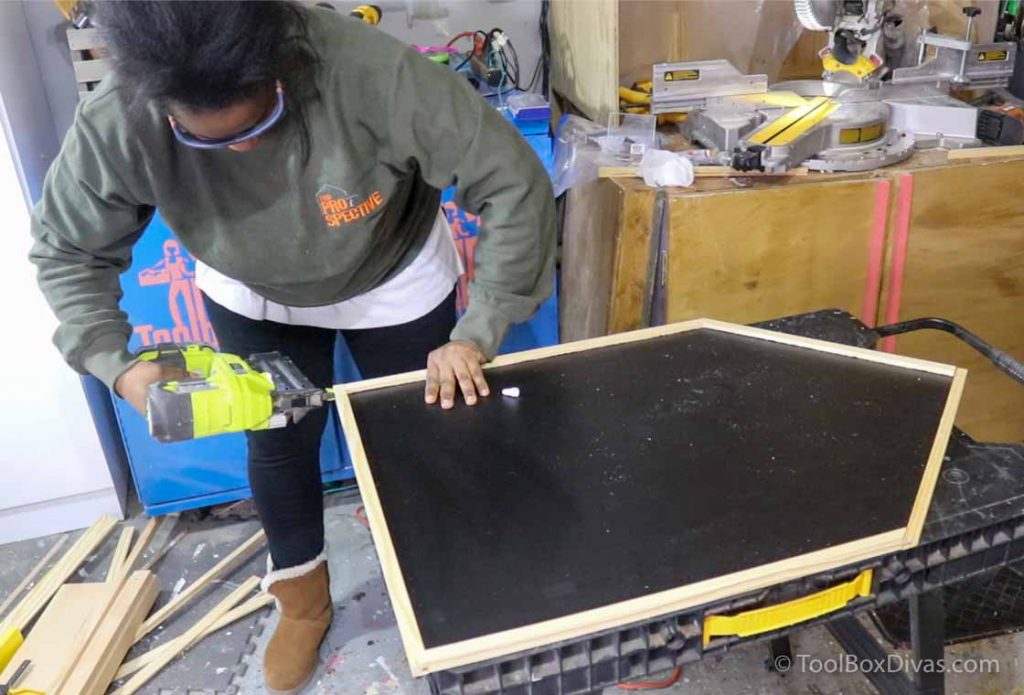
Step 5. Apply Trim.
With all the pieces cut line the grove with glue and slide the wooden square dowel trim for the chalkboard in place.
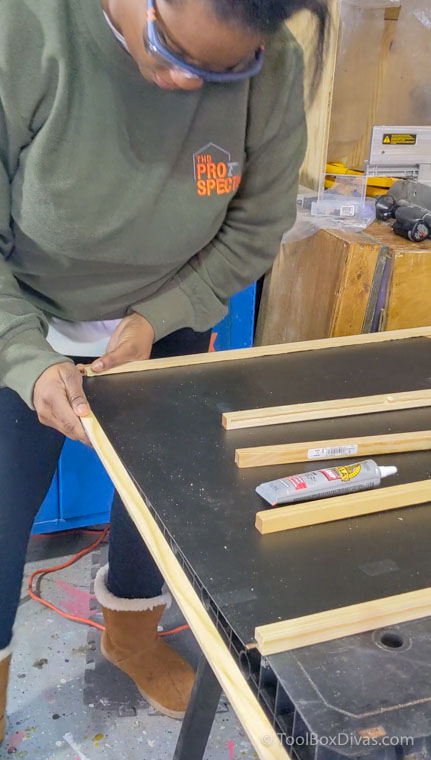
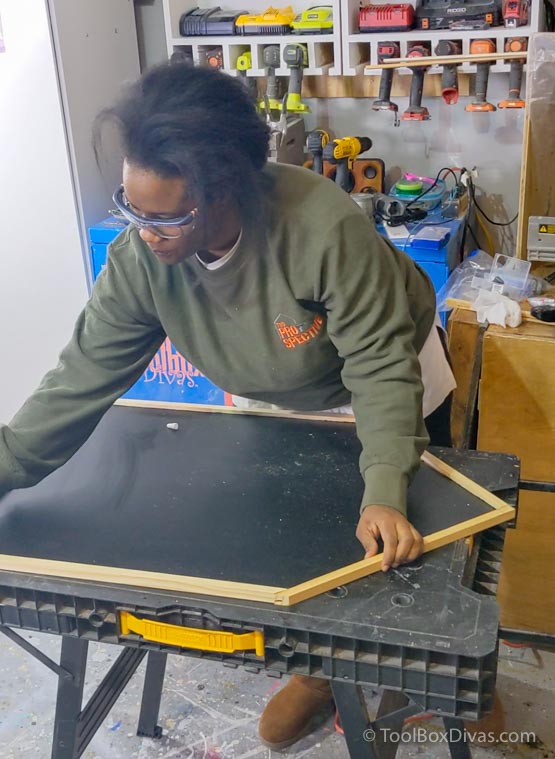
To secure the edge I used a brad nailer on the edges and corners.
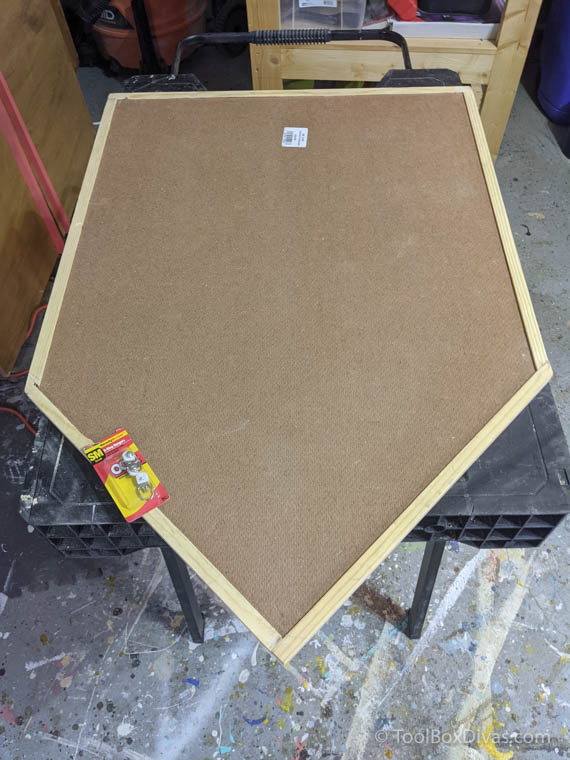
Step 6. Add hanger hooks.
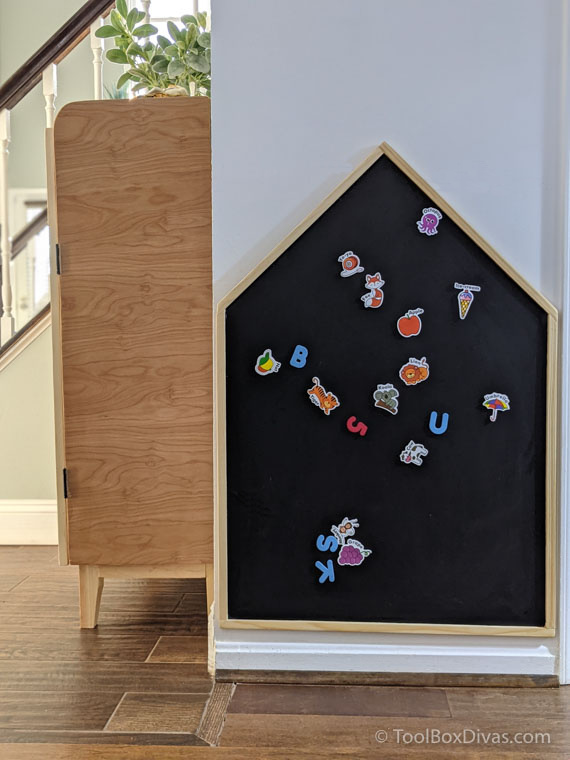
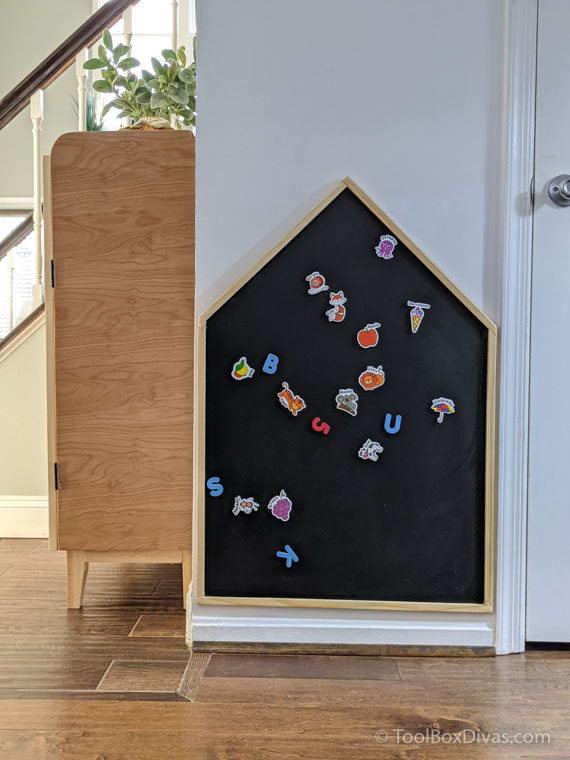
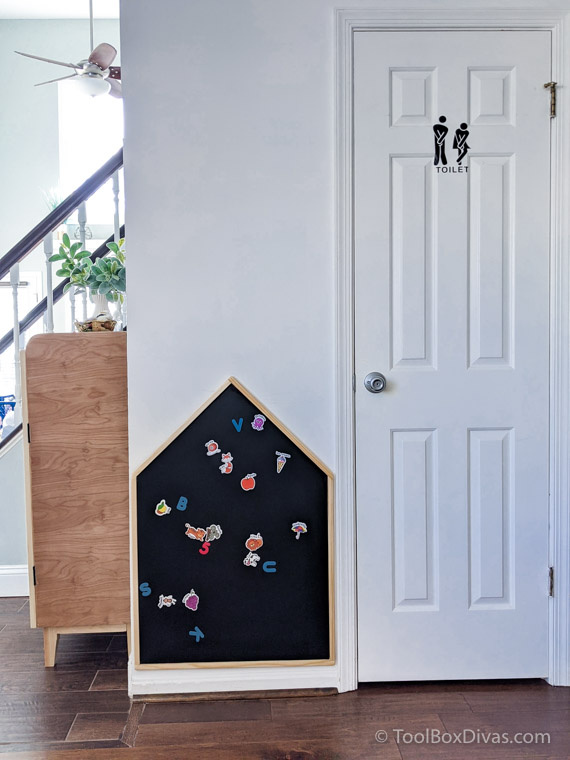
The house-shaped chalkboard is all done. Now add small picture hangers to the back and it’s time to put this chalkboard to use.
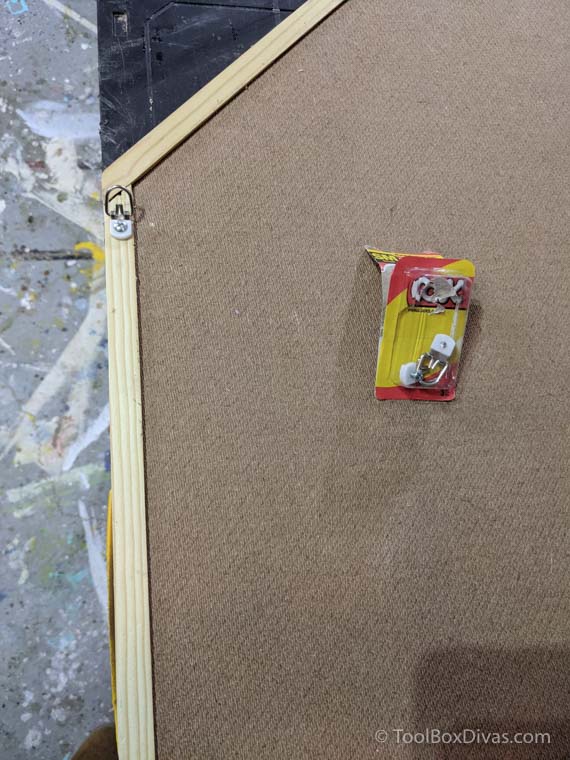
Hang in a location where your child has easy access. For additional security, use velcro strips to all 4 corners and at the top. My daughter is rough and the first thing she tried to do was remove the chalkboard from the wall. These velcro strips stopped it from moving. I strongly recommend using them.
Get some chalk and add colorful magnets to the board. Enjoy! My daughter now has her own “workspace” in our shared home office.

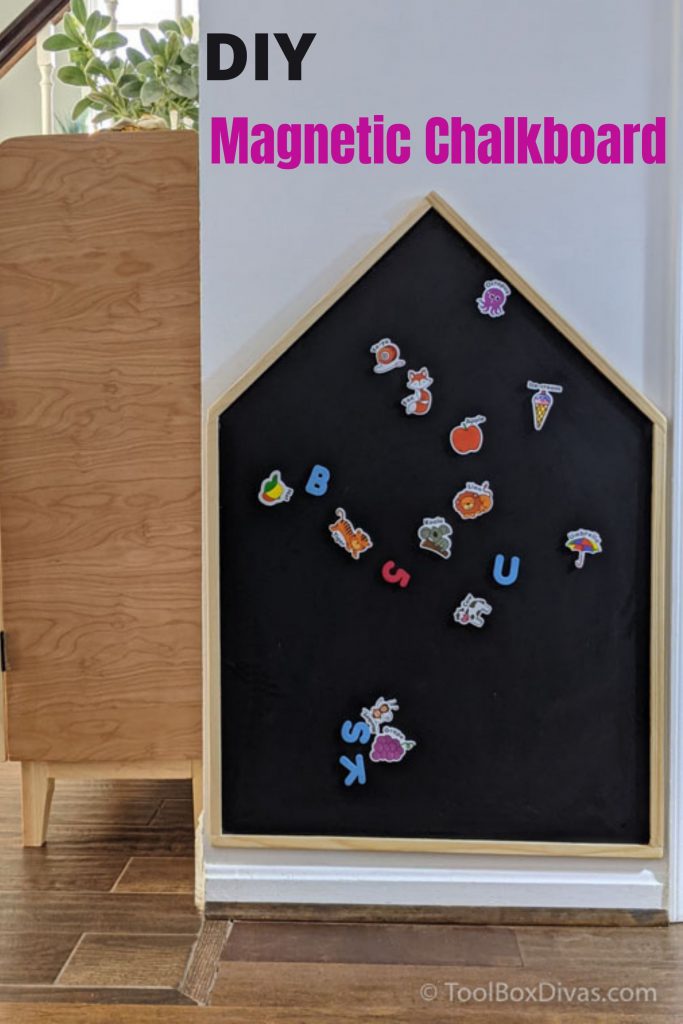
Pin It. Save it for Later
For more easy to follow DIY projects visit:
DIY Cable Management Box | Baby Proof the Surge Protector
Super Easy DIY Kids Table and Stools
I acknowledge that The Home Depot is partnering with me to participate in the THDProSpective 2020 Campaign. As a part of the Program, I am receiving compensation in the form of products and services, for the purpose of promoting The Home Depot and its partners. All expressed opinions and experiences are my own words. My post complies with the Word Of Mouth Marketing Association (WOMMA) Ethics Code and applicable Federal Trade Commission guidelines.