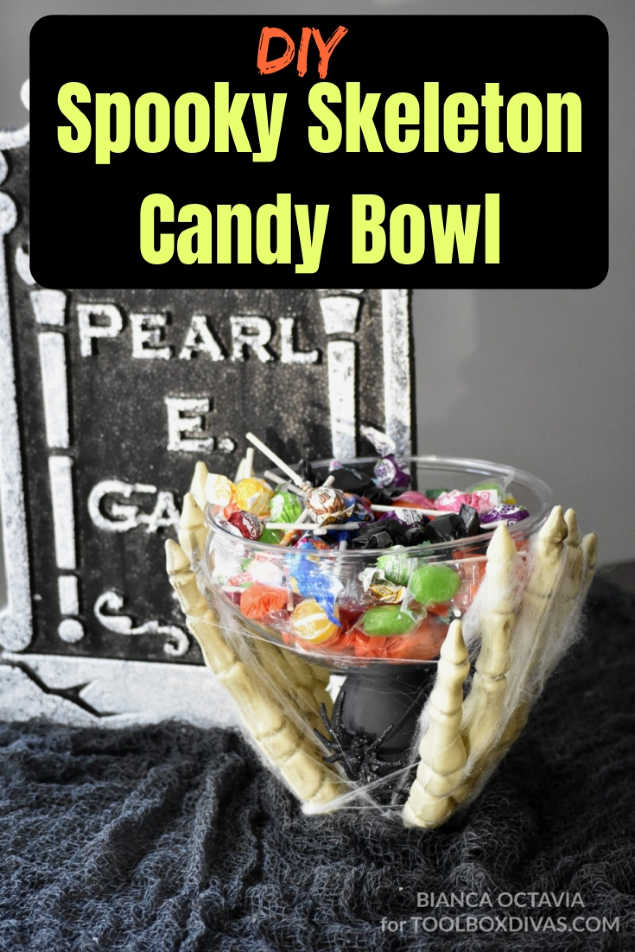
Spooky Skeleton Candy Bowl
Create a Spook-Ta-Cular candy bowl for your Halloween party or the visiting trick or treaters with a few items from the Dollar Tree.
Hey guys! It’s Bianca, an avid DIYer and I blog over at Bianca Octavia.
One of my favorite holidays is quickly approaching and I am back this month with my first DIY project of the season. I made this spooky skeleton bowl in preparation for my Halloween themed housewarming and I am loving how it turned out. When you aren’t passing out candy to the kiddies, it can also be used a creepy cool serving dish. The supplies you’ll need are few, and the project is easy to complete!
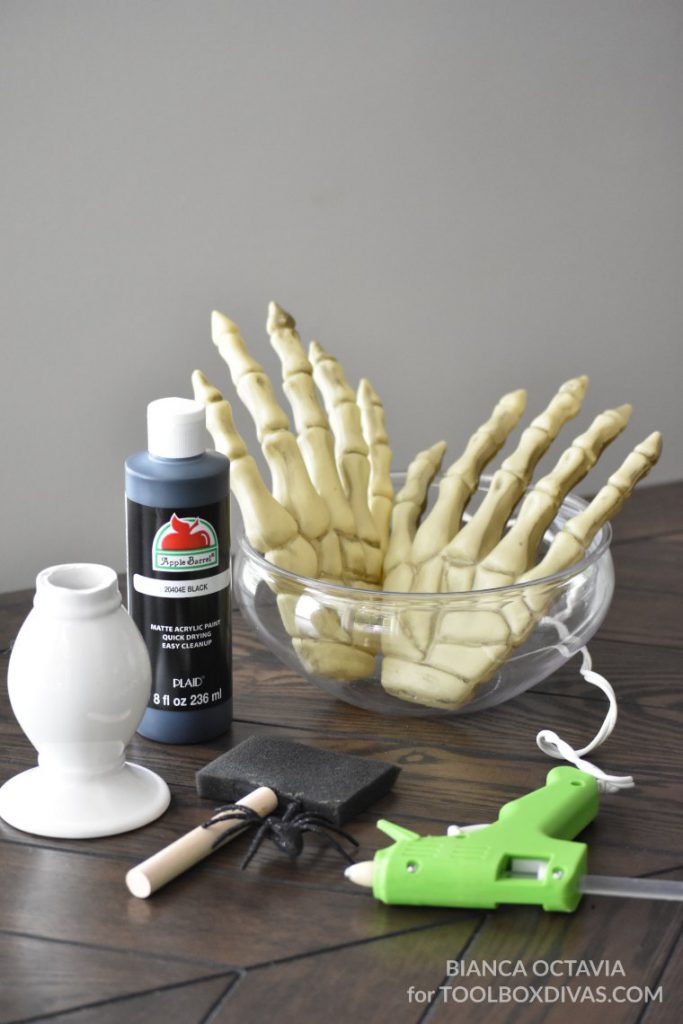
Here’s what you’ll need:
MATERIALS
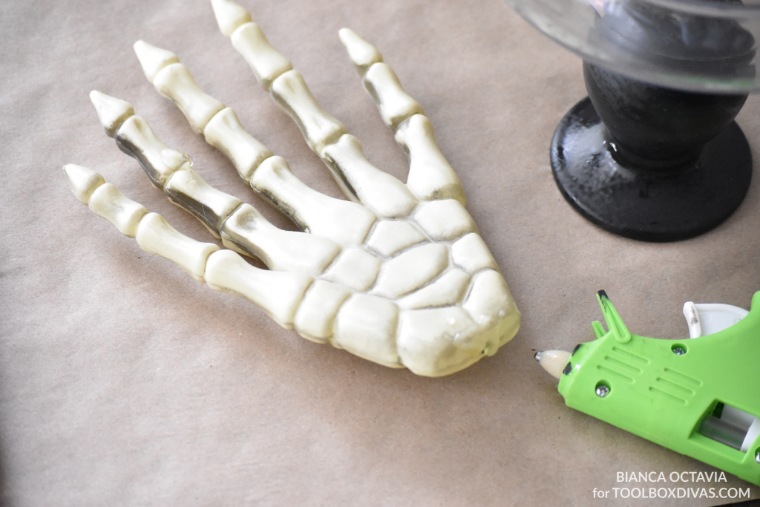
- 1 pair of skeleton hands
- Medium-sized bowl
- Candleholder or pedestal
- Hot glue gun
- Craft paint
- Sponge brush
OK, LET’S GET DIRTY!
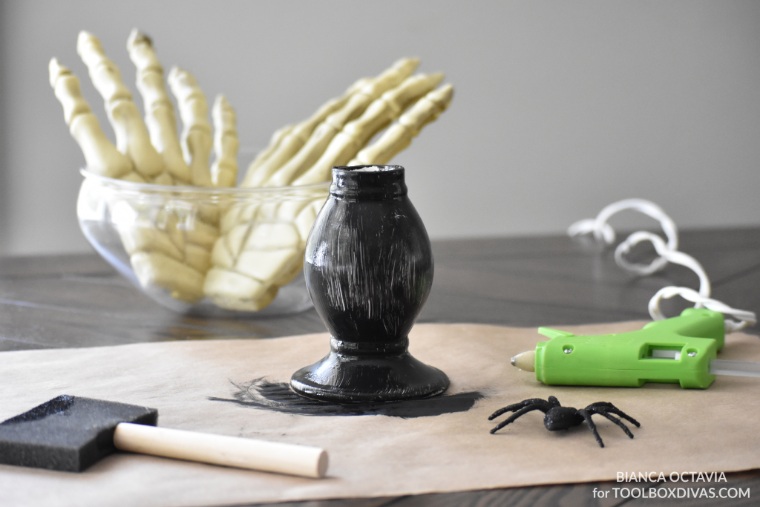
Step 1.
Paint your candle holder or pedestal using your choice of crafting paint. Apply a second coat if needed and allow the paint to dry for 15-20 minutes.
psssst……I was able to get away with using a pedestal from a cake stand that I’d broken earlier this year. I decided to keep it because I knew there would be some type of clever use for it in the future. If you do not have a broken pedestal like me, no worries. You’ll still follow the same steps.
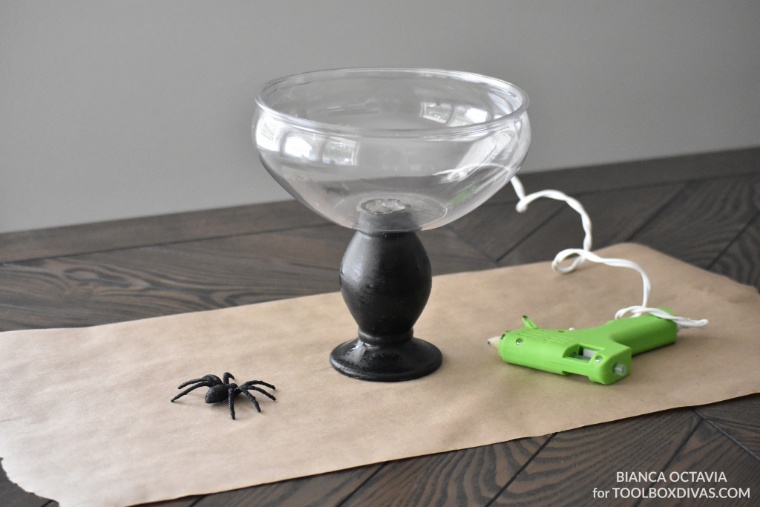
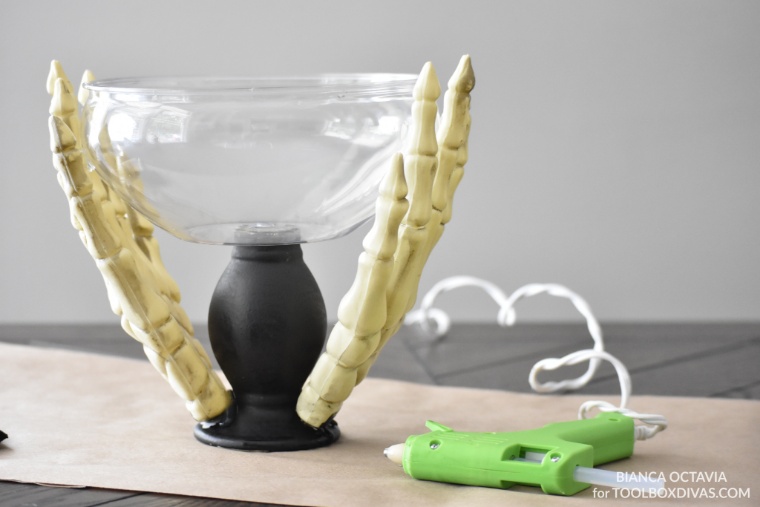
Step 2.
Line the top the candle holder/pedestal with hot glue and immediately set your medium-sized bowl on top. Hold the bowl down for 30 seconds or until it is completely secured to the base.
I suggest using a plastic bowl instead of glass to avoid clean up in the event that it is knocked over.
Step 3.
Line the bottom of your first skeleton hand with hot glue and quickly press it against the base of the candle holder/pedestal. If your bowl size allows the fingers to touch the bowl in any way, add extra security by gluing them to the bowl as well. Repeat the same process with the second skeleton hand.
Step 4.
After all the glue has dried and everything is securely in place, you can decorate the bowl to your hearts desire. I glued plastic spiders to the bottom of my base and added fake spider webs around the hands to add a little extra spookiness!

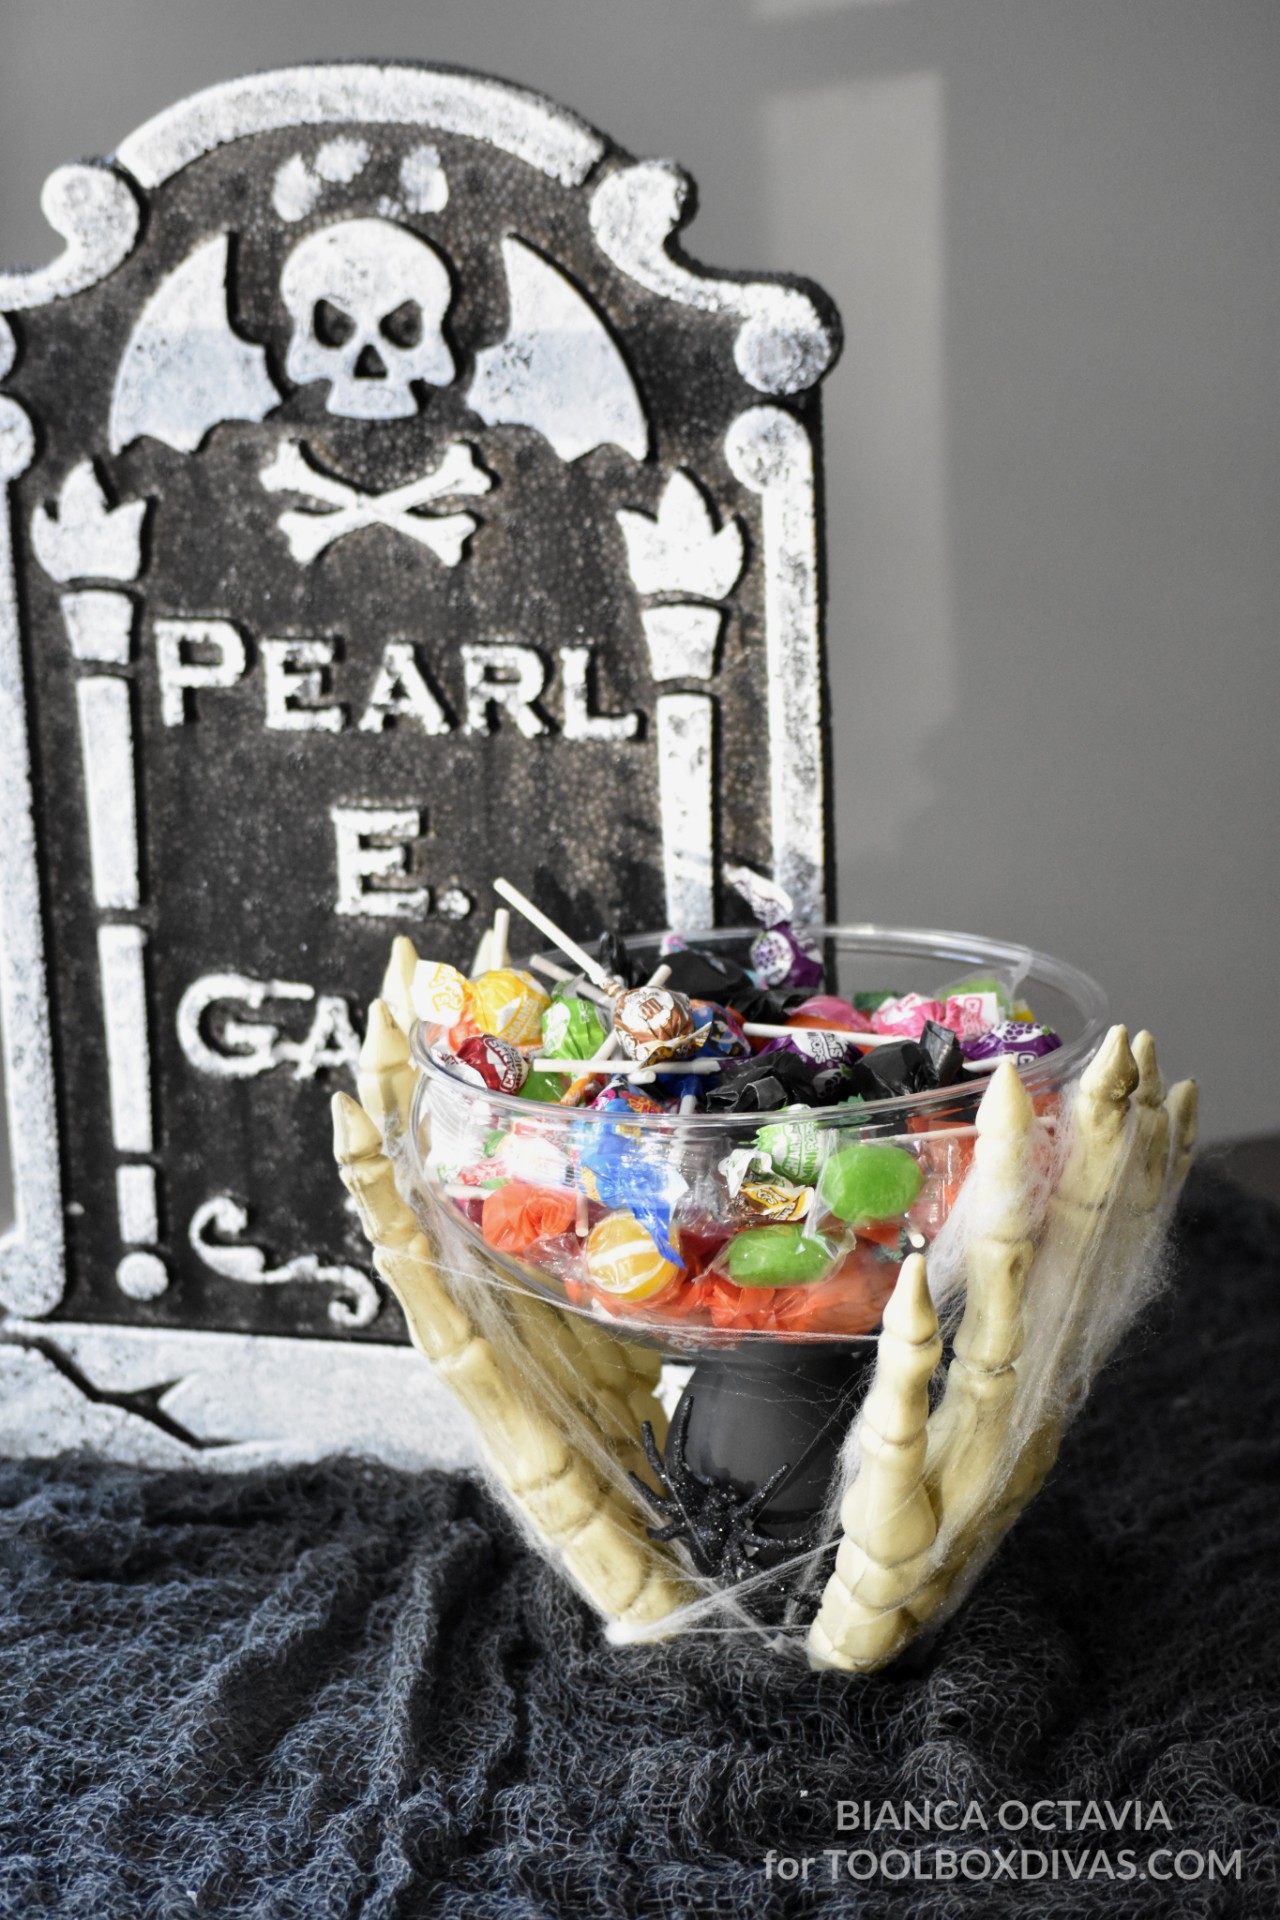
Happy haunting everyone!
For more Fall DIY projects check out these: