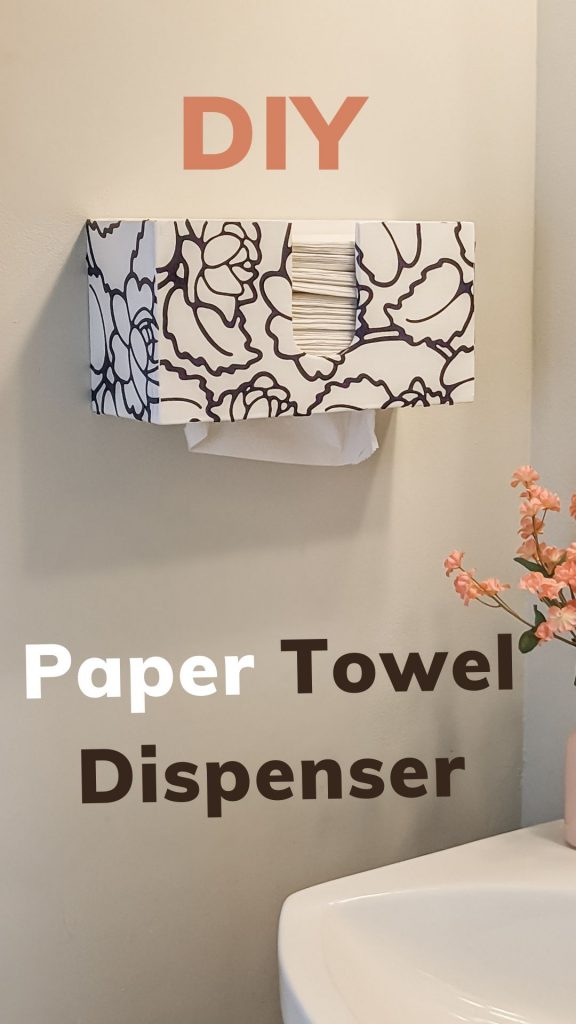
How to Make a DIY Paper Towel Dispenser
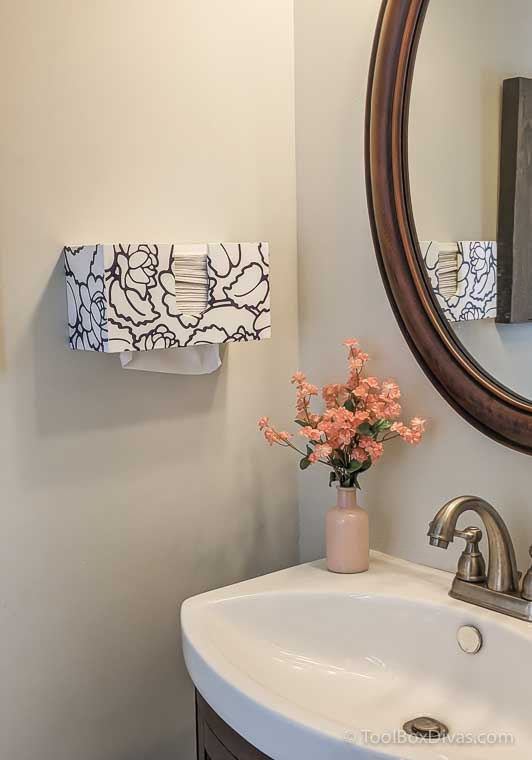
Learn how to make this easy paper towel dispenser for c-fold and multi-fold paper towels.
*This post is sponsored by The Home Depot and contains affiliate links. I will be compensated if you make a purchase after clicking on my links.
When the pandemic first started paper towels were in short supply. During that time I started buying C-Fold or Multi-Fold Paper Towels. But the problem is I had no place to store them. I’d just place it on the counter or in an old Krispy Kreme box (lol it was rough). I kept saying I need to get a dispenser for these paper towels. But like a true procrastinator, I kept putting it off. But I finally got around to it and now I’m thinking ‘what took me so long.’ Hahaha. I love the way it turned out and I’m making multiple for other rooms throughout the house. This super cute DIY paper towel dispenser can be placed on the counter on mounted to the wall.

Materials
- 1 – 1/2 in. x 4 in. x 4 ft. S4S Poplar Board
- 1- 1/4 in. x 6 in. x 4 ft. S4S Poplar Board
- Wood Glue
- Paint or stain
- Permanent Vinyl (Optional)
Tools
- Dremel 8220 Series Cordless Rotary Tool Kit with 30 Accessories and Case
- Jigsaw or add Dremel Multi-Purpose Cutting Kit for Cutting Wood to the Dremel 8220 Series Cordless Rotary Tool
- Miter Saw ( can be cut with a hand saw)
- Brad Nailer
- Sander
- Sanding Block
- Speed Square
- Tape Measure
OK, Let’s Get Dirty
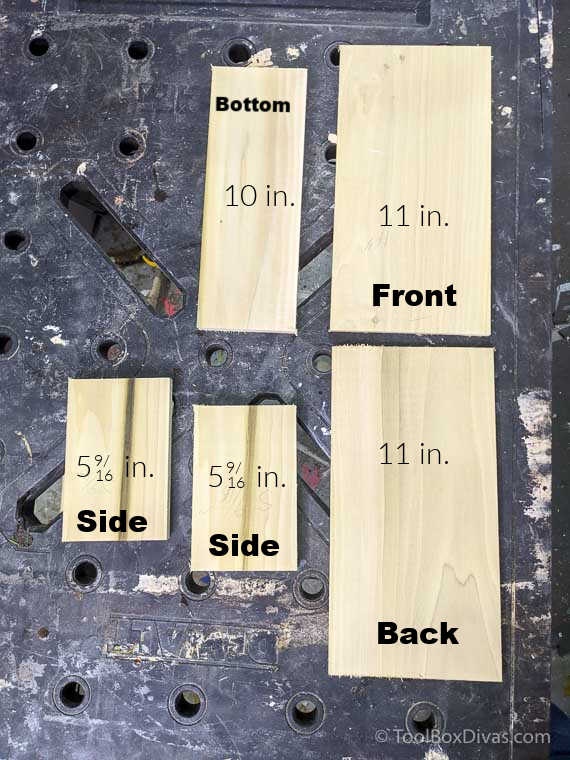
1. Cut boards to size.
Start by cutting the boards down to size. This can be done with a hand saw, miter saw, or jigsaw. Use what you have. For this project I’m keeping it simple with hobby/craft boards you can find at your local Home Depot.
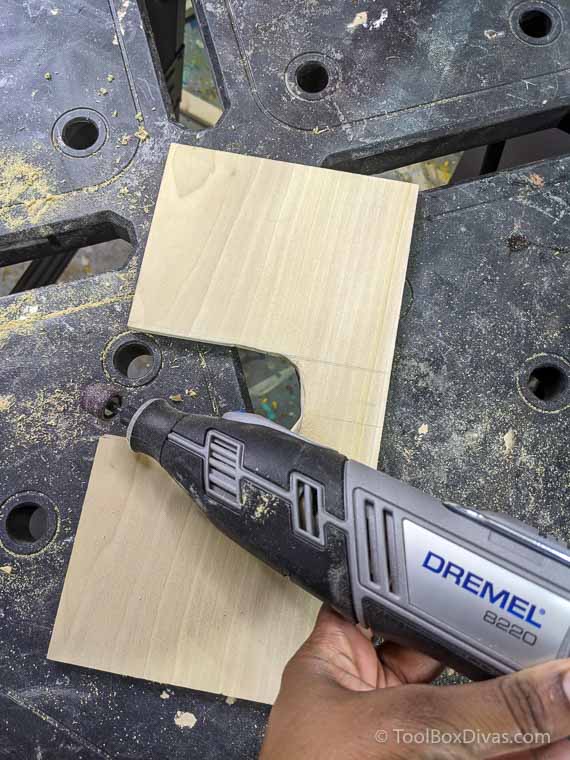
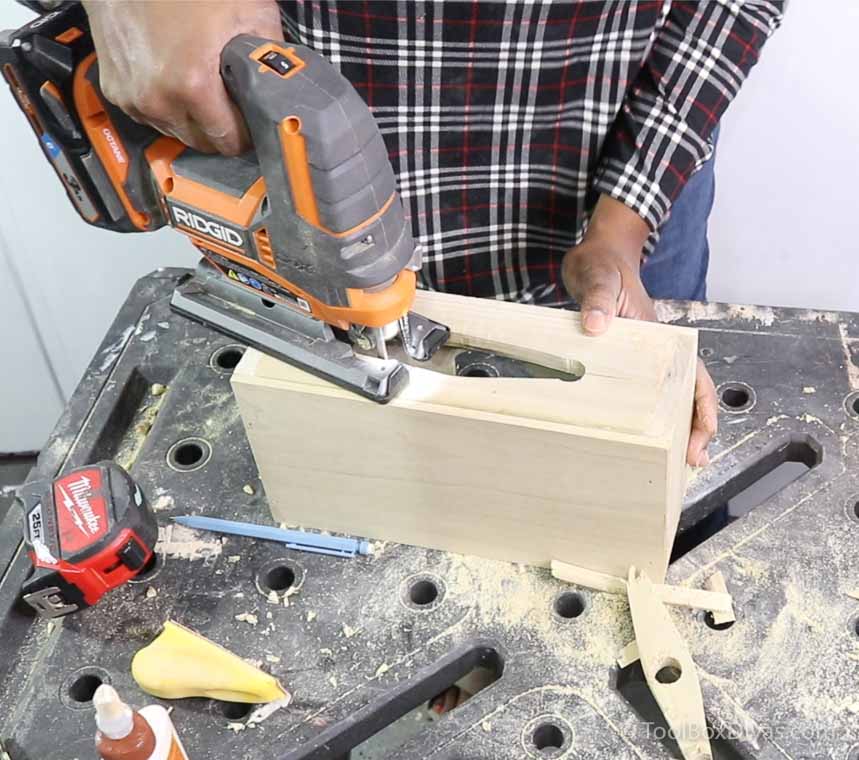
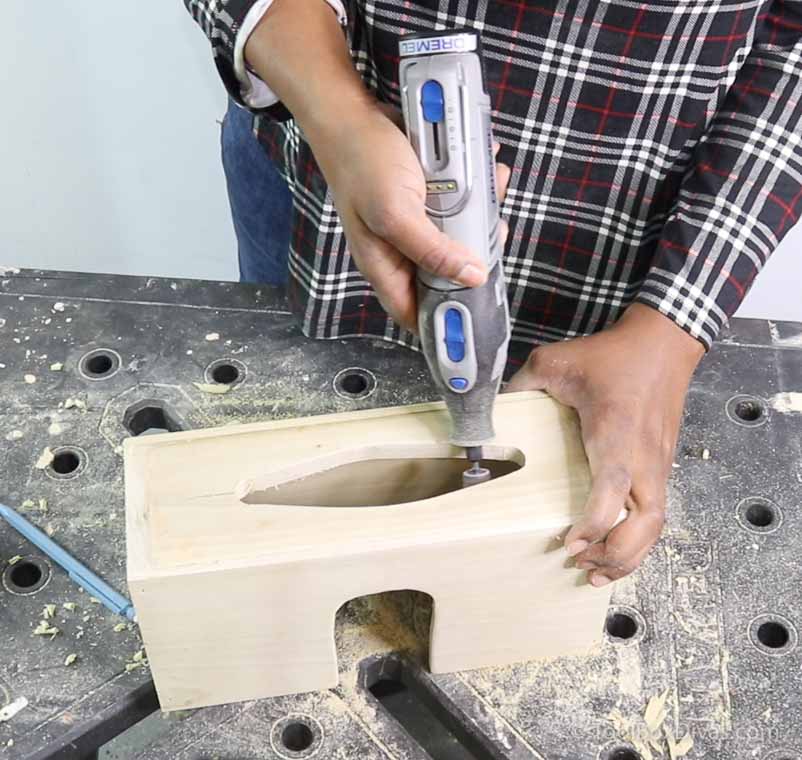
Step 2. Cut out the opening for the front panel.
Draw a line down the center of the front panel and trace out the front opening for the paper towel dispenser. Cut the opening using a jigsaw or attaching the Dremel Multi-Purpose Cutting Kit for Cutting Wood to the Dremel 8220 Series Cordless Rotary Tool. Then clean up the opening with the sanding tool attachment using the Dremel 8220 Series Cordless Rotary Tool. and a sanding block.

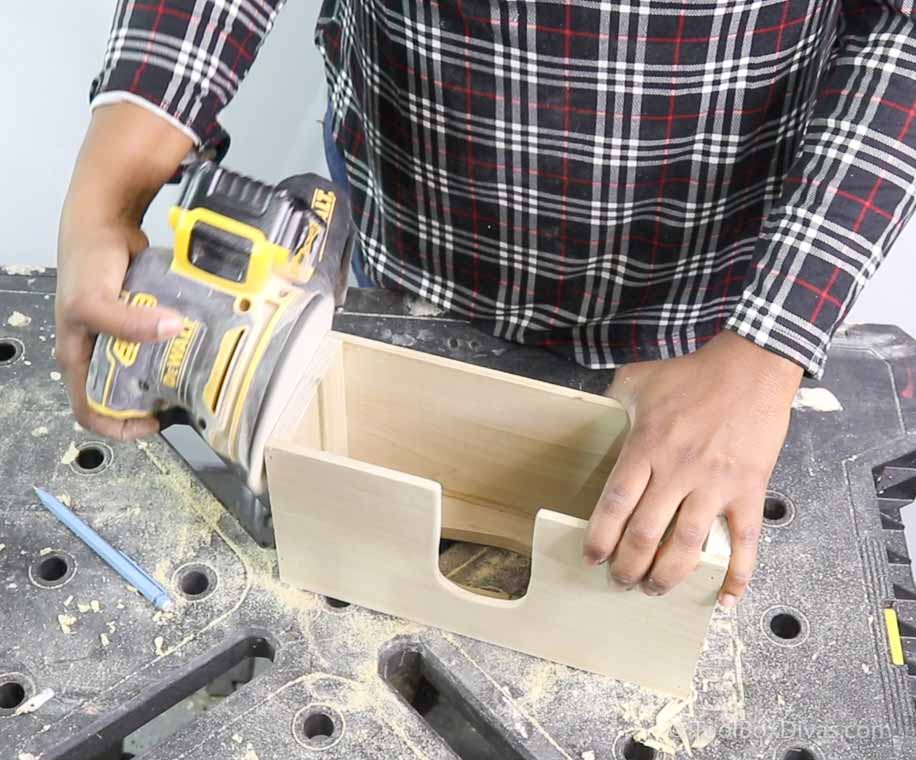
Step 3. Assemble the paper towel dispenser.
Using wood glue and a Brad Nailer attach the side boards to the bottom. The place the back and front of the dispenser over the side boards. A speed square comes in very handy in ensuring the sides are square.

Start by attaching the side using wood glue and a brad nailer. 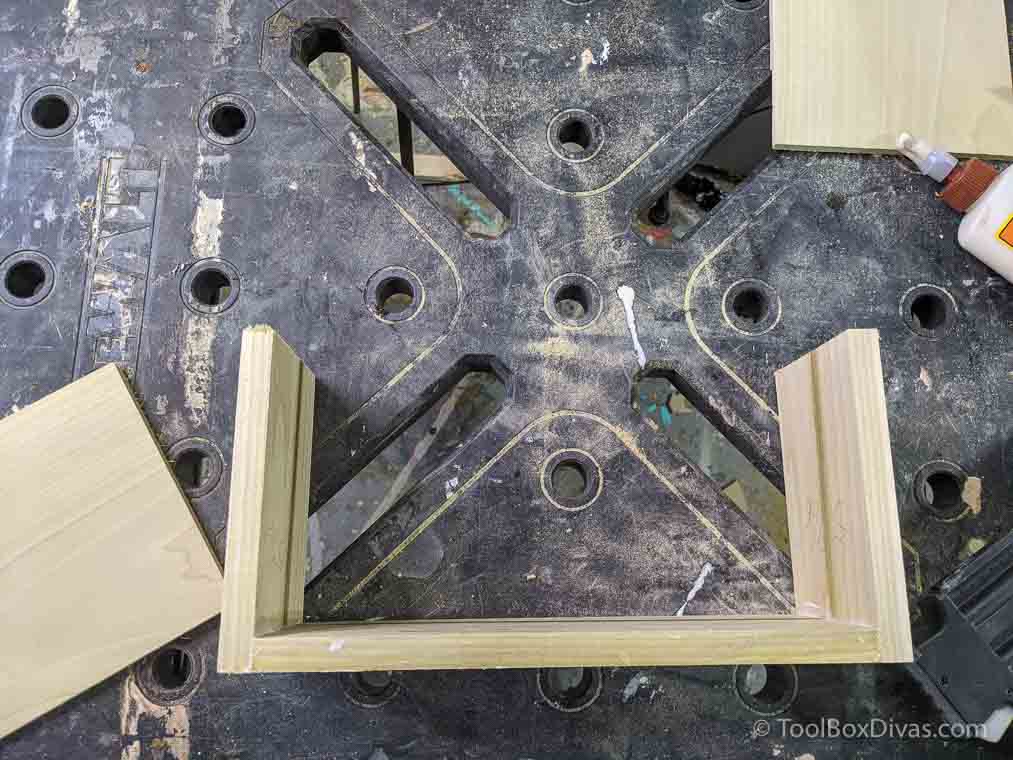
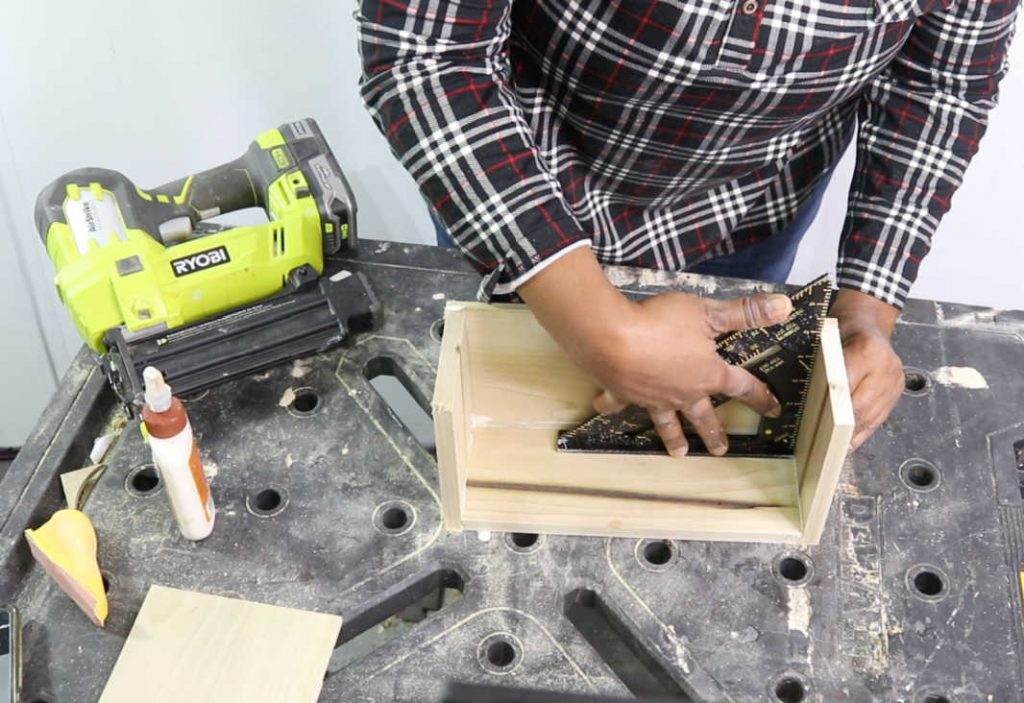
Use a speed square to ensure the sides are square. 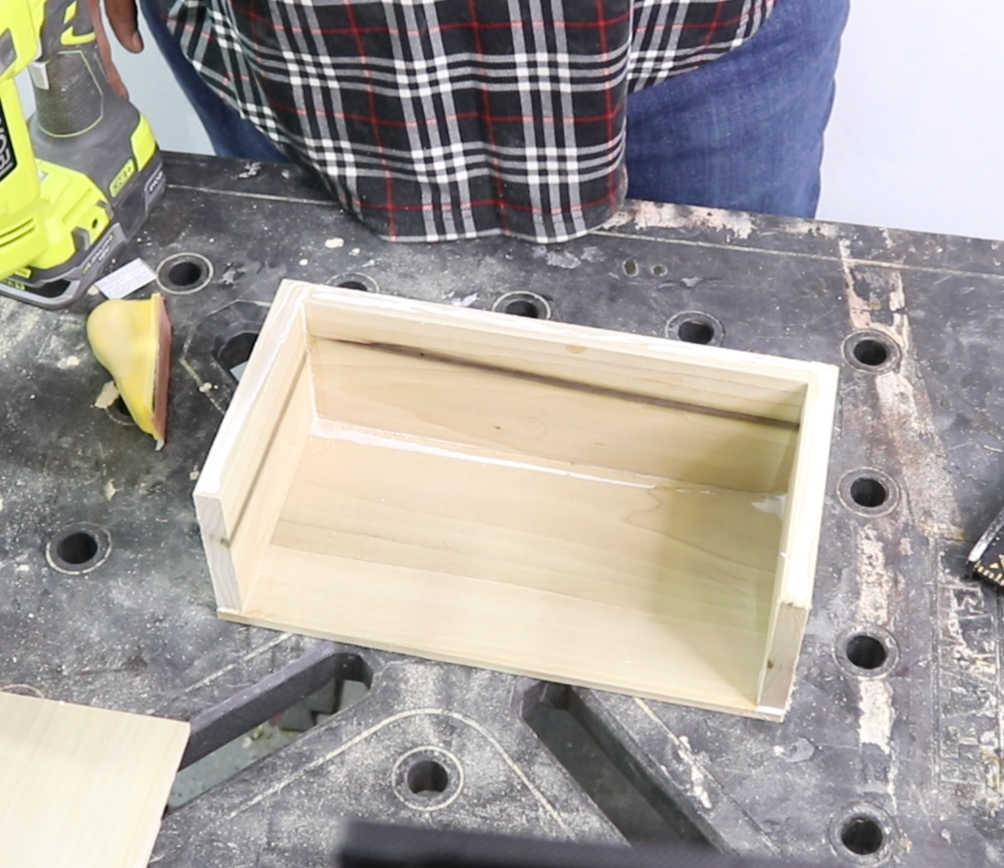

Cover the nail holes with wood filler.
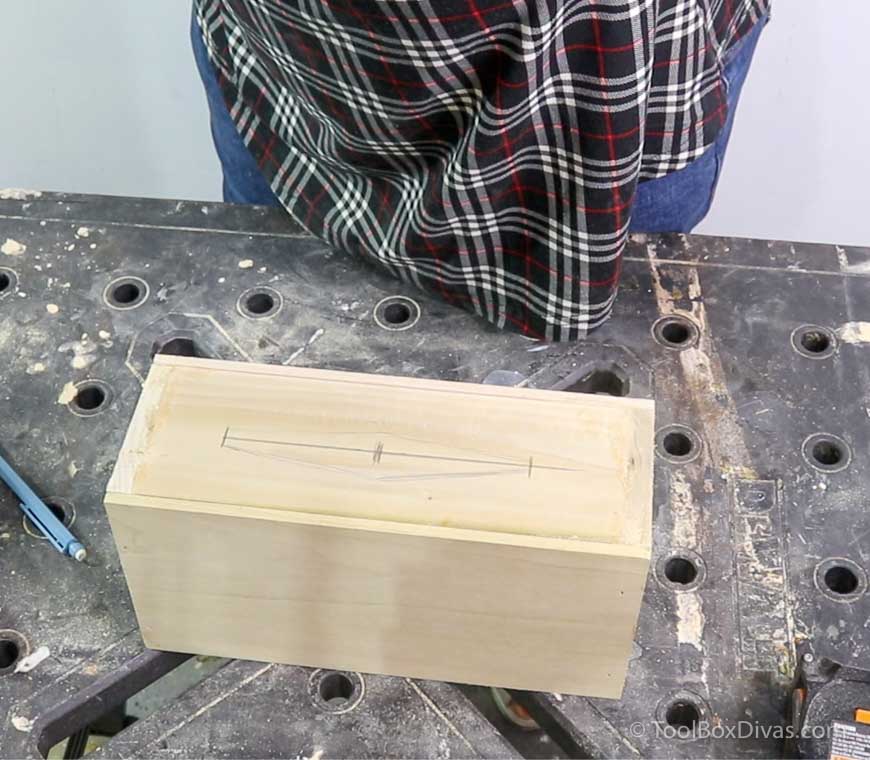
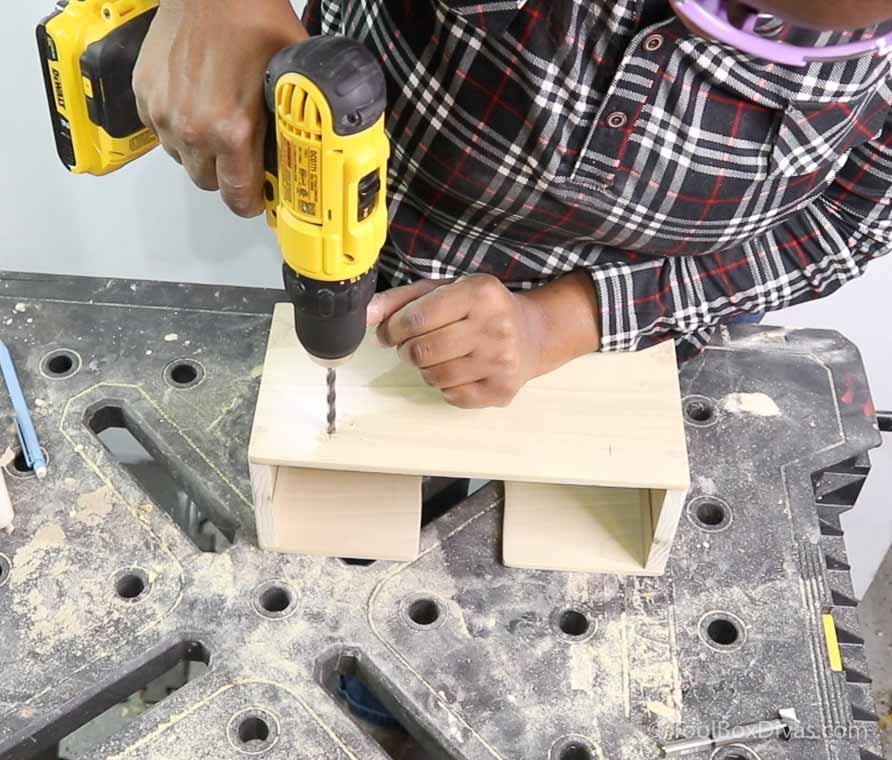
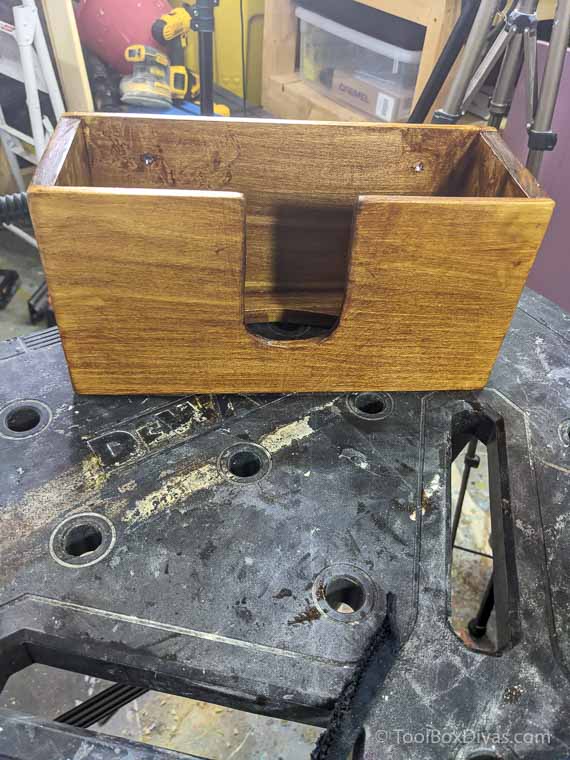
Step 4. Cut out the bottom opening.
Mark the center of the dispenser as a reference and trace an oval shape for the opening for wall mounted usage.
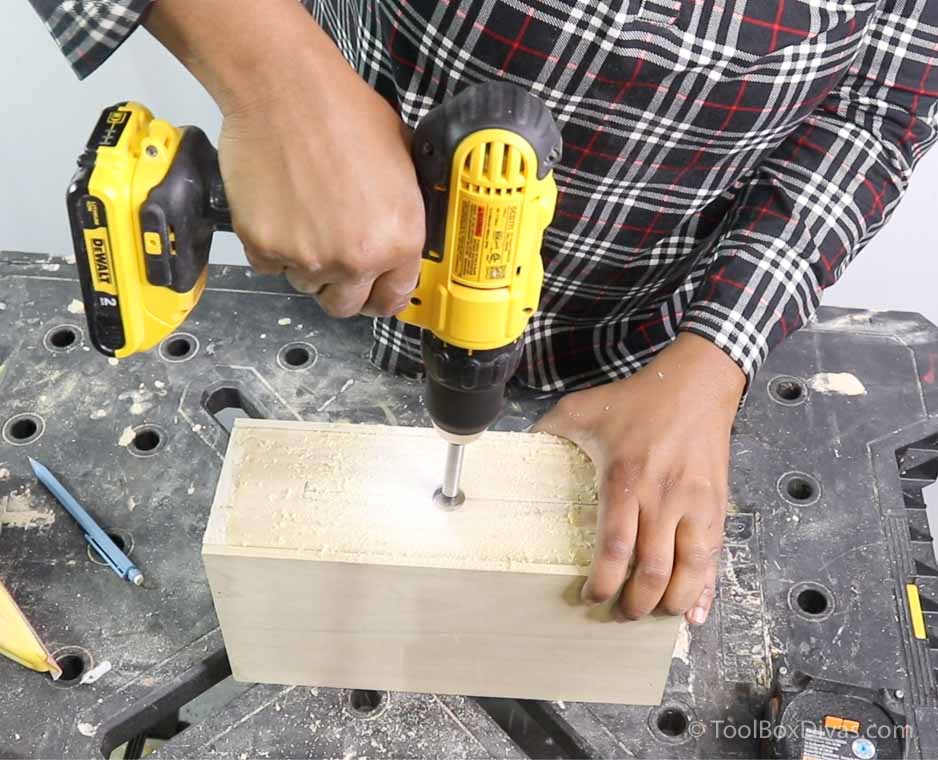
Start by drilling a hole in the center and at each side of the opening. Then use a Jigsaw or add Dremel Multi-Purpose Cutting Kit for Cutting Wood to the Dremel 8220 Series Cordless Rotary Tool to cut out the opening.
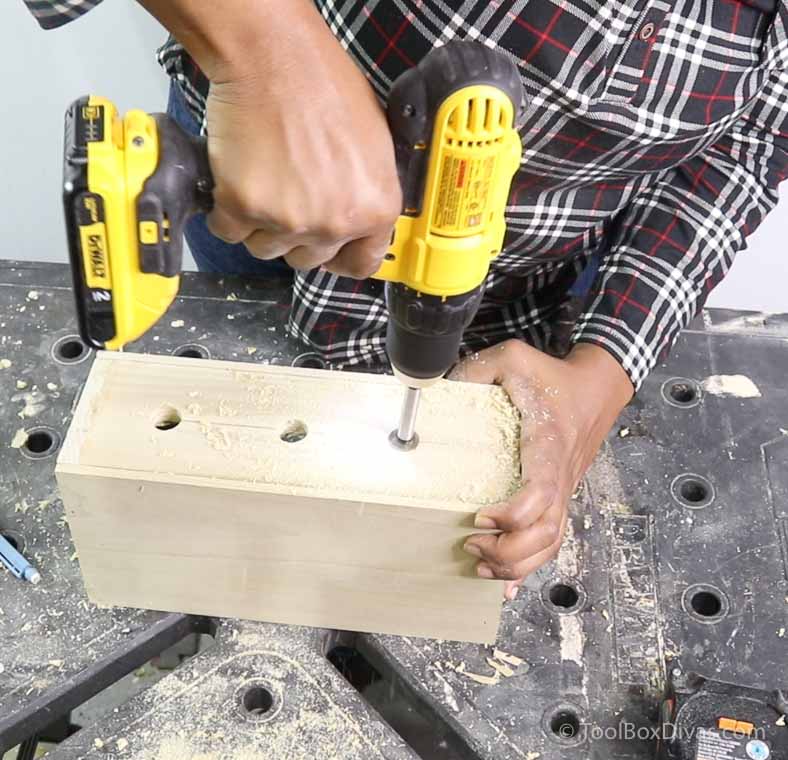
Follow up by sanding the opening with the Dremel 8220 Series Cordless Rotary Tool and a sanding sponge.
Drill two holes in the back for mounting.
Step 5. Finishing Touches.
Now sand down any rough areas and the places where you used wood filler to cover nail holes using a Sander or Sanding Block and apply stain or paint your new paper towel dispenser.
So initiallyI stained my dispenser, BUT when I went to pick up a can of Shellac, I didn’t realize I was actually holding a can of white spray paint. LOL!
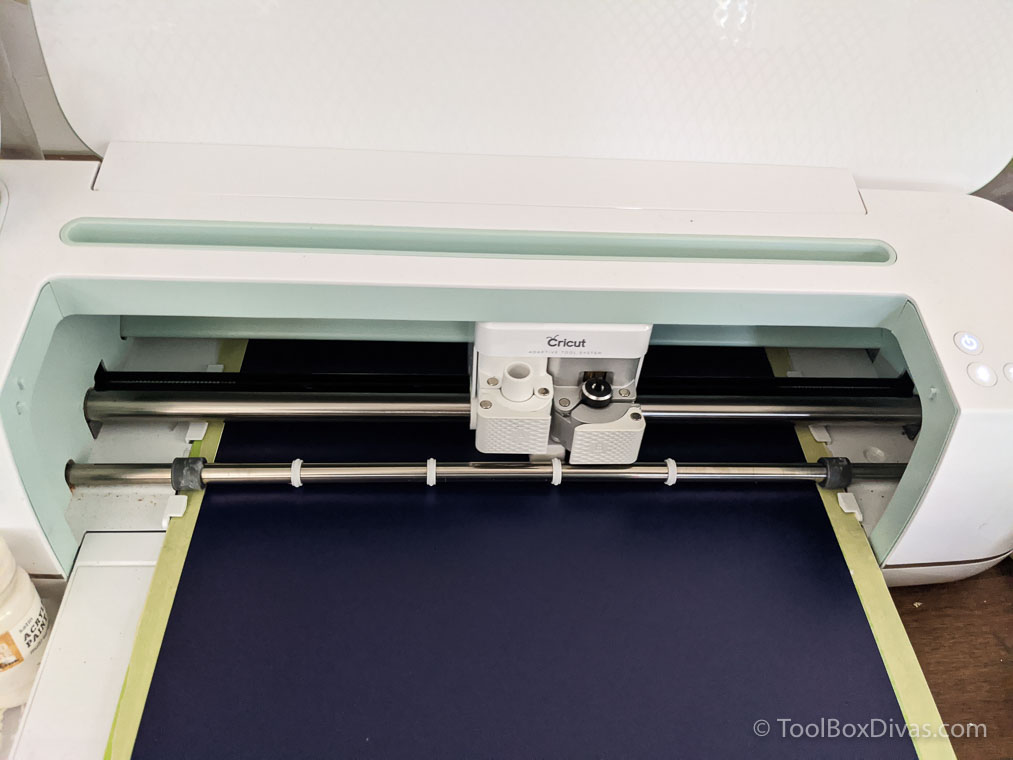
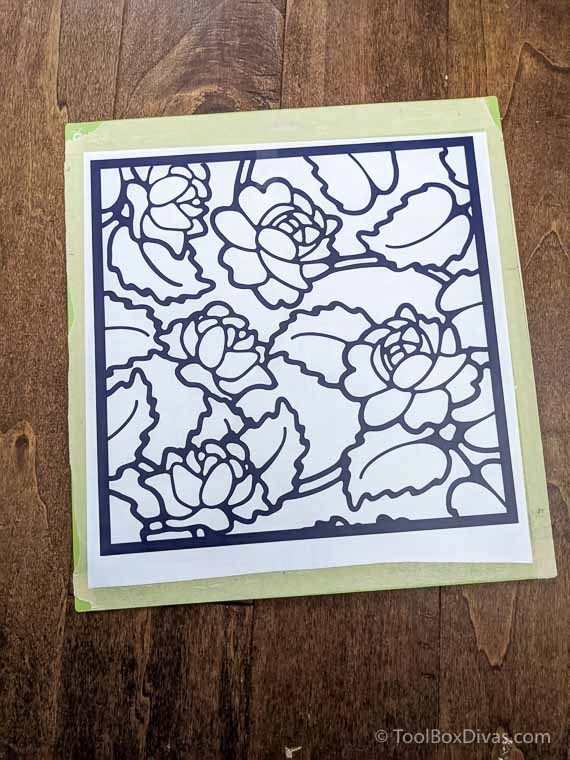
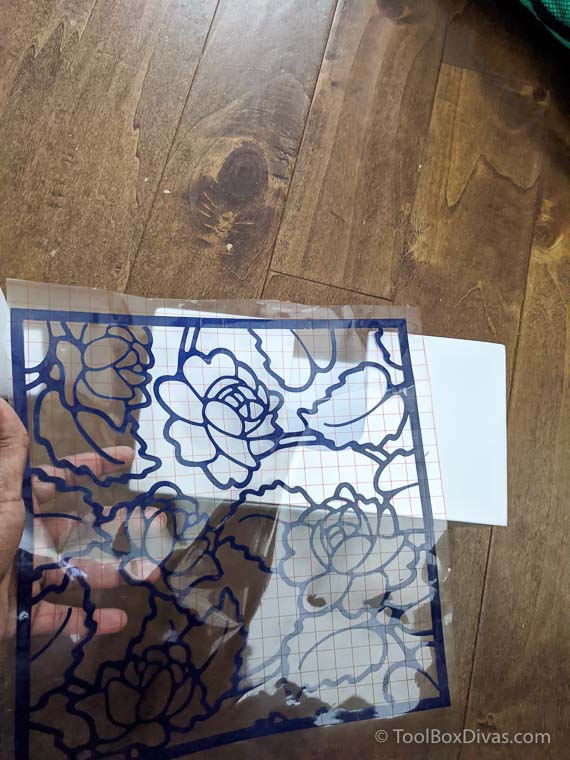
So I decided to just paint it white and apply a vinyl overlay. Using my Cricut I created a floral vinyl overlay that was able to place over the paper towel dispenser.
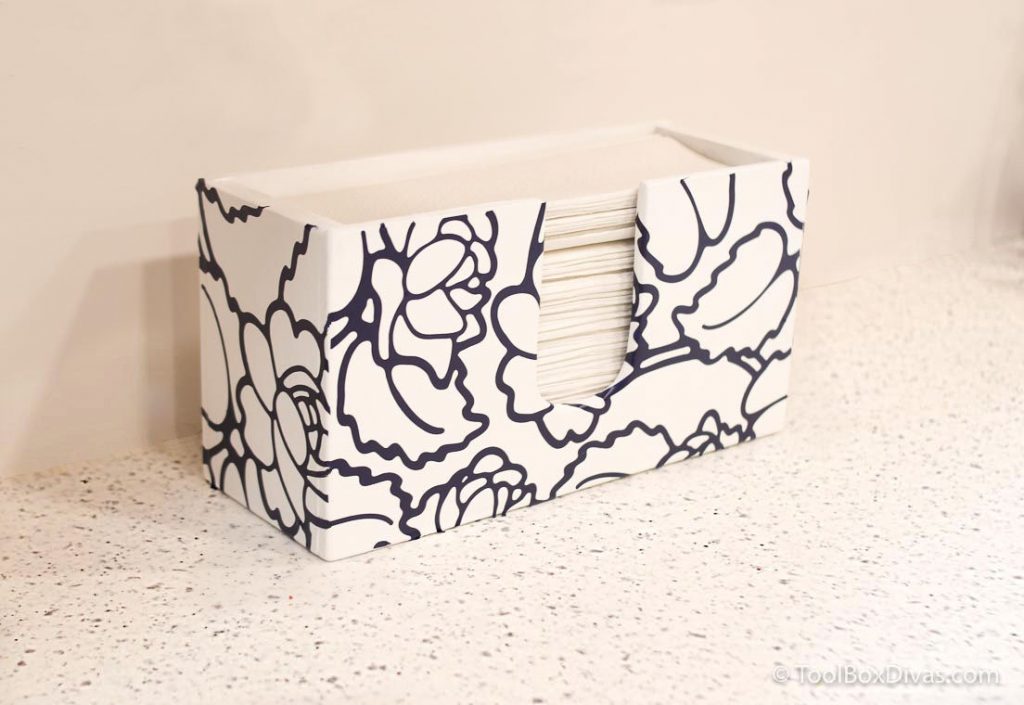
The Final Result
I absolutely LOVE LOVE LOVE the way it turned out. I am even really glad I messed up the stain. This white with vinyl overlay is classic! What do you think of my “mistake”? hahaha. When placing it on the counter I went back and added rubber bumpers to lift it off the counter.
Alright Guys, Till Next Time. ~T.
Save It for Later
For more projects you can do in an hour or two consider DIY Wall Mounted Clothing Rack For Kids: A Nap Time DIY or How to Build a Modern Desk with Hairpin Legs: A Nap Time DIY.
I acknowledge that The Home Depot is partnering with me to participate in the THDProSpective 2020 Campaign. As a part of the Program, I am receiving compensation in the form of products and services, for the purpose of promoting The Home Depot and its partners. All expressed opinions and experiences are my own words. My post complies with the Word Of Mouth Marketing Association (WOMMA) Ethics Code and applicable Federal Trade Commission guidelines.
I have a question regarding the cut list. It doesn’t specify what to cut from what boards. For example what am I cutting from the 1/2×4/x4? I’m new so it may seem obvious to you…not this newbie.
Toni
[email protected]
Oh Sorry, the cut size of each board is labeled in the image in step 1. Sorry about that.
So for the 1/2 in. x 4 in. x 4 ft. S4S Poplar Board you want to make 3 cuts: 10 inches for the bottom and (2) at 5 9/16th inches for the sides.
1/4 in. x 6 in. x 4 ft. S4S Poplar Board for the back and front. (2) is 11 inches.