How to Make a DIY Night Light
Learn how to make a DIY night light box with battery operated LED lights. These super cute night lights are great for a kids room or nursery.
I love this project because these night lights are super cute and you can make them in just a couple of hours.
Let’s be real here, as kids start crawling around and walking, one of the first things that catches their attention are electrical outlets. I mean, they are right there at their level, so naturally they’re going to want to check them out.
Serious mommy freak out moment!
When there is something plugged into them, like a cute plug in night light, they become even more determined to get to it and play with it.
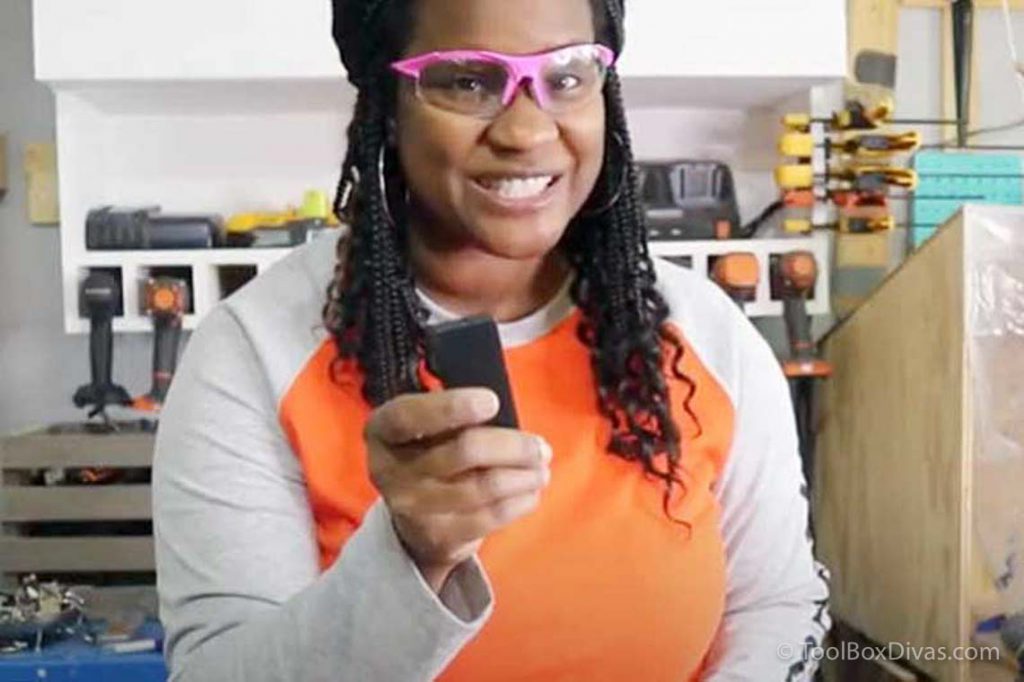
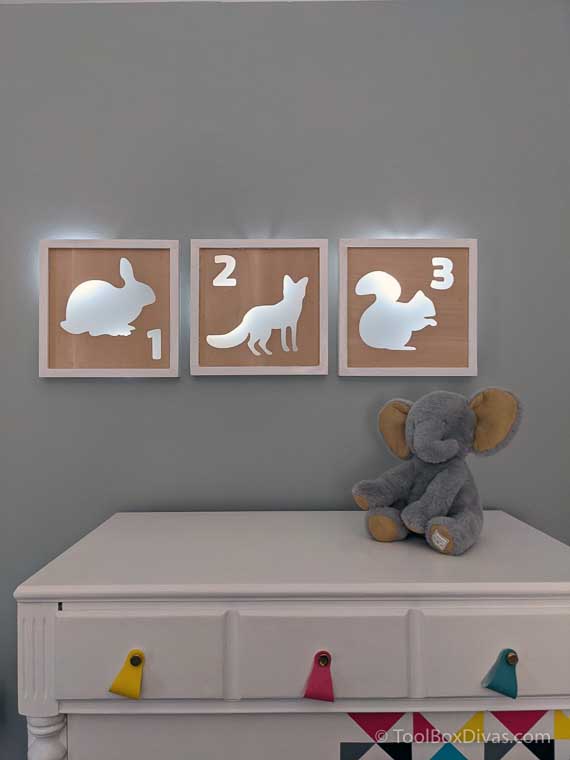
This DIY night light hangs on the wall and has battery operated LED lights. Out of reach of little hands, safe, and remote control operated. YES! I said remote control!
Check out the video and full tutorial below to make your own!
Let’s get dirty!
This post contains affiliate links. As part of the Amazon affiliate program if you purchase from a link on this blog, I earn a small commission at no additional cost to you. Thank you for supporting me and my blog! You can read my full disclosure here
Materials and Tools
- 1x2x8 board
- Basswood
- Acetate Sheet
- LED Battery Operated Lights
- Glue
- Wood filler
- Dremel Rotary tool
- Dremel 1/8 in. Rotary Tool Multi-Purpose Cutting Bit (Use only with the Dremel 566 Cutting Adapter)
- Sander
- Brad Nailer
- Hot glue gun
- Miter Saw
- Cricut Maker or you can use a craft/hobby knife
How to Make a DIY Night Light
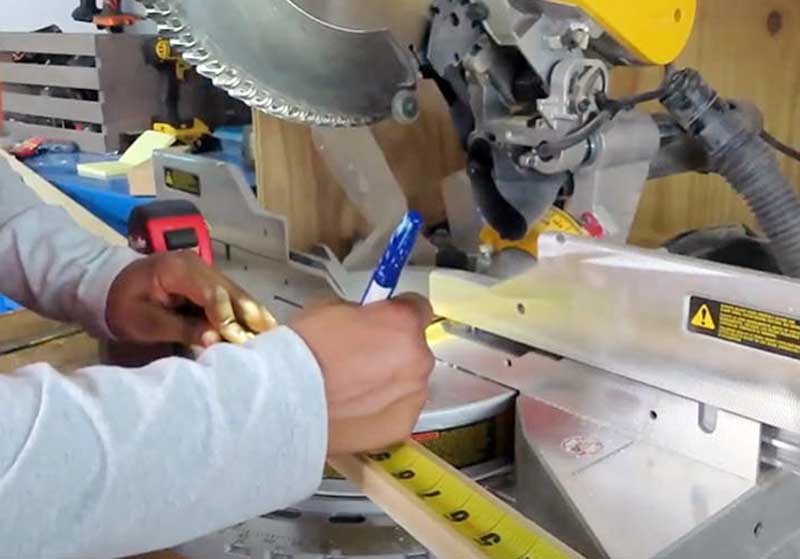
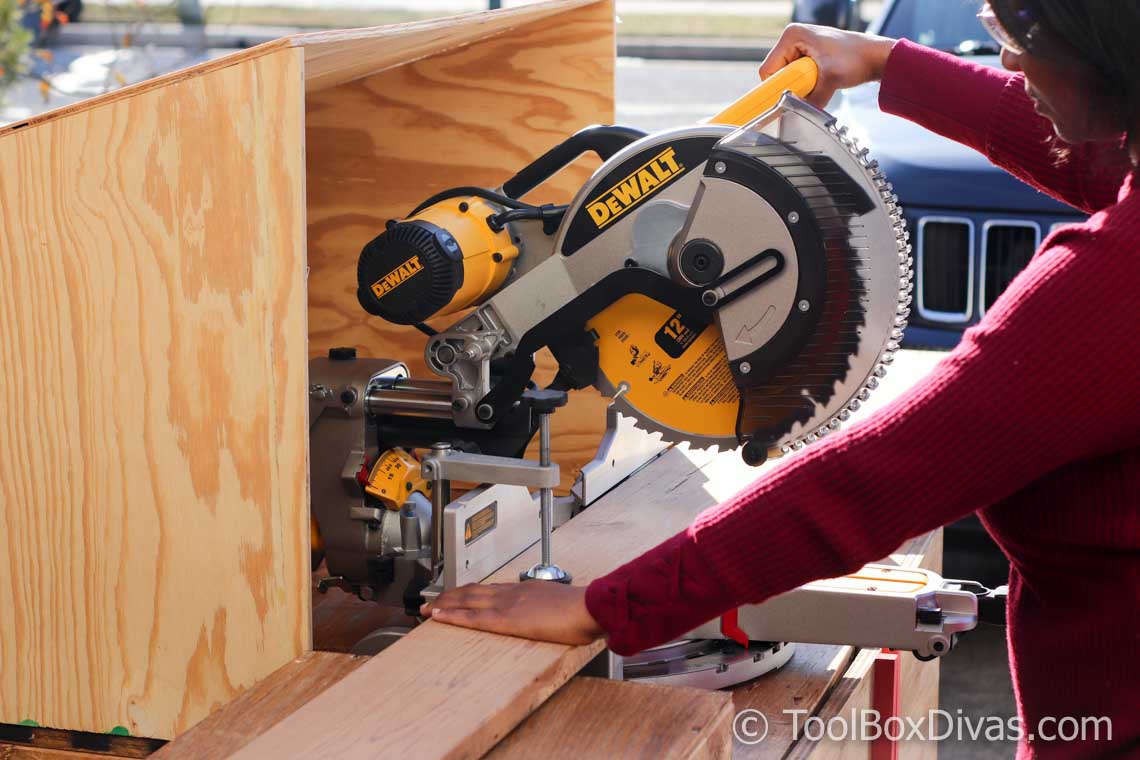
Step 1. Cut the 1×2 for the frame
Mark and cut the 1×2 into 12 inch lengths using a miter saw. Cut 45 degree angles on each end so that the frame will fit together nice and smooth.
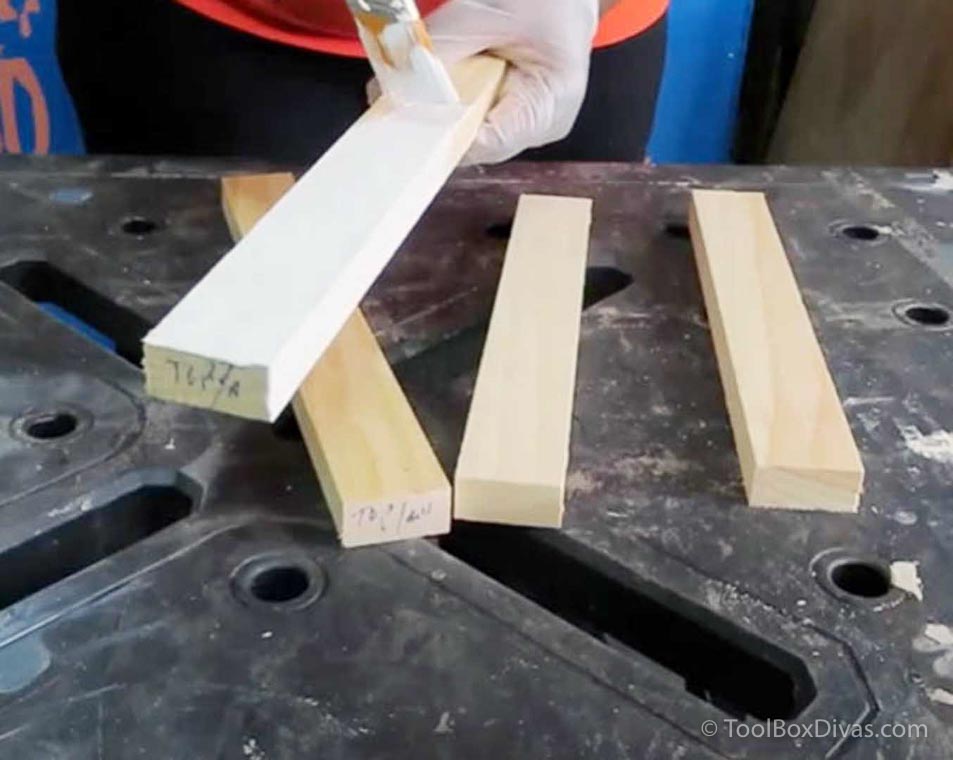
Step 2. Paint
Now is the perfect time to go ahead and paint the pieces of the night light frame. You don’t want to risk dripping paint on it once it is all assembled.
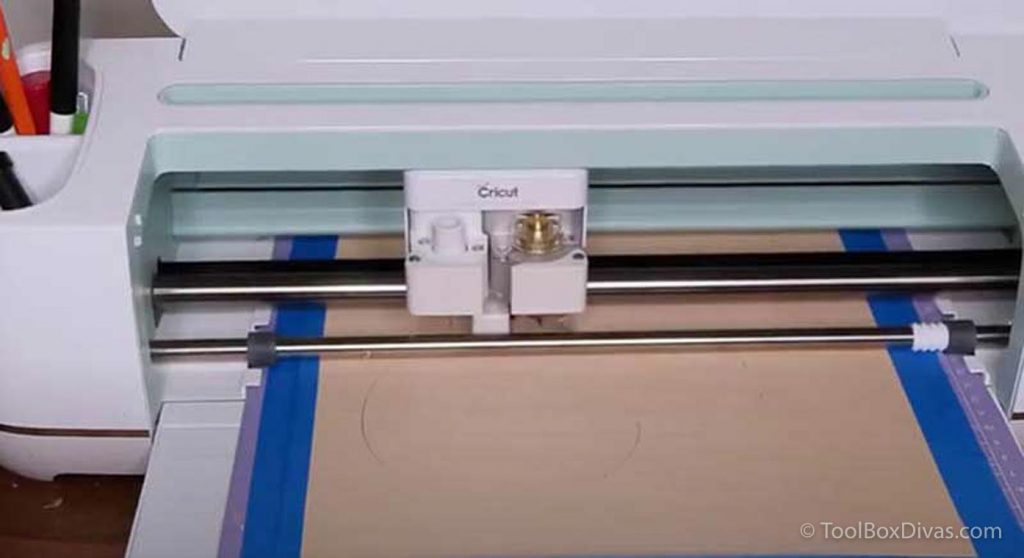
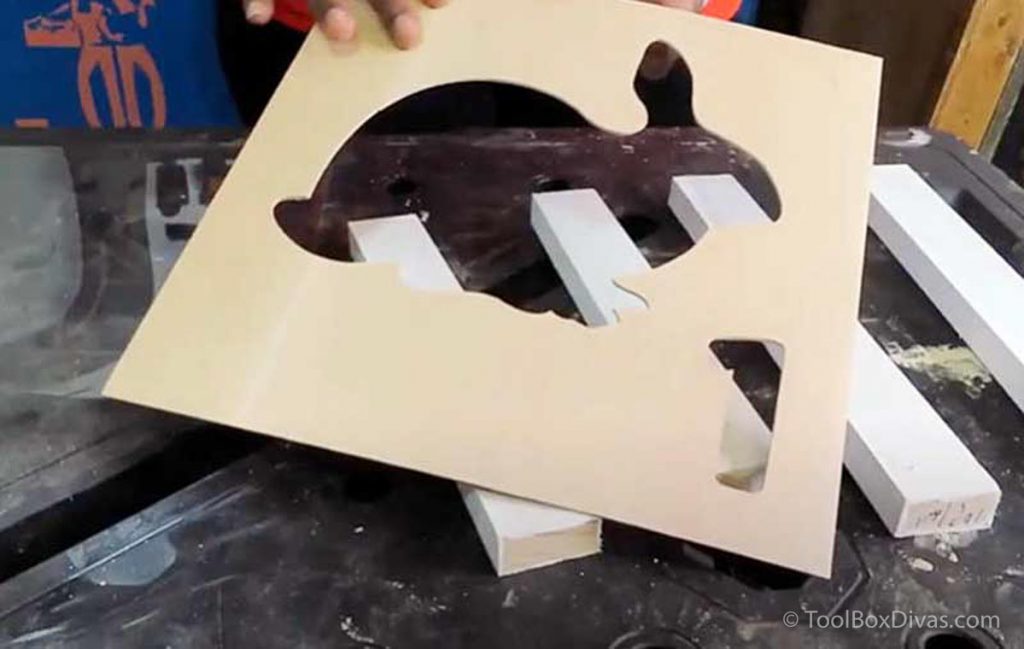
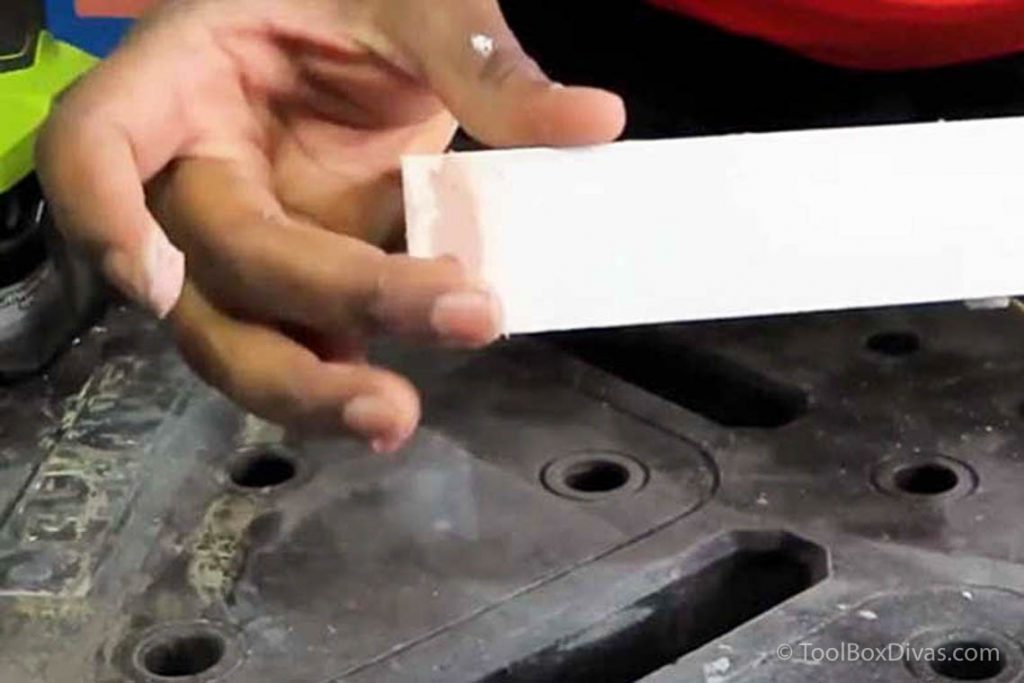
Step 3. Cut the basswood
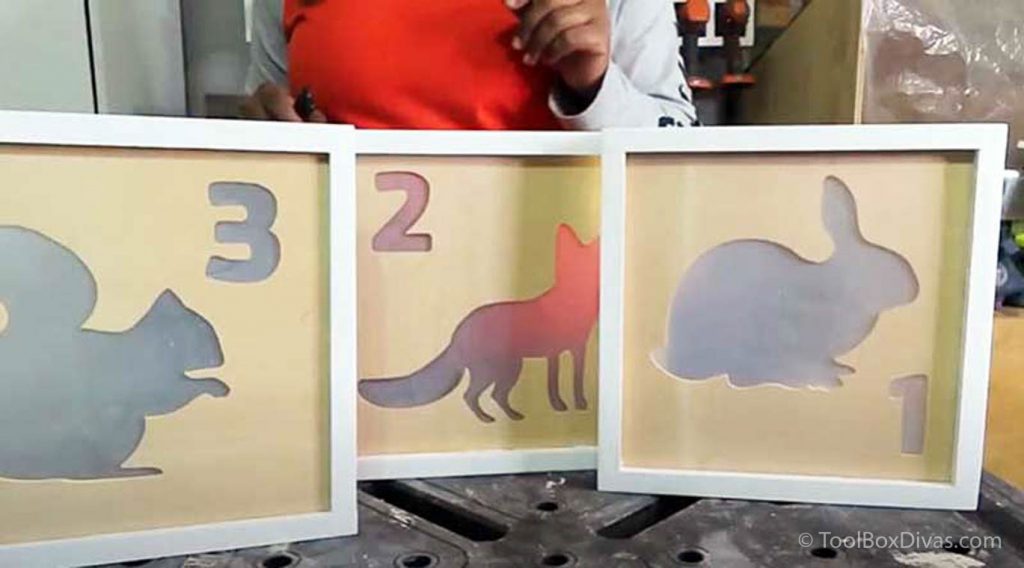
While the paint is drying on the frame, go ahead and cut your basswood. You can choose any image to cut out you want.
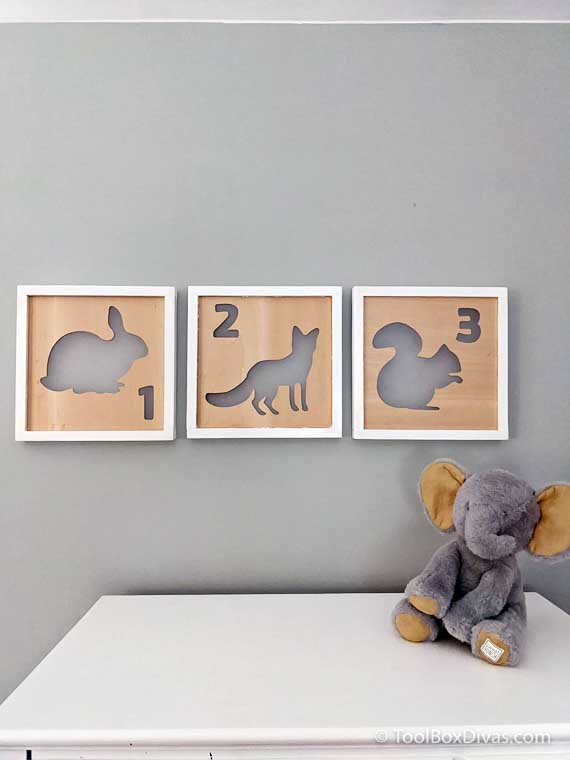
I decided to use a rabbit, a fox, and a squirrel. I also added numbers to each night light. I love how the set looks together.
I used my Cricut Maker to cut out the images, but if you don’t have one, you can trace your image and carefully cut it out with a craft knife
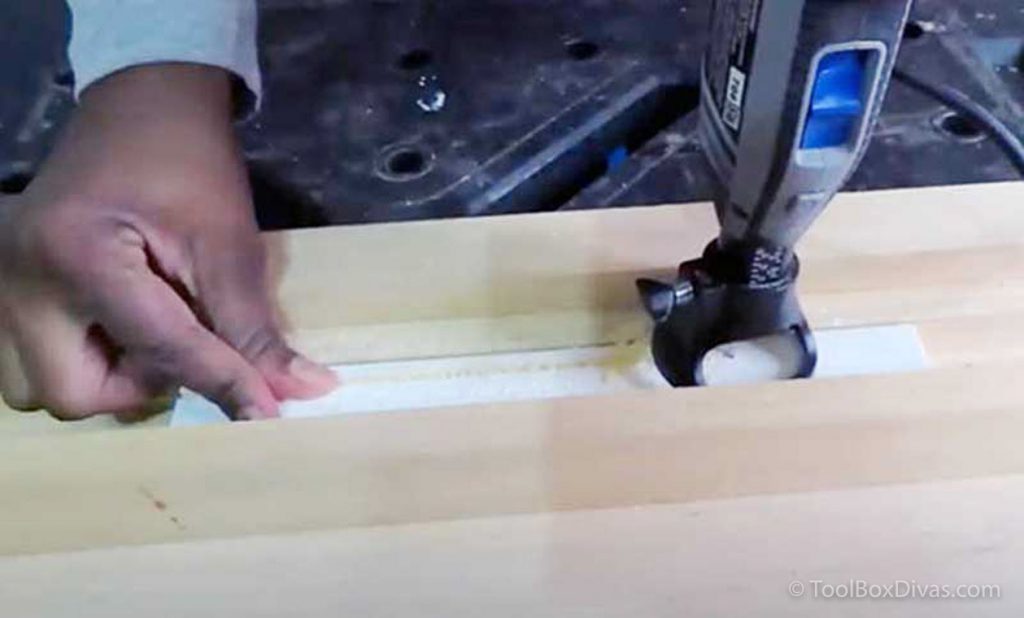
Step 4. Assemble the DIY night light
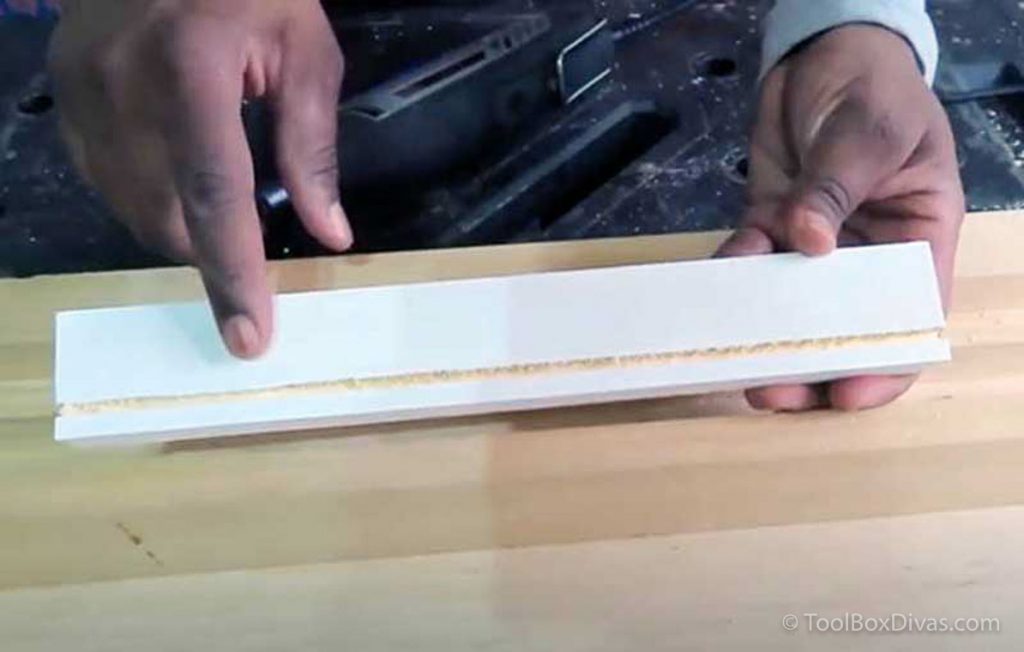
First, using a Dremel bit in your rotary tool, cut a slot in your pieces of 1×2. Measure in about a 1/4 inch on each end, cut your slot between those two marks.
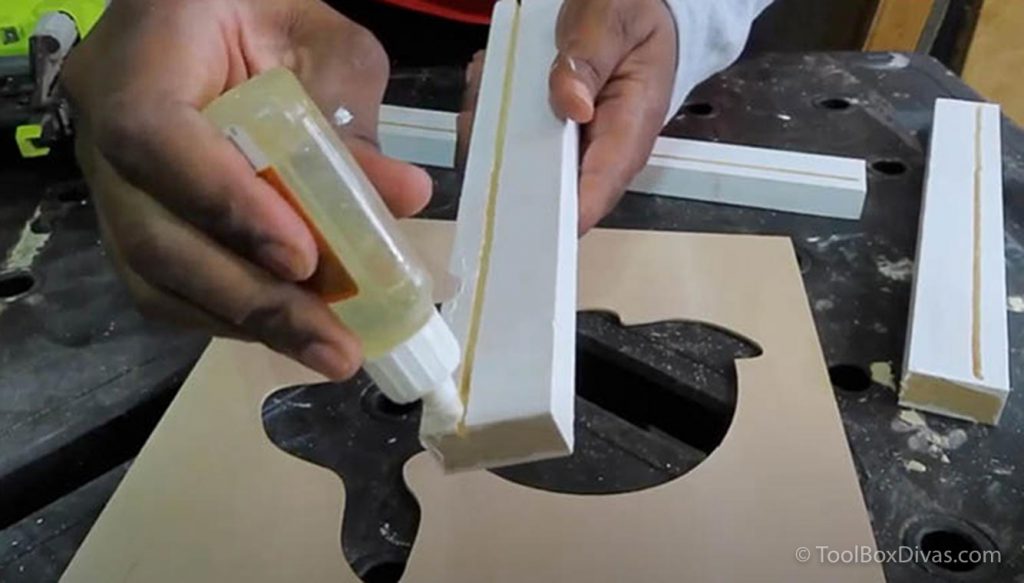
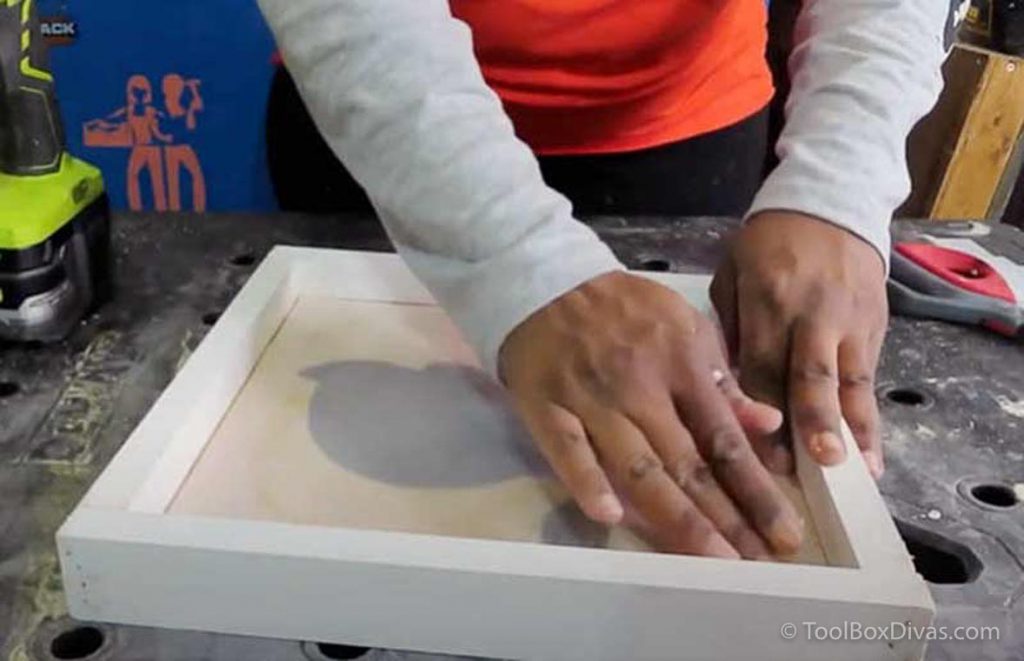
Place glue in the slots and insert you basswood panel into each piece of the frame. Secure the corners using finishing nails.
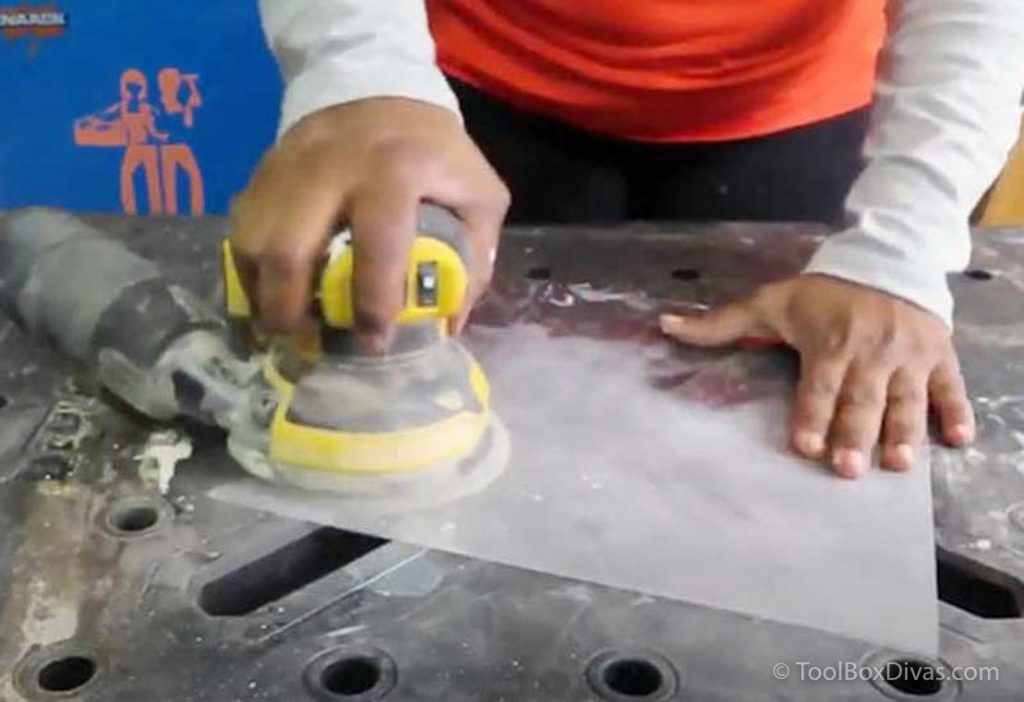
Use a sander to sand the acetate sheet. This will give it a matte finish instead of being transparent. It will diffuse the light from the LED lights.
Hot glue the acetate sheet to the back of the basswood panel. Flip it over and take a look, it’s okay I did. It looks so cool!
Step 5. Add LED lights
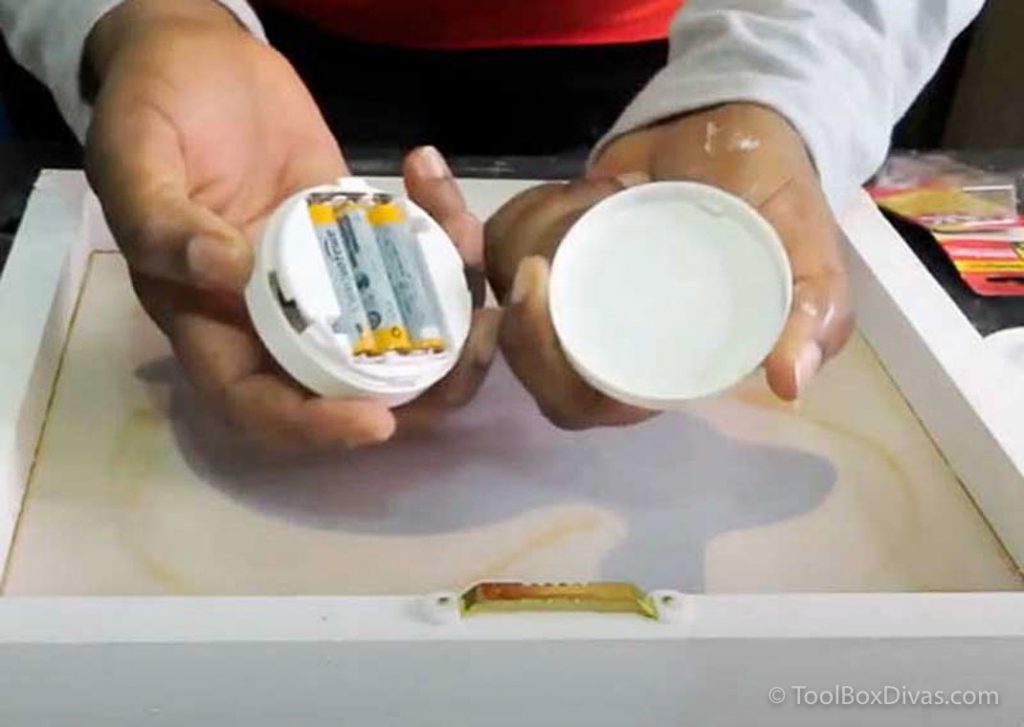
Flip it back over and add the battery operated LED lights using double sided tape.
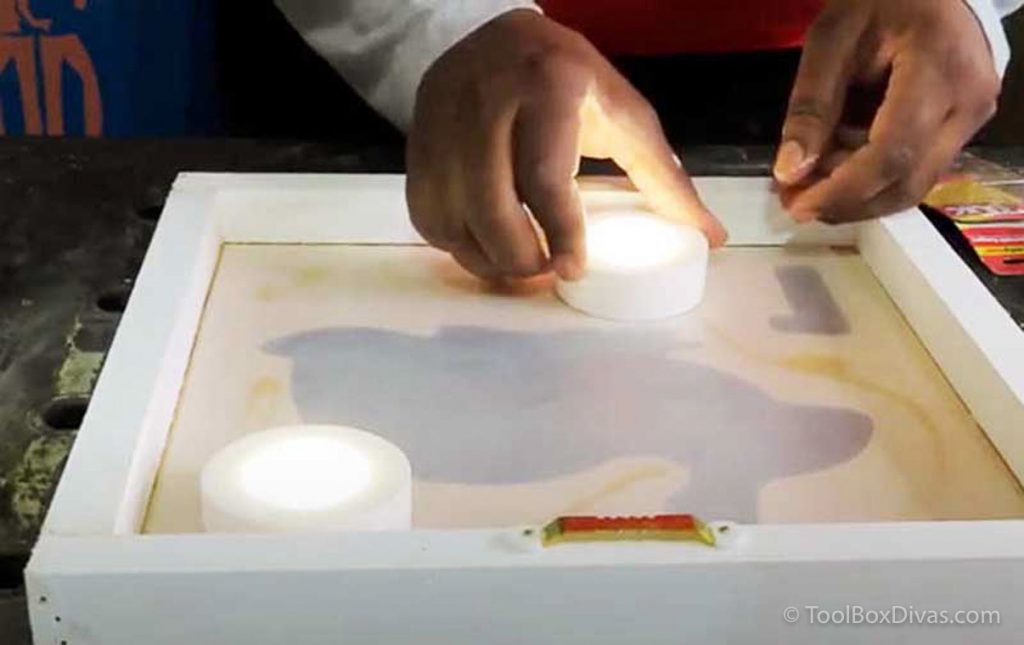
You will still be able to open the light and replace the batteries when needed and they are controlled with a remote control!
Step 6. Finish and hang
Use wood glue to touch up the corners and the nail holes. Sand lightly.
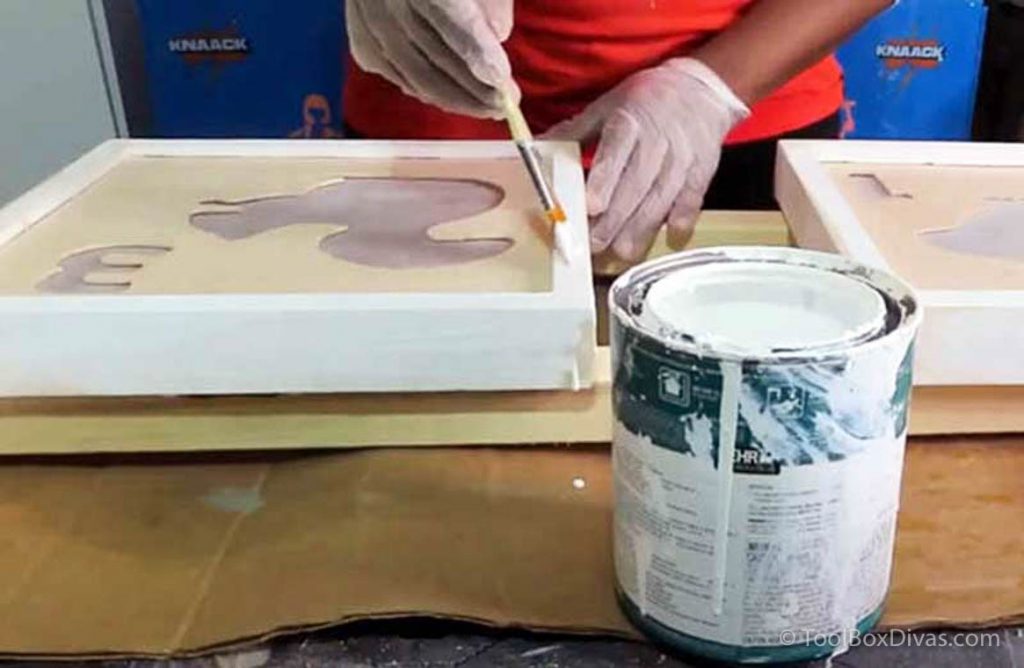
Touch up with paint and you’re ready to hang them up!
I love how these turned out! They are a great addition to Sydney’s room and I don’t have to worry about her playing with plug ins. Whew!
Pin my Easy DIY Night Light to Pinterest


timi you are sooo awesome , that is a beautiful creation , for me diyers are very special human beings congratulations¡ p
Thank you so much!!! I really appreciate it.