DIY Outdoor Movie Theater and Projection Screen
DIY Outdoor movie theater projection screen using Gorilla Tough & Clear Mounting Tape and items found at a dollar store. These easy to follow step by step instructions show you how to create a low-cost projection screen and home outdoor movie area in the backyard.
This is a sponsored post written by me on behalf of The Gorilla Glue Company for IZEA. All opinions are 100% mine.
I have been wanting to make any outdoor theater for the longest time. The idea of being outdoors at night watching a movie or even a sporting event has always seemed so cool, ever since my first trip to a drive-in movie theater outside of Baltimore, MD. It was such a fun experience. However, going to the movie theater is pricey. Let’s face it, as a family, going to the movies, it’s about $100 for a family of 4. That’s expensive. But when a friend gave me a mini projector for as a gift, I knew I had to do this. So I’ve come up with a really inexpensive solution that you can use in your own backyard. Imagine, date night, movie night with the kids, and entertaining during that summer BBQ all from the comfort of your own backyard. Also, you can set this up in under an hour.
Materials

Tools
The projector I used was an awesome wireless smartphone projector a friend gave me. Interested? Click HERE.
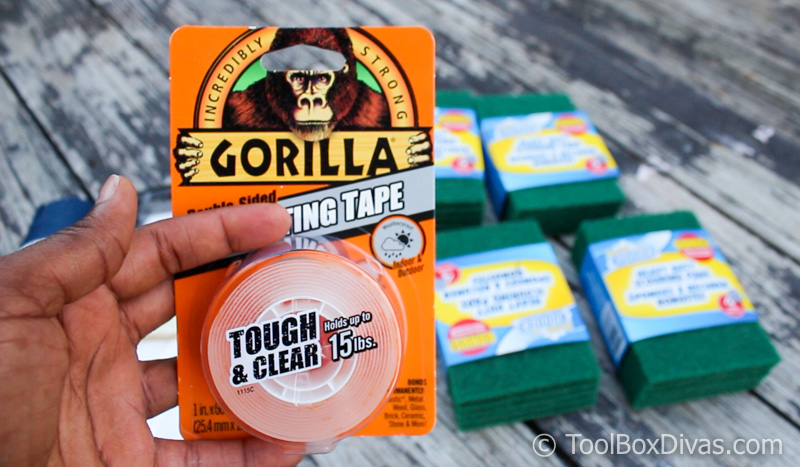
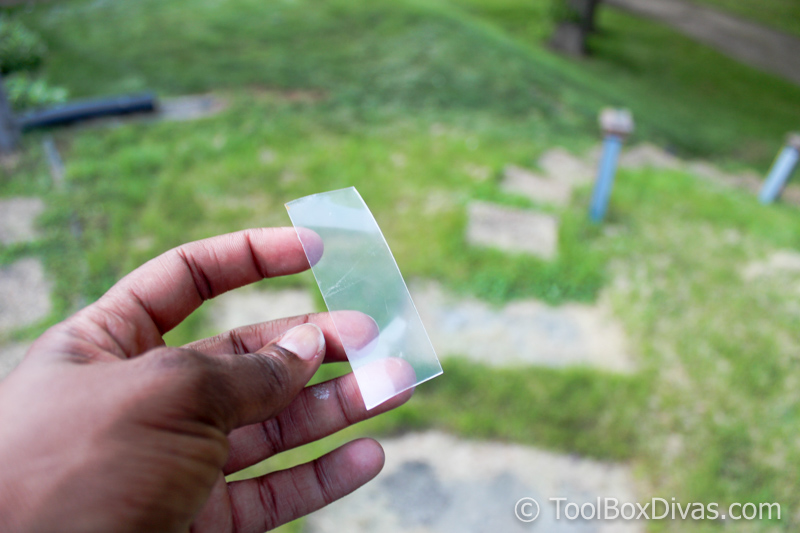
Things you should know when working with Gorilla Tough & Clear Mounting Tape
- It is a permanent adhesive. So don’t use this on any delicate surfaces.
- This works best on material that is less than 3/4 in. thick and it holds up to 15 pounds (7 pounds for squares).
- This is waterproof. So this can easily be used with outdoor projects.
- And this can be applied to smooth or rough surfaces. Just keep in mind the tape has to touch the surface in order to bond with it.
- It bonds to plastic, metal, wood, glass, brick, ceramic, stone & more.
Now let’s get to the fun part.
Steps
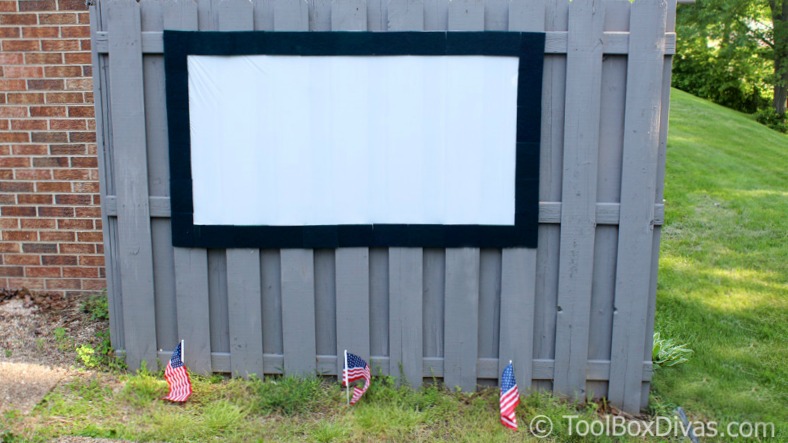
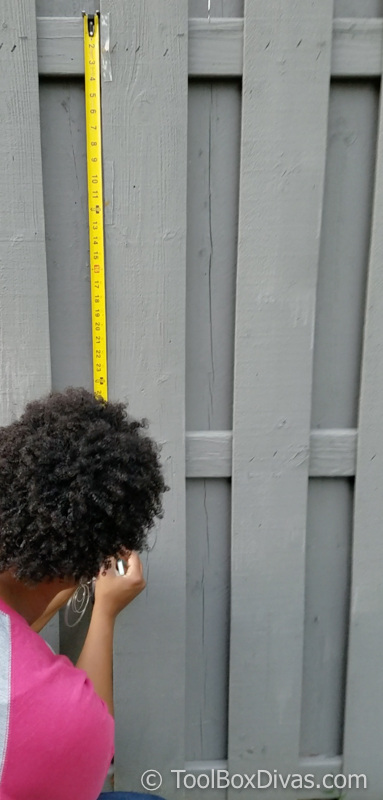
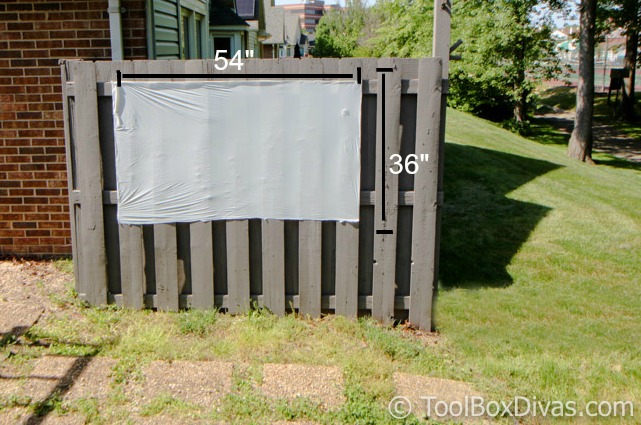
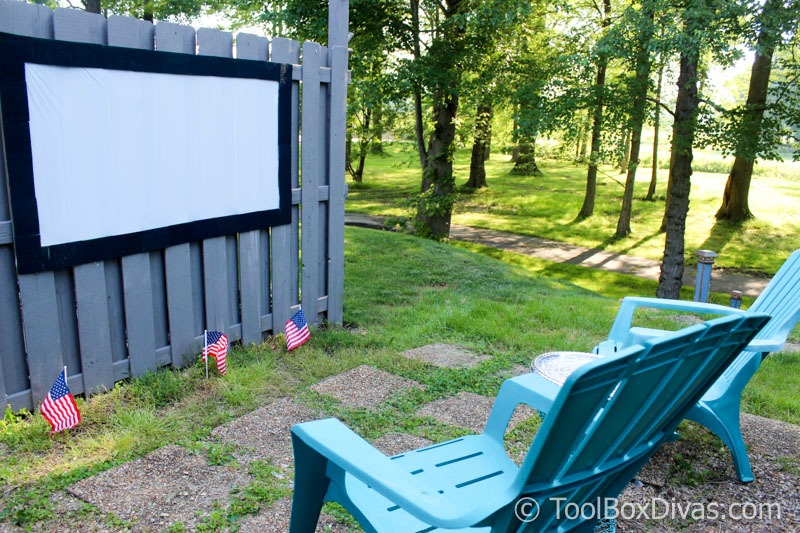
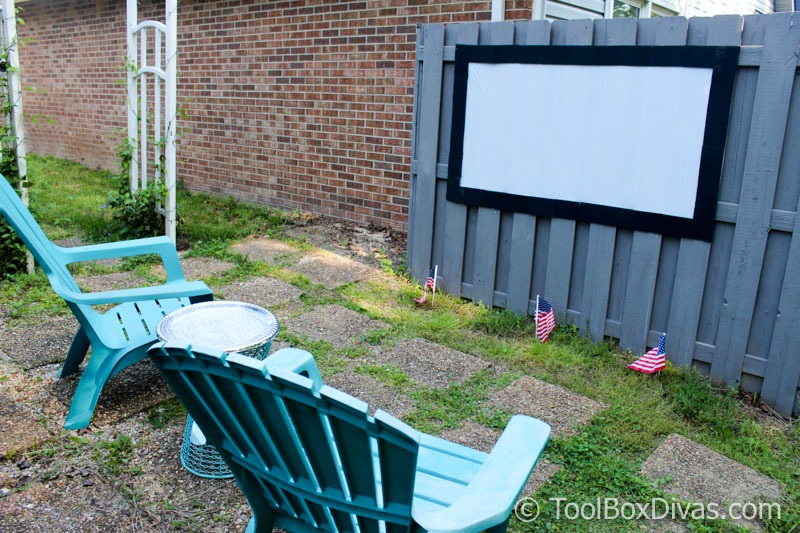
1. Establish your location. This works well on a fence or the side of the house.
You need a flat surface from which to hang the shower curtain. Measure and mark the width and length of the area you will place the screen. Mark the placement with a pencil. This screen is 54″x36.”
 2. Place the mounting tape on the surface.
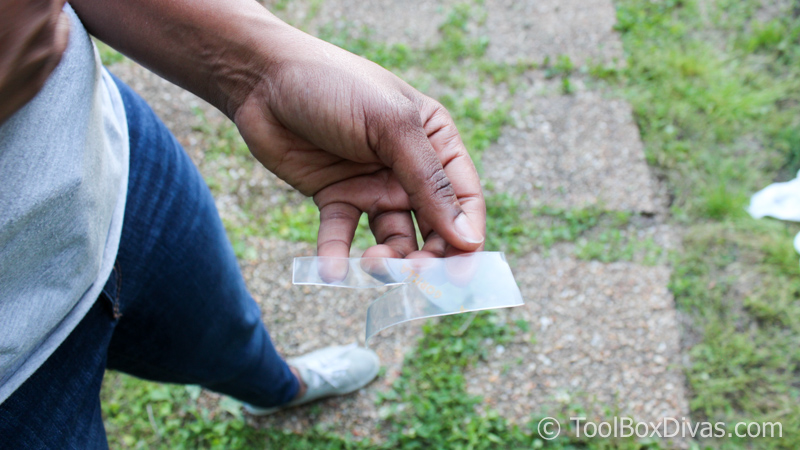
This Gorilla Mounting Tape supports 7 lbs. in squares. I only need a fraction of that strength. I am working with really lightweight material. So I cut the mounting tape down the middle to stretch its use. 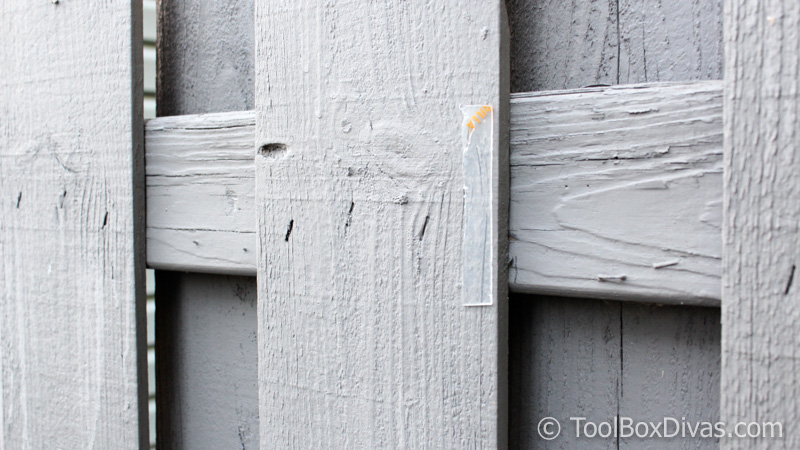 Once I placed the tape on the surface of the fence I removed the backing using a 5 in 1 multi-tool. You can use your nails to remove the backing but I found that this tool made it very easy to remove.
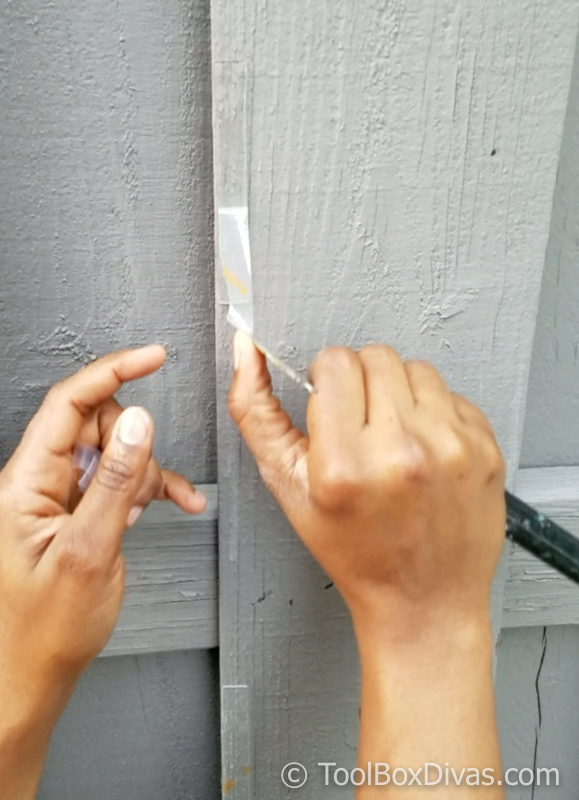
3. Adhere the shower curtain to the surface. 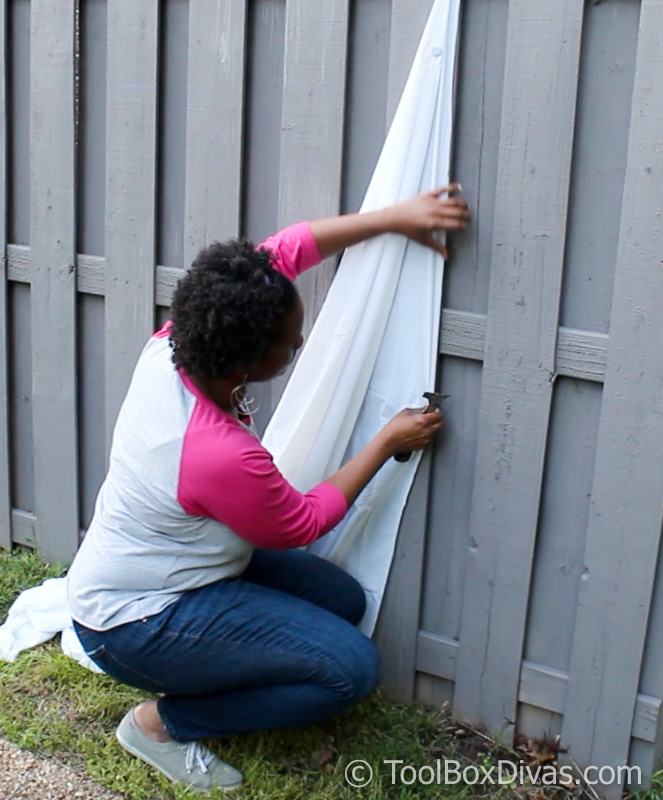
It’s very important to pull the shower curtain tight from the sides and the top and bottom. You don’t want to leave any of the creases in the screen.  Trim the excess curtain with scissors.
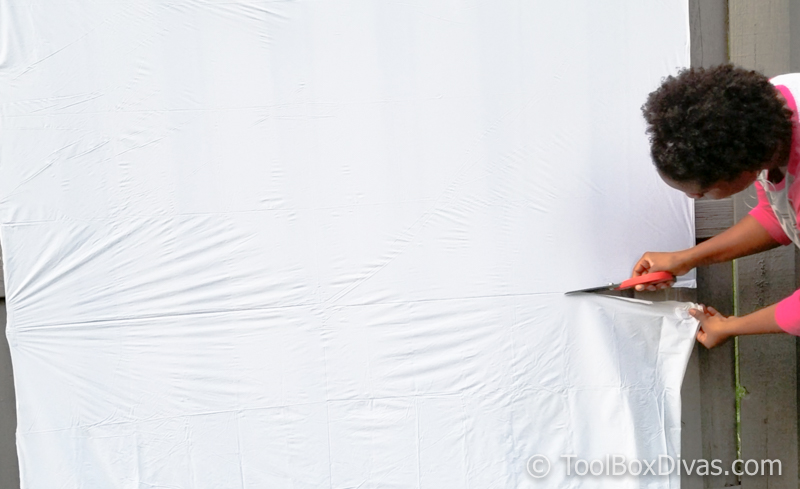
4. Spray paint the border.
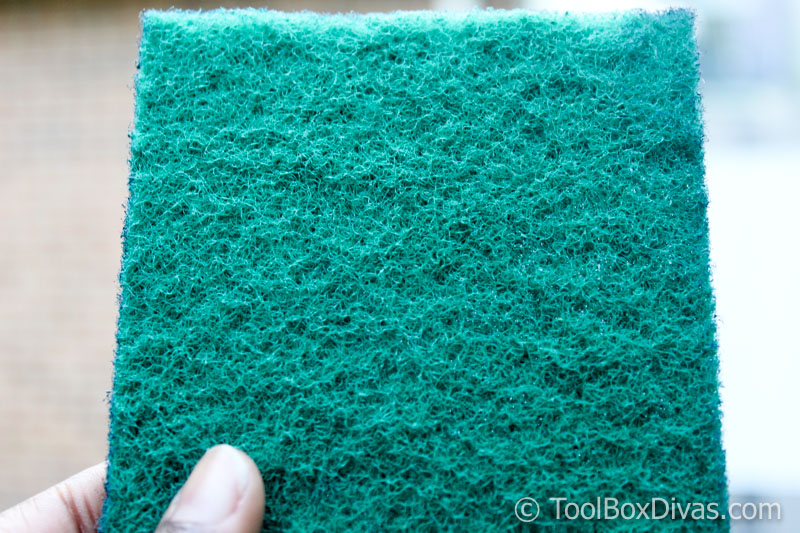
I am using scrubbing pads to create a border around the projection screen. This is a great and easy way to clean up the look of the screen, giving you that finished theater effect and look. 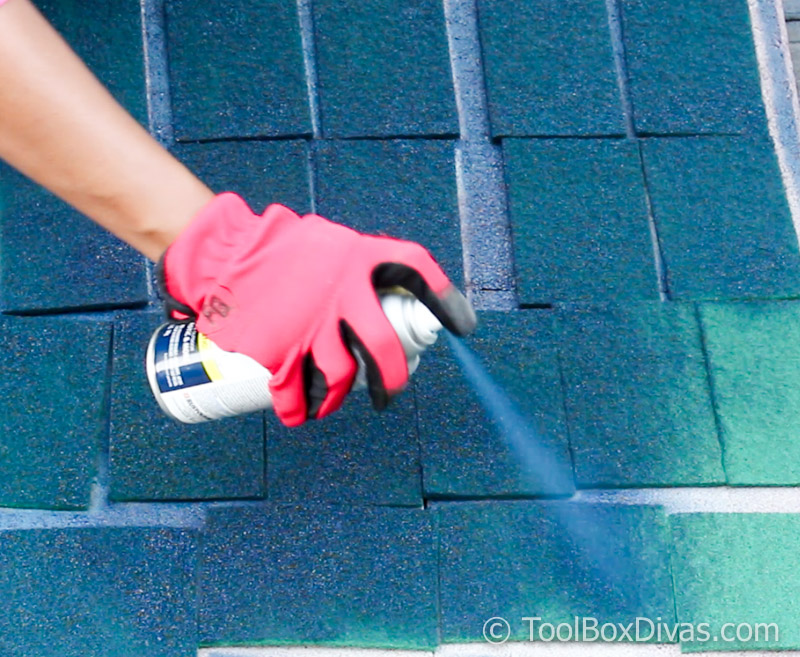 The spray paint I decided to go with is a dark blue that I thought complimented my gray fence. You can leave the pads green or paint it. It’s a total preference.
5. Attach the border to the surface around the screen.
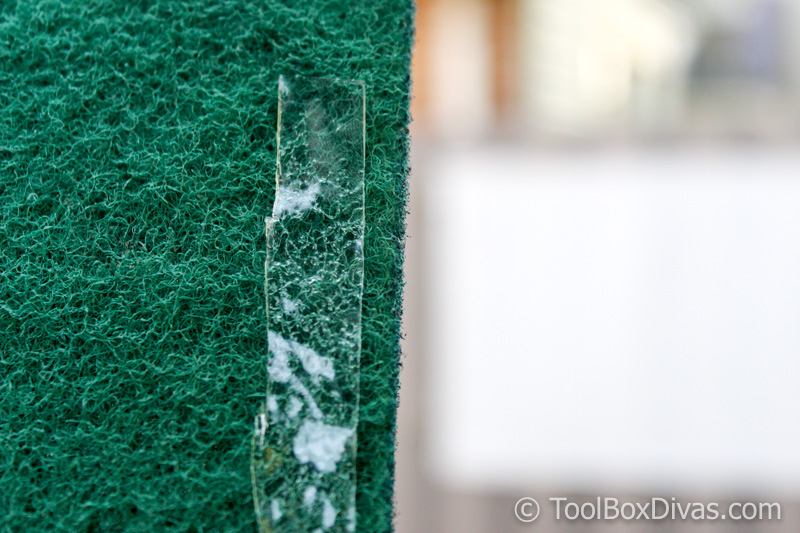
The scrubbing pads are really rough in texture, but the Gorilla Mounting tape performed wonderfully. Simply press down on the pad with the tape for about 10-30 seconds and it adheres to the scrubbing pad.
 With the adhesive attached to the scrubbing pads, I lined the shower curtain screen, creating a border around the edges. It’s also a great way to hide any ugly trim marks from cutting the curtain with the scissors.
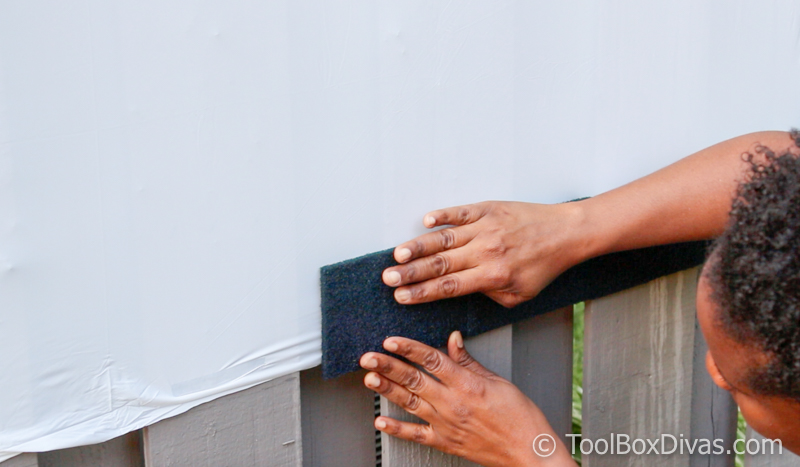
 Another great feature about the Gorilla Tough & Clear Mounting Tape is that it stretches. When you remove the backing from the tape it’s pliable and allows you to stretch it. I did this when attaching the tape to the scrubbing pads. Keep in mind stretching it does reduce the strength. Again, I am working with very lightweight material so this holds perfectly. But I don’t recommend this for larger thicker items.
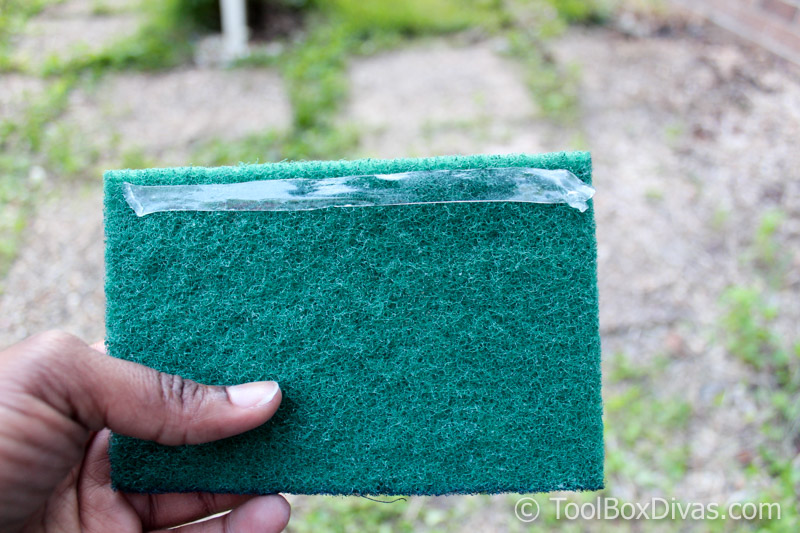
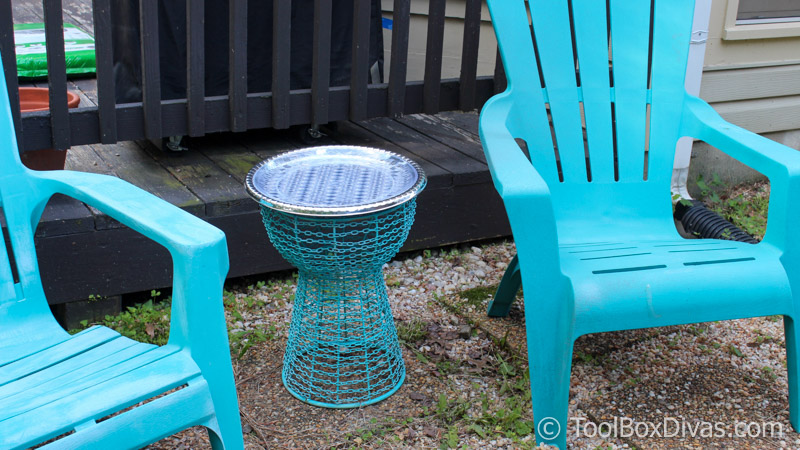
6. Dress up your area. Add chairs and a table for the projector and Enjoy.
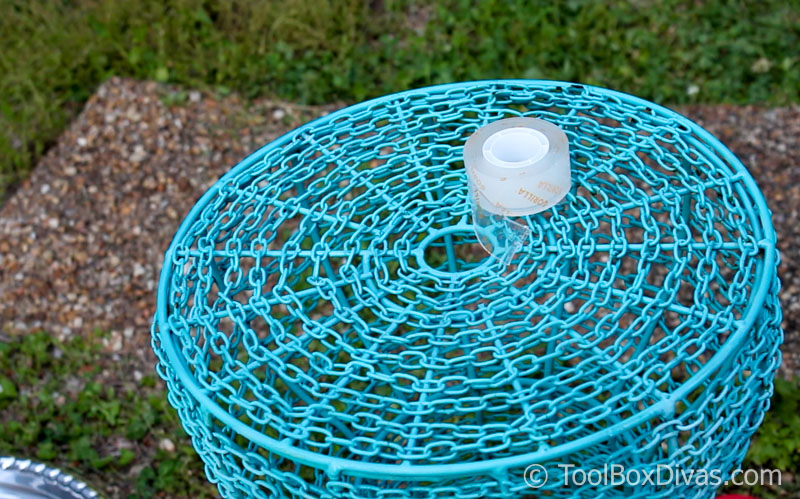 Using an old chain stool that I had in the backyard I attached a dinner platter that I got from the dollar store to the stool using the Gorilla Tough & Clear Mounting Tape.
 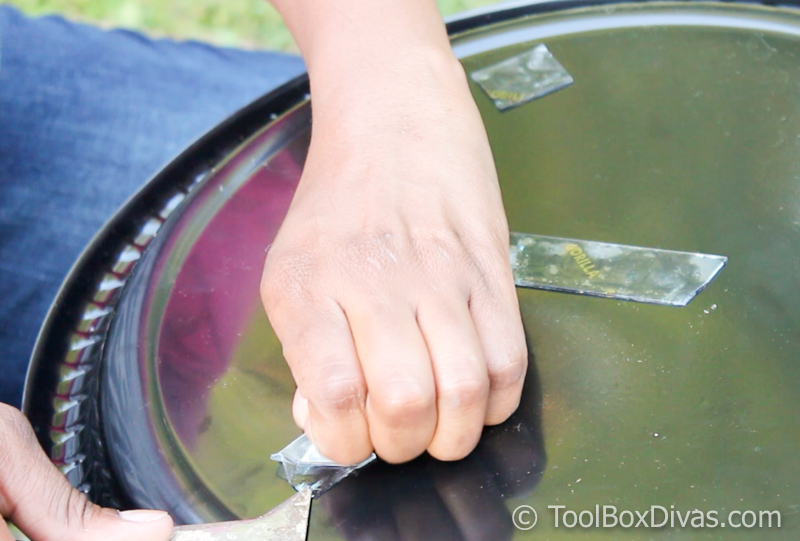 And with everything in place it was time to enjoy this space.
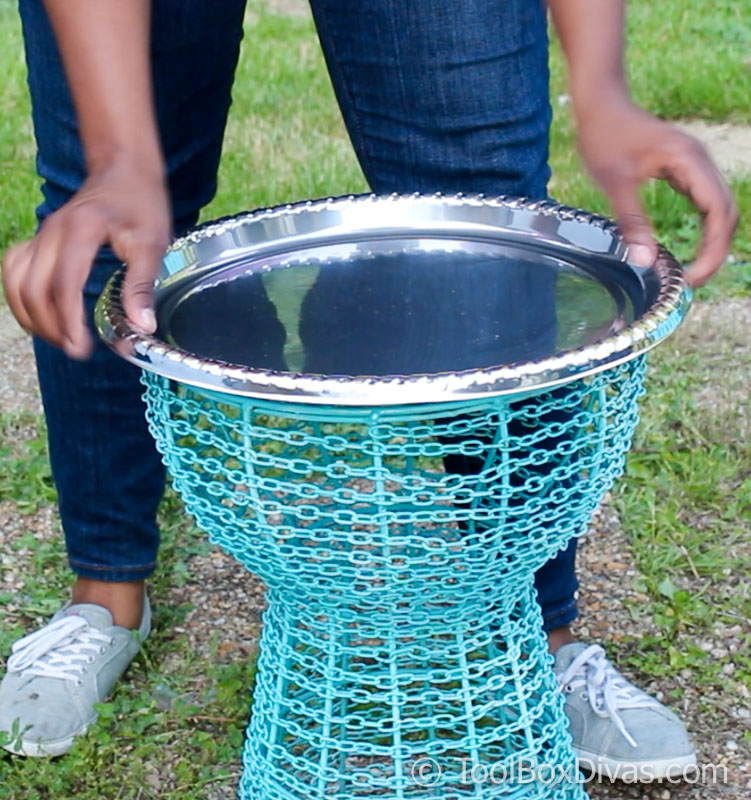
Now that’s #GorillaTough 😉
Check out another great Summertime DIY projects.
Till Next Time. ~T.

For more easy DIY tutorials check out these:

Super cute idea! We love backyard movies!
Thank you, Jessica! I actually didn’t realize how much fun it was going to be. Now its like we want to be out there all the time. It’s like going out.
Who doesn’t love movies outdoors in the summer? Great quick project Timi!
Right?! Hahaha Thank you Adam!
Invite me to your place next time you have movie night. I love it. This project seems easy and fun.
You bet. Next time I will be calling you up! Thank you!
Super Cute! What a creative and inexpensive way to create a fun way to view movies outside.
Love it!
Thank you so much, Michelle! I surprised myself on all you can do using such inexpensive materials. 🙂
Great idea, this will be added to the list of projects for my new backyard. I need Gorilla Glue for some unfinished projects.
Awesome Denise! Congratulations on the new backyard btw. I keep tons of Gorilla Glue products on hand from the glue to the different types of tape. You’d be surprised how much it comes in handy.
Absolutely brilliant idea and cheap too 😋….
Thank you! with the emphasis on cheap. 🙂 That’s my favorite part of the project.
You did a awesome job. My question is does your projector have sound with it or do you use a separate sound device? And I love the use of the cleaning pads genius!!
😊 Thank you so much Stephen! I actually use a Bluetooth speaker. The smart phone projector I got isn’t very high tech hahaha.
This is so awesome. Definitely want to try it!
Thank you Mandy! You will love it!
Great idea and looks like a manageable project.
Thank you! it is very easy to put together and maintain.
Wow,
This is amazing. Great work. I really appreciate this and try this for my home.
Thank you! I’m so glad I was able to provide some inspiration for your home.
Super cute idea and so easy to do! Thank you for the wonderful tutorial, mu family will definitely be trying this soon!
THank you so much! Your family will truly enjoy it.
This is wonderful!!!! I have just the place for this…thankyou!!!!
Yayyyy!
Wow! I love your idea! We were thinking about getting a projector soon but I was wondering how to create the screen and then your pin popped up! Thank you! This is both easy and budget friendly.
That’s great! I’m so glad this provided inspiration. Recently I updated the boarder and trimmed the shower curtain with exterior Balck Masking Tape by Gorilla Glue. WAYYYYY faster and works so well.
Found this DIY budget idea for a party I’m throwing next week – we want to do those dances like the video games but they’re on YouTube so you need to see the dance moves- this sounds like the perfect setup for our outside dancing activity!!! Thank you
Sounds like a lot of fun! So happy to provide inspiration.
The link you provided for projector is no longer working can you provide the name of projector ?