Modern Farmhouse DIY Open Shelving
Learn how easy it is to install easy modern farmhouse open shelving in your kitchen creating a rustic elegance you’d see by Joanna Gaines in Magnolia.
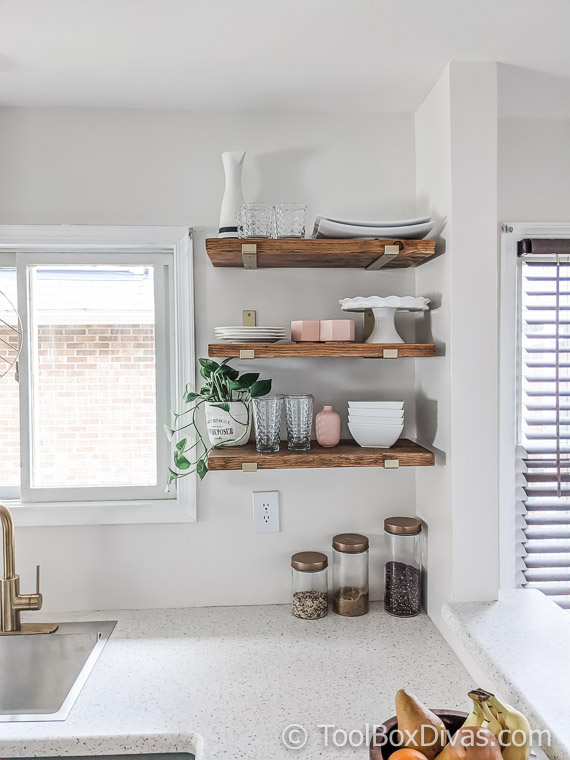
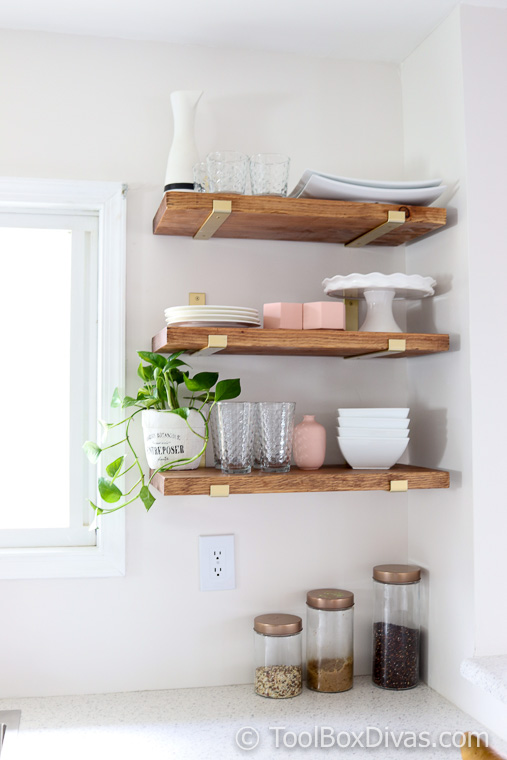
Recently, I renovated my severely outdated kitchen. I used primarily cabinets I found on the shelves at my local Home Depot. I took the whole kitchen down to the studs and removed the useless soffits. This made room for taller cabinets and shelves. I didn’t want floating shelves. I wanted the shelf brackets to be apart of the overall esthetics of the kitchen. So I opted for open shelving with visible shelf brackets.
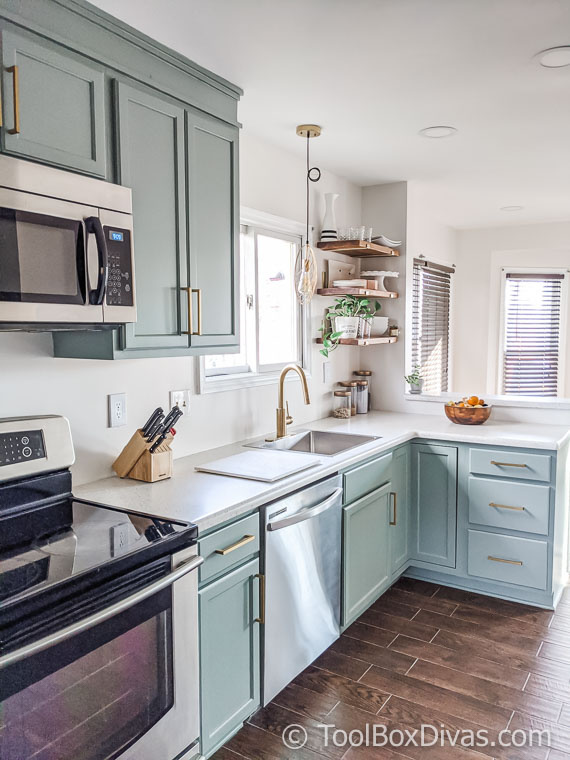
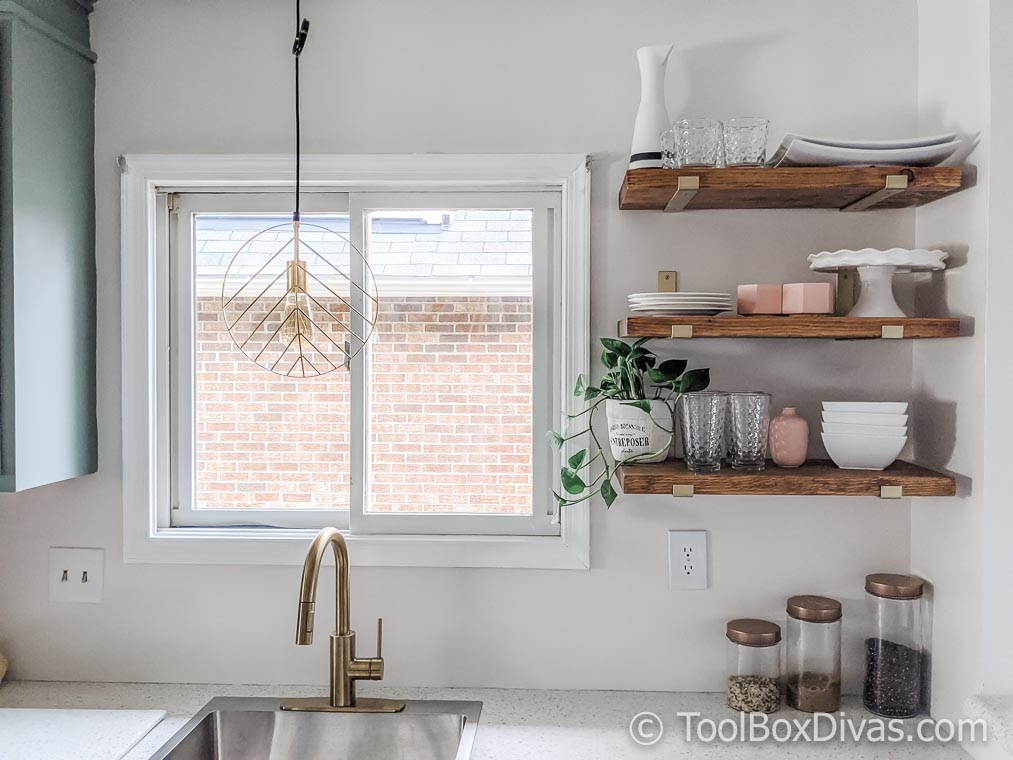
I’d always wanted to do some sort of open shelving in my kitchen. So this was a perfect time. So I replaced a corner wall cabinet with open shelves. Adding shelves versus a traditional wall cabinet can allow you to save money on expensive cabinets. It also adds a decorative element to the kitchen. In my case, the open shelves paired gold brackets create a modern farmhouse feel… rustic elegance.
In the past I put up quite a few shelves around my home and the home of friends including this Rustic Faux Beam Mantel and DIY Floating Bookshelf.
Here’s what I did.
Materials
- 3 – 2 in. x 12 in. x 12 ft. lumber cut to 3 – 24 in. (DO NOT USE Pressure Treated wood for interior shelves)
- Shelf Brackets (4 brackets come in a set for 2 shelves). I used them in Gold. However, you can spray paint these brackets in any color to fit your kitchen decor.
Tools
- Drill (RIDGID 18v Cordless Drill/Driver and Impact Driver 2-Tool Combo Kit)
- Drill bits (RYOBI Impact Rated Driving Kit – 70-Piece)
- Laser Level – (Bosch 65 ft. Self Leveling Cross Line Laser Level with Plumb Points)
- Stud Finder
- Miter Saw (DEWALT 15-Amp Corded 12 in. Double-Bevel Sliding Compound Miter Saw)
- Orbital Sander
- Planer (Optional)
OK, Let’s Get Dirty!
- Cut the wood to size. I replaced a 24″ wall cabinet. So I cut each shelf down to 24 inches.
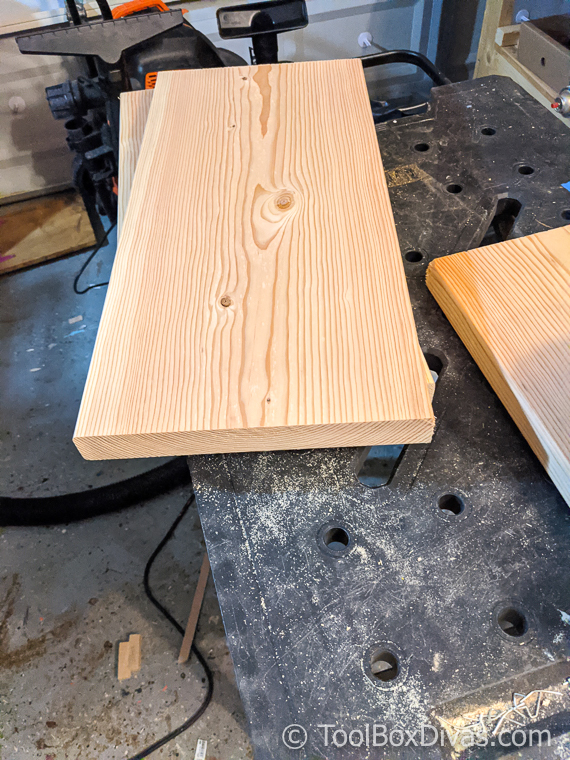
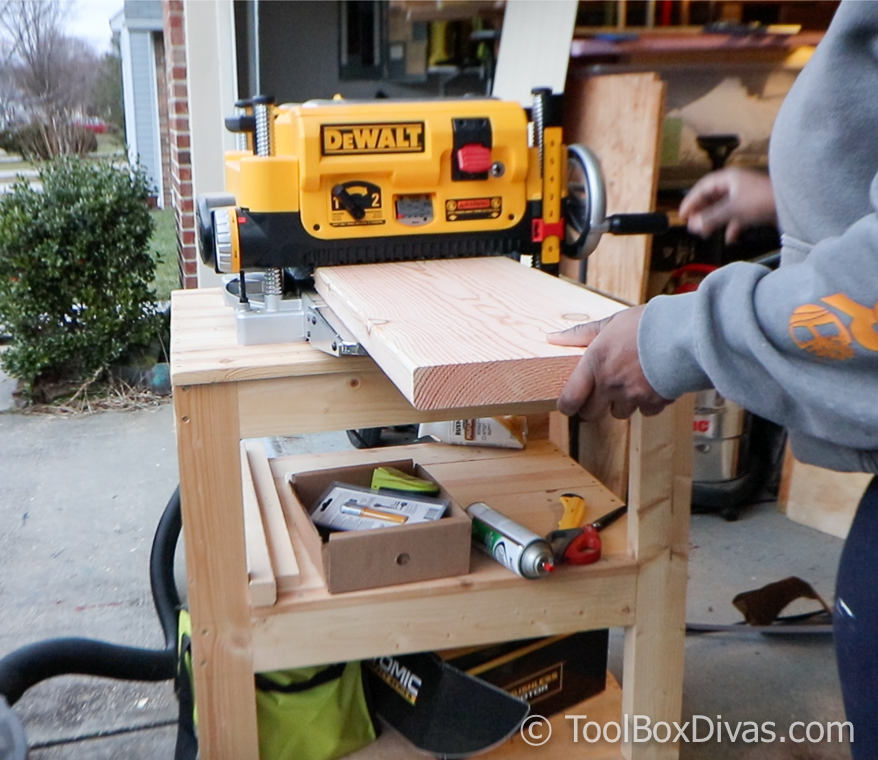
Planing is optional 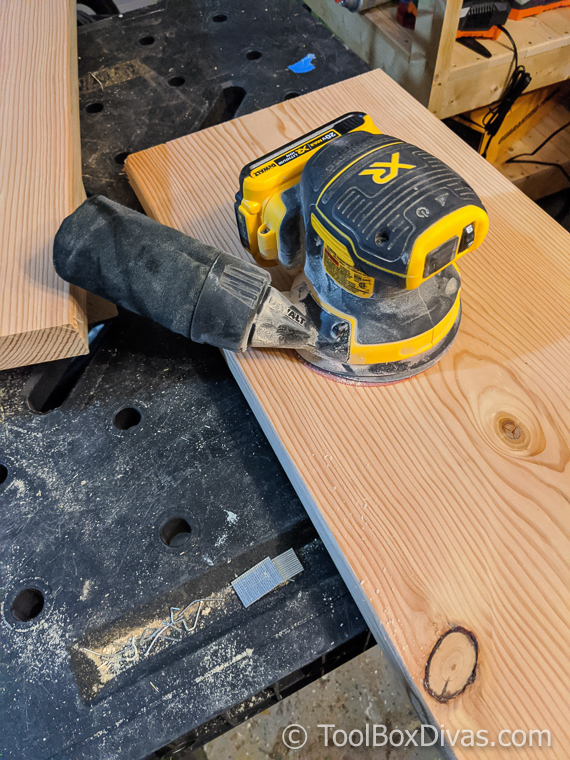
Sand all the way up to a 400 grit sand paper
2. Plane and sand. Planing is optional. But I planed each shelf then sanded it down using an orbital sander. I started with 120 grit sandpaper and worked to 400 grit
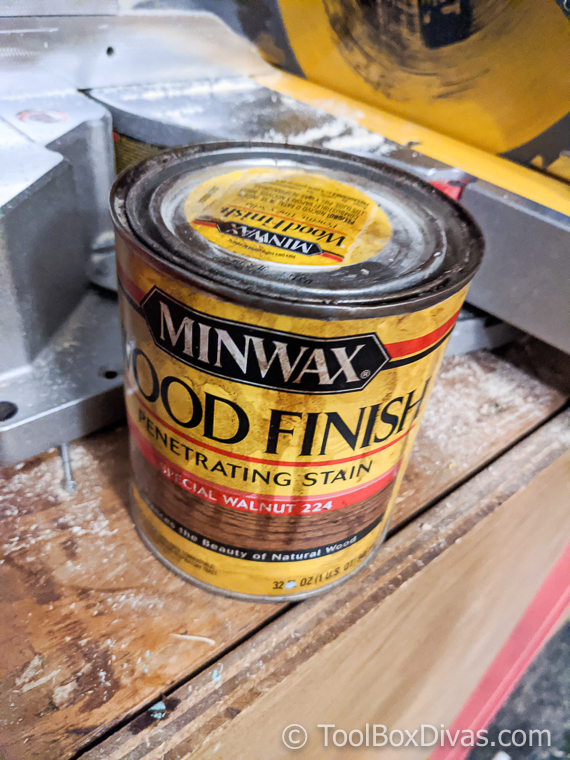
3. Apply Stain and Poly. I used special walnut by Minwax.
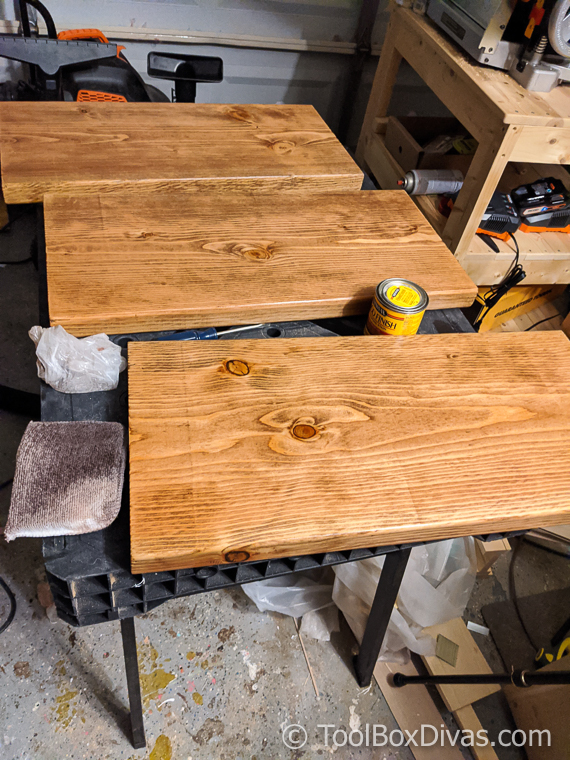
While the shelves dried I installed the shelf brackets.
4. First, locate the studs. Using a Stud Finder I located the studs. I highly recommend using the studs to secure the brackets to the wall if possible. When you can’t use drywall anchors.

5. Using a laser level I marked the line for the first shelf. Screw the brackets in place into studs or anchors.
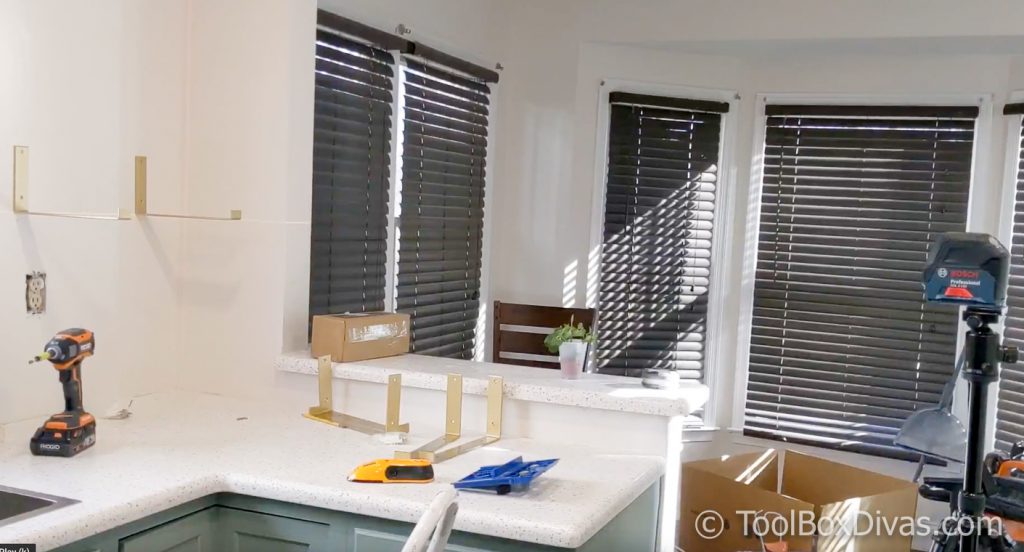
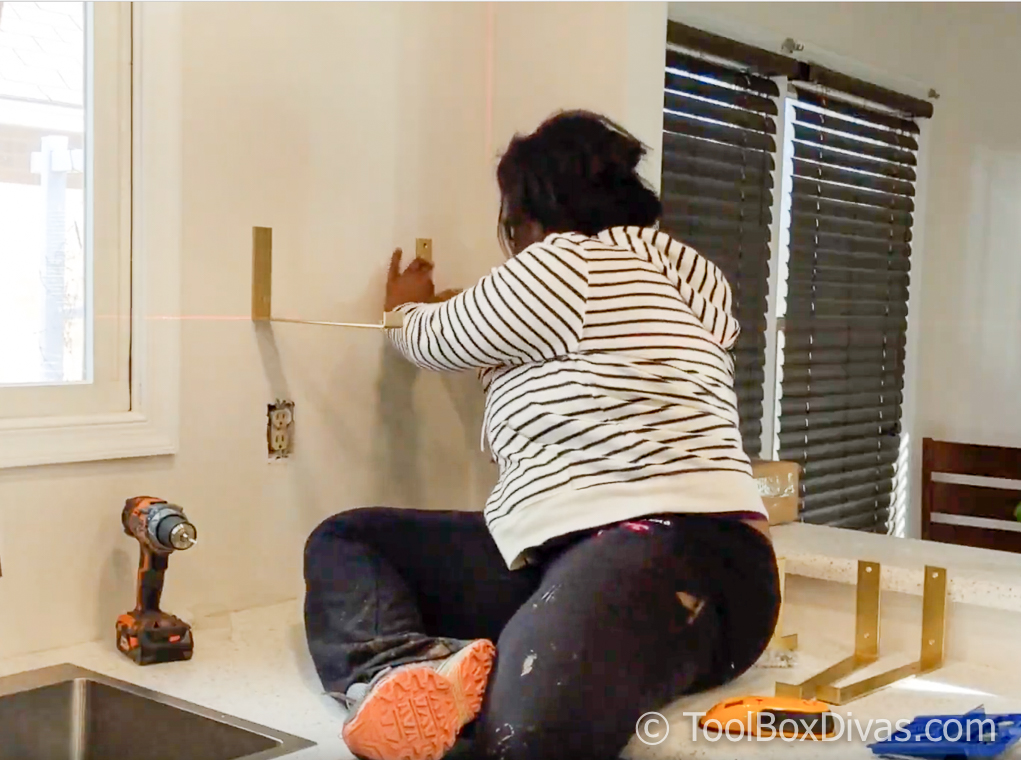
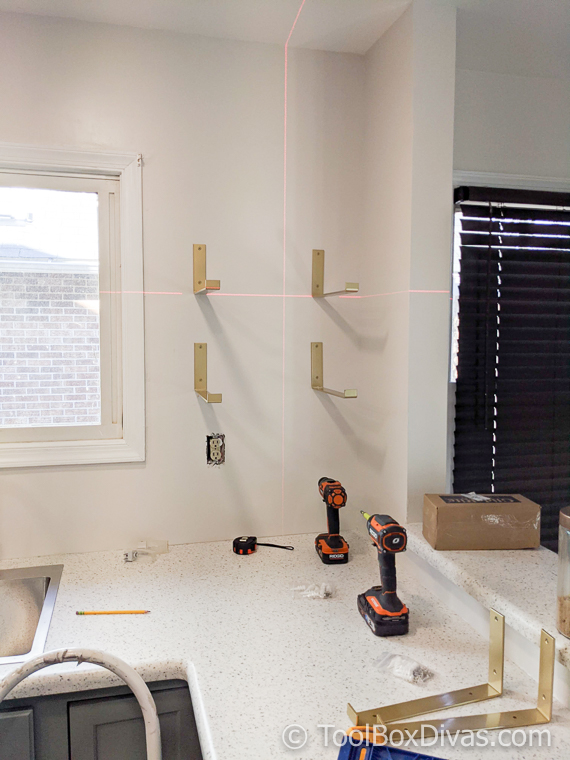
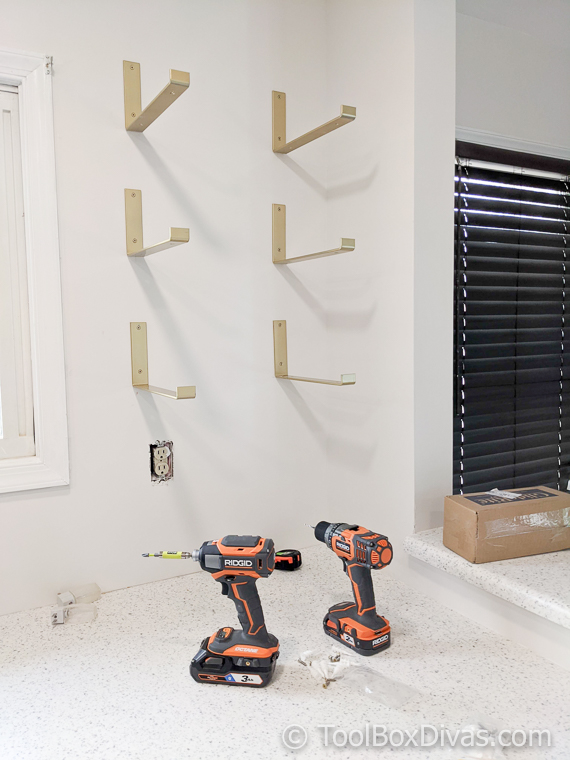
I even spaced out the brackets so that there would be 10 inches between one shelf to the other. The bottom shelf started at the same level as the bottom of all the wall cabinets on the opposite side of the window.
6. Center and place each wood shelf on brackets.
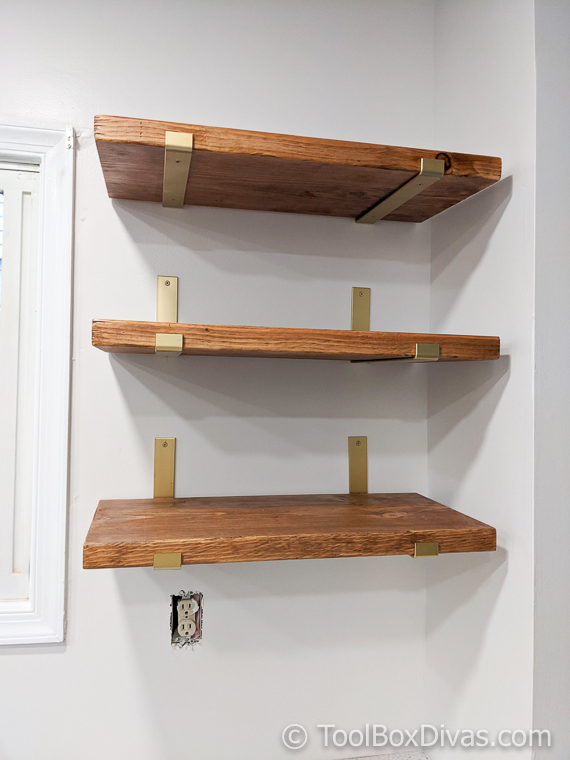
Secure the wood shelves to the brackets by placing a screw in the bottom of the shelves under each shelf. Ensure all shelves are level.
7. Decorate and style your open shelves. Enjoy the open and airy view. I know I do.
There are no rules here. So don’t feel you have to have shelves on both sides of the window to create symmetry. After all, this is your kitchen. 😉


Love it!
Thank you!
What wood did you buy ? Is it pine, oak, birch ??
its Pine.
Thank you for this! I love these shelves so simple and beautiful.
Thank you so much!