How to Make a DIY Halloween Lantern using a Cricut
Learn how to make your own DIY Halloween Lantern using basswood and your Cricut Maker. Chase away the ghosts and ghouls this Halloween season!
If you like Cricut projects you will love these DIY Basswood Christmas Ornaments and this cute DIY Wooden Elephant Pencil and Phone Holder
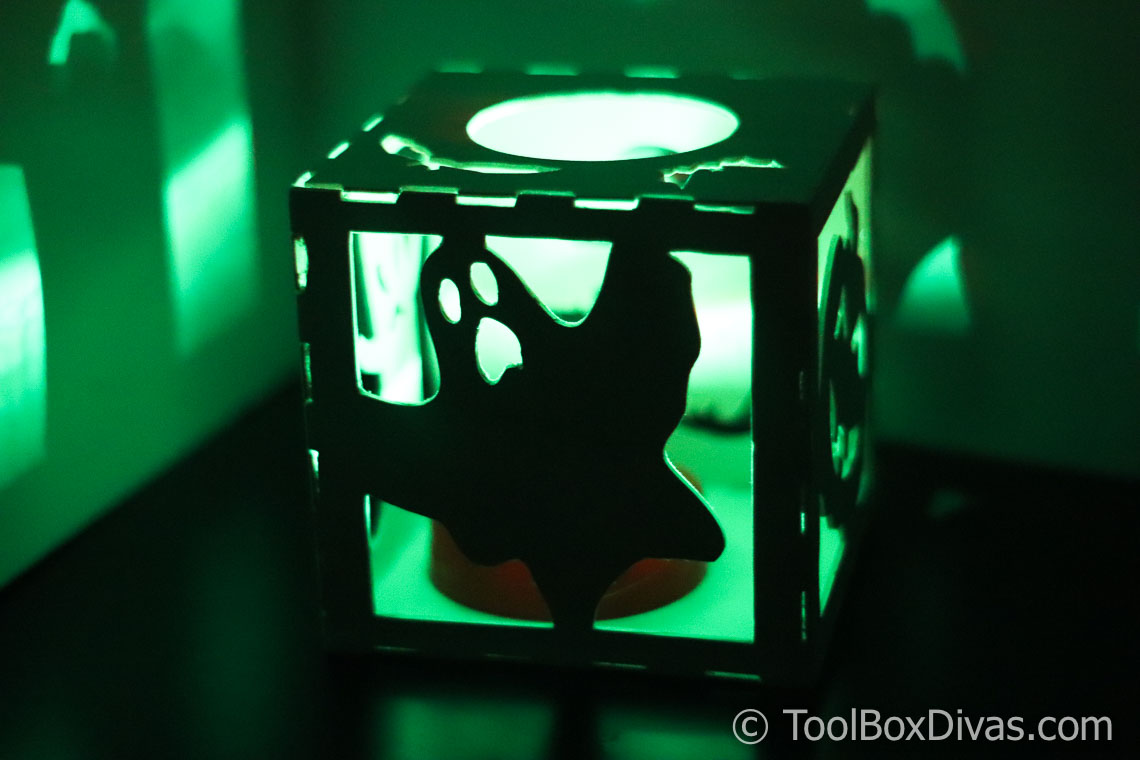
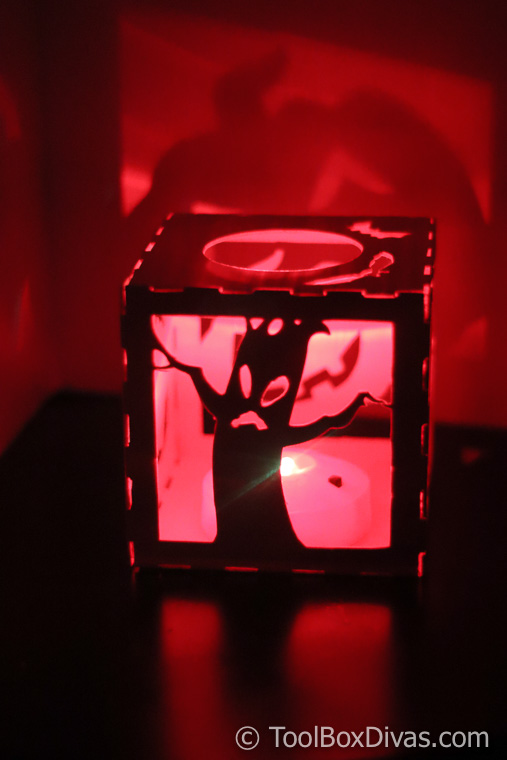
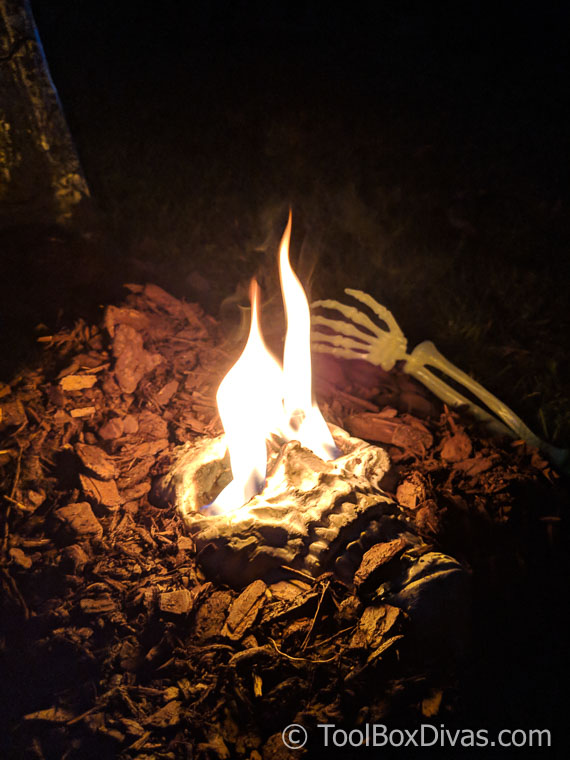
Darkness is moving across the land and things that go bump in the night are upon us. This DIY Halloween Lantern will light up the darkness.
I love Halloween and I wanted to make something different this year. I mean seriously…pumpkins are so overdone, don’t ya think?
My Cricut machine makes these DIY Halloween lanterns super easy to make and I’m sharing exactly how I did it in the video and tutorial below.
Download the halloween Lantern Files
Supplies Needed to Make a DIY Halloween Lantern:
- Halloween Lantern Files
- Cricut Maker
- Sheets of Basswood
- LED light
- Hot glue gun
Halloween Lantern Tutorial
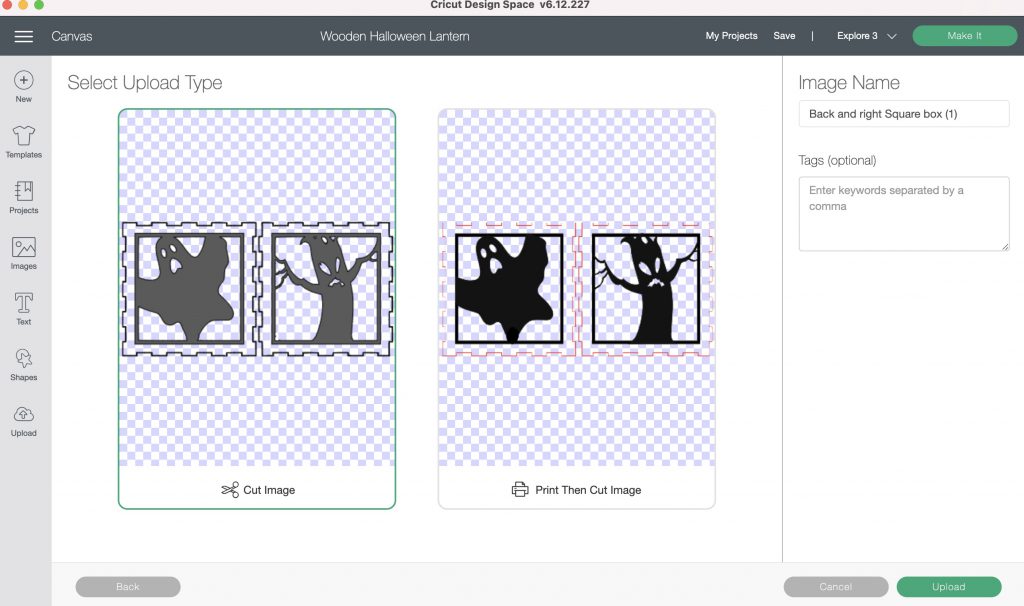
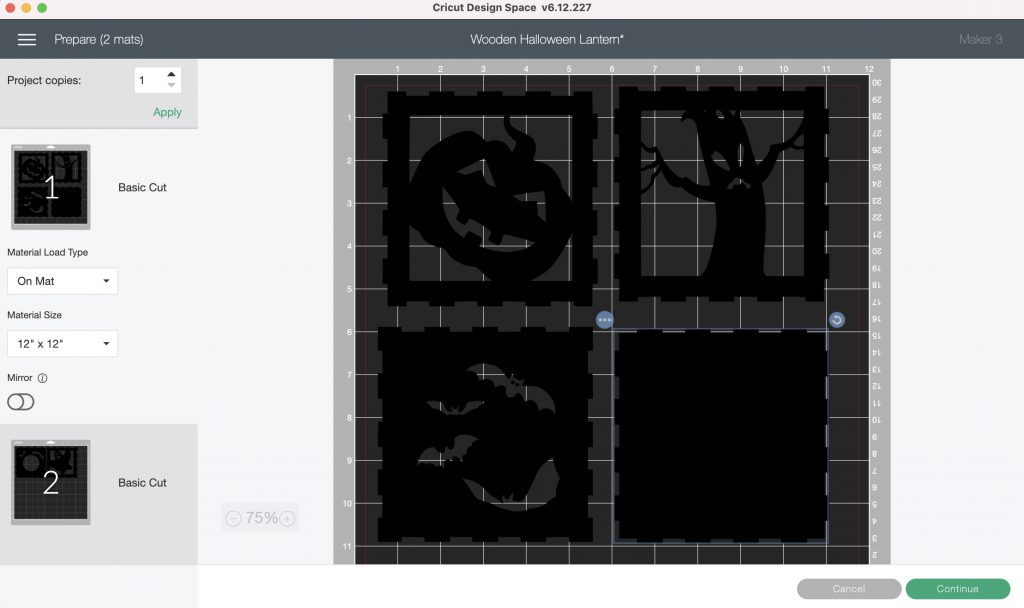
Open a “new project” in Cricut Design Space. Next, click upload to upload the Halloween lantern templates. Be sure to choose “cut image” not “print and cut image”.
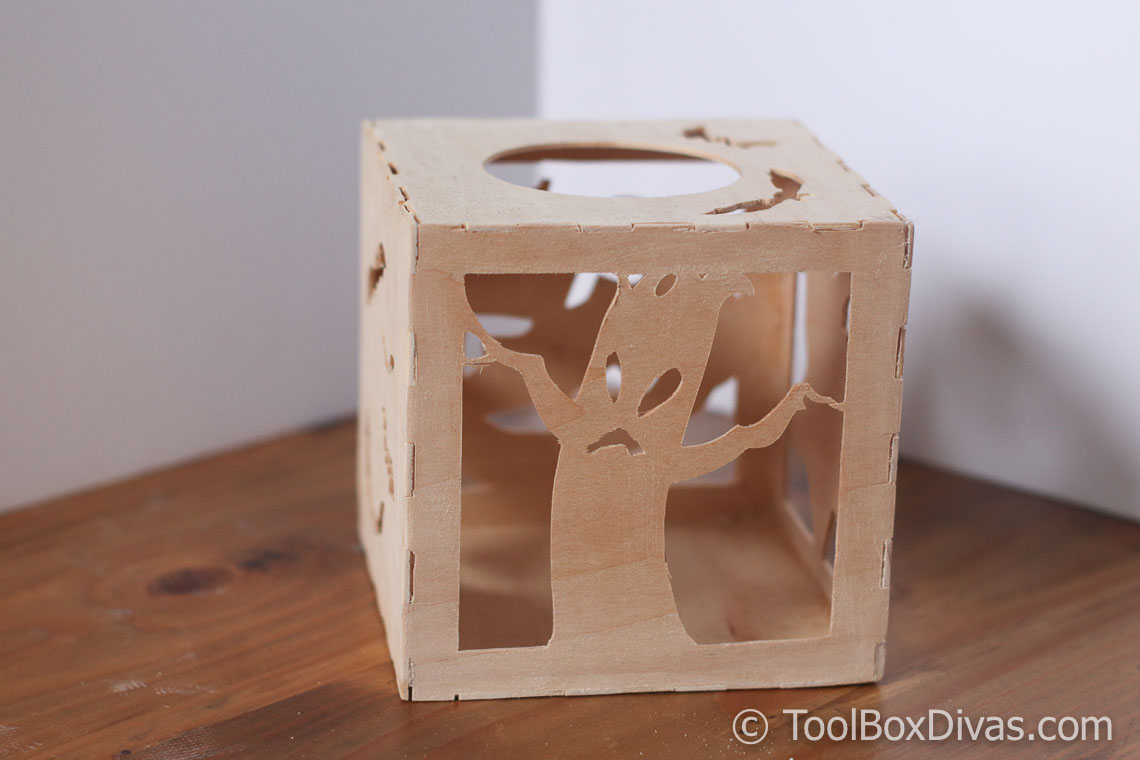
Each side of the lantern should be 5″ X 5″. You will have a total of 6 squares and you will need two sheets of basswood. Position each box within the 12X12 mat area and set the size of each box. Now you’re ready to Make It. Click “Make It” to go to the next step to make your halloween lantern.

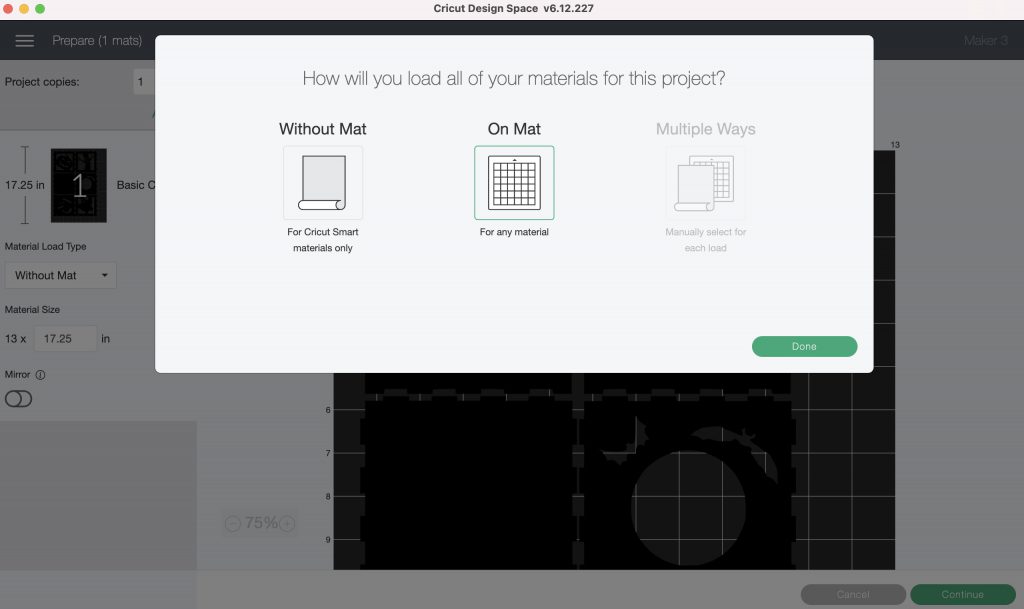
Choose “on mat” for how will you will load the basswood for the lantern. Position your basswood onto your mat and tape it in place using masking tape on the edges. You want to make sure that the wood doesn’t shift while being cut.
Review your design placement to make sure it’s correct. Choose the appropiate cut on you Cricut Maker for the material you are using. Place your mat onto the loading tray to start your cuts. Be patient this will take some time to complete.
Once your project is done cutting, carefully remove the masking tape and weed out your design. I used a scraper to get under the edges to gently lift it from the mat.
Assemble your Halloween lantern using hot glue. Sand the edges smooth to remove any tabs that are sticking up and paint the color of your choice. Add a battery operated LED light and you’re lantern is ready!