Wooden Ornament Tree: A Crate & Barrel Hack
In this post, you will learn how to make this DIY Wooden Christmas tree inspired by a wooden tree sold at Crate and Barrel.
The other day I was turning the pages of the latest Crate & Barrel holiday catalog and I came upon the cutest ornament trees made of steel. I loved it. But then I thought, this would be totally cool if it were made of wood and had a more rustic feel. So I went back to my workshop and in about 2 hours created my very 1st Crate & Barrel hack. And it was a lot cheaper. I used the extra old flooring I had bought while out shopping for a previous project from my local 2nd hand retailer.

The cost: Under $10
Cost savings: $95
Materials:
Scrap pieces of wood
Burlap string
Eye screws (approx. 16)
Wood glue
Staples
Dimensions:
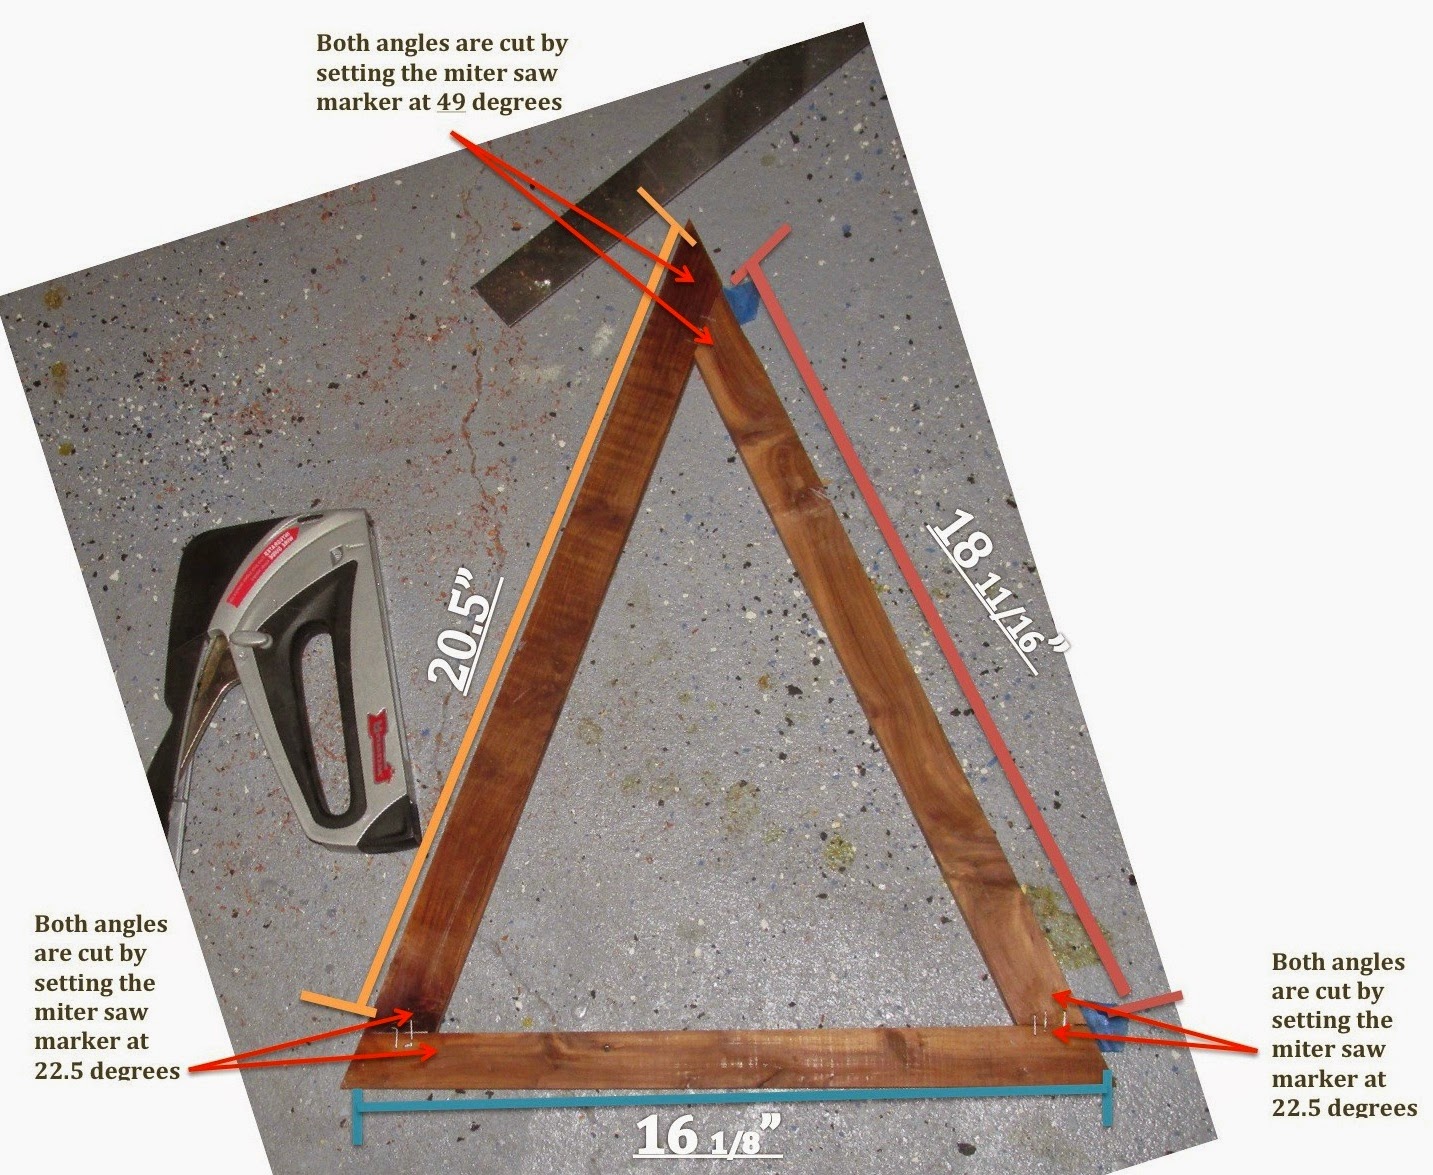 |
| The Big Tree |
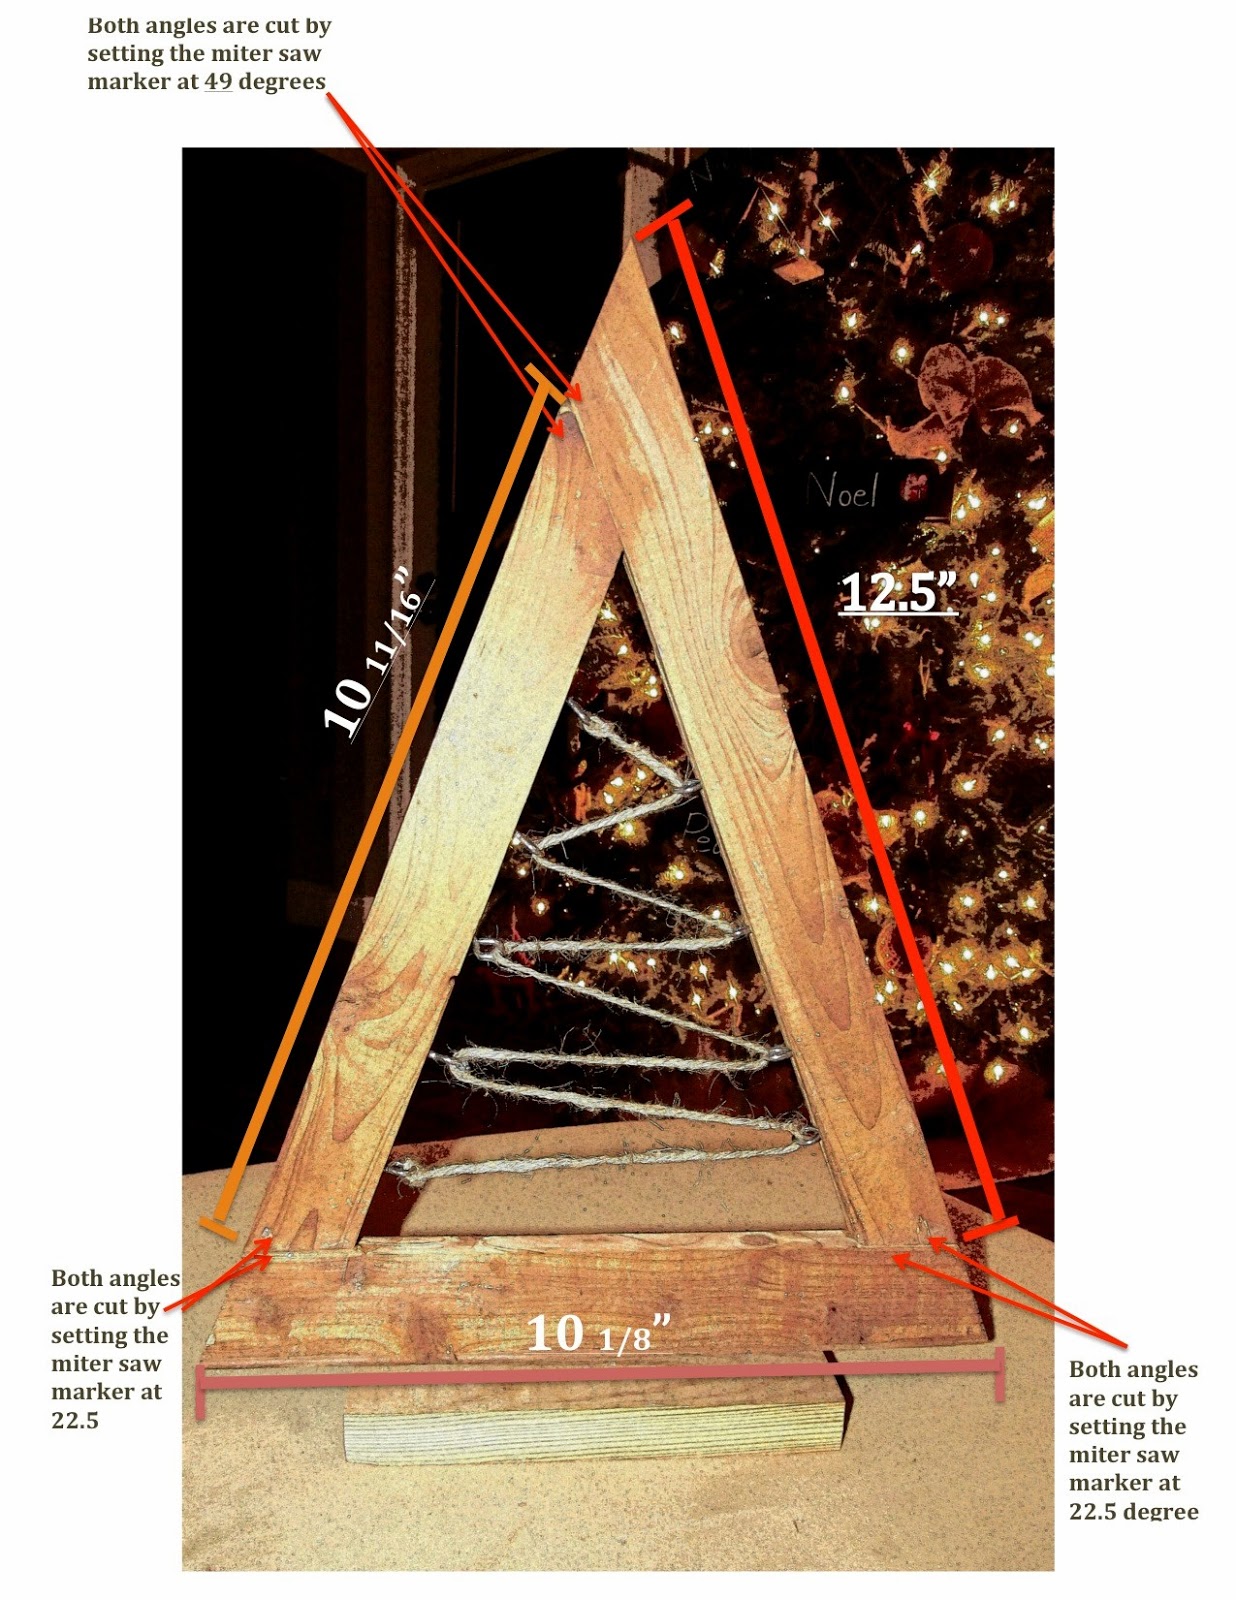 |
| The Small Tree |
Ok, let’s get dirty!
Steps
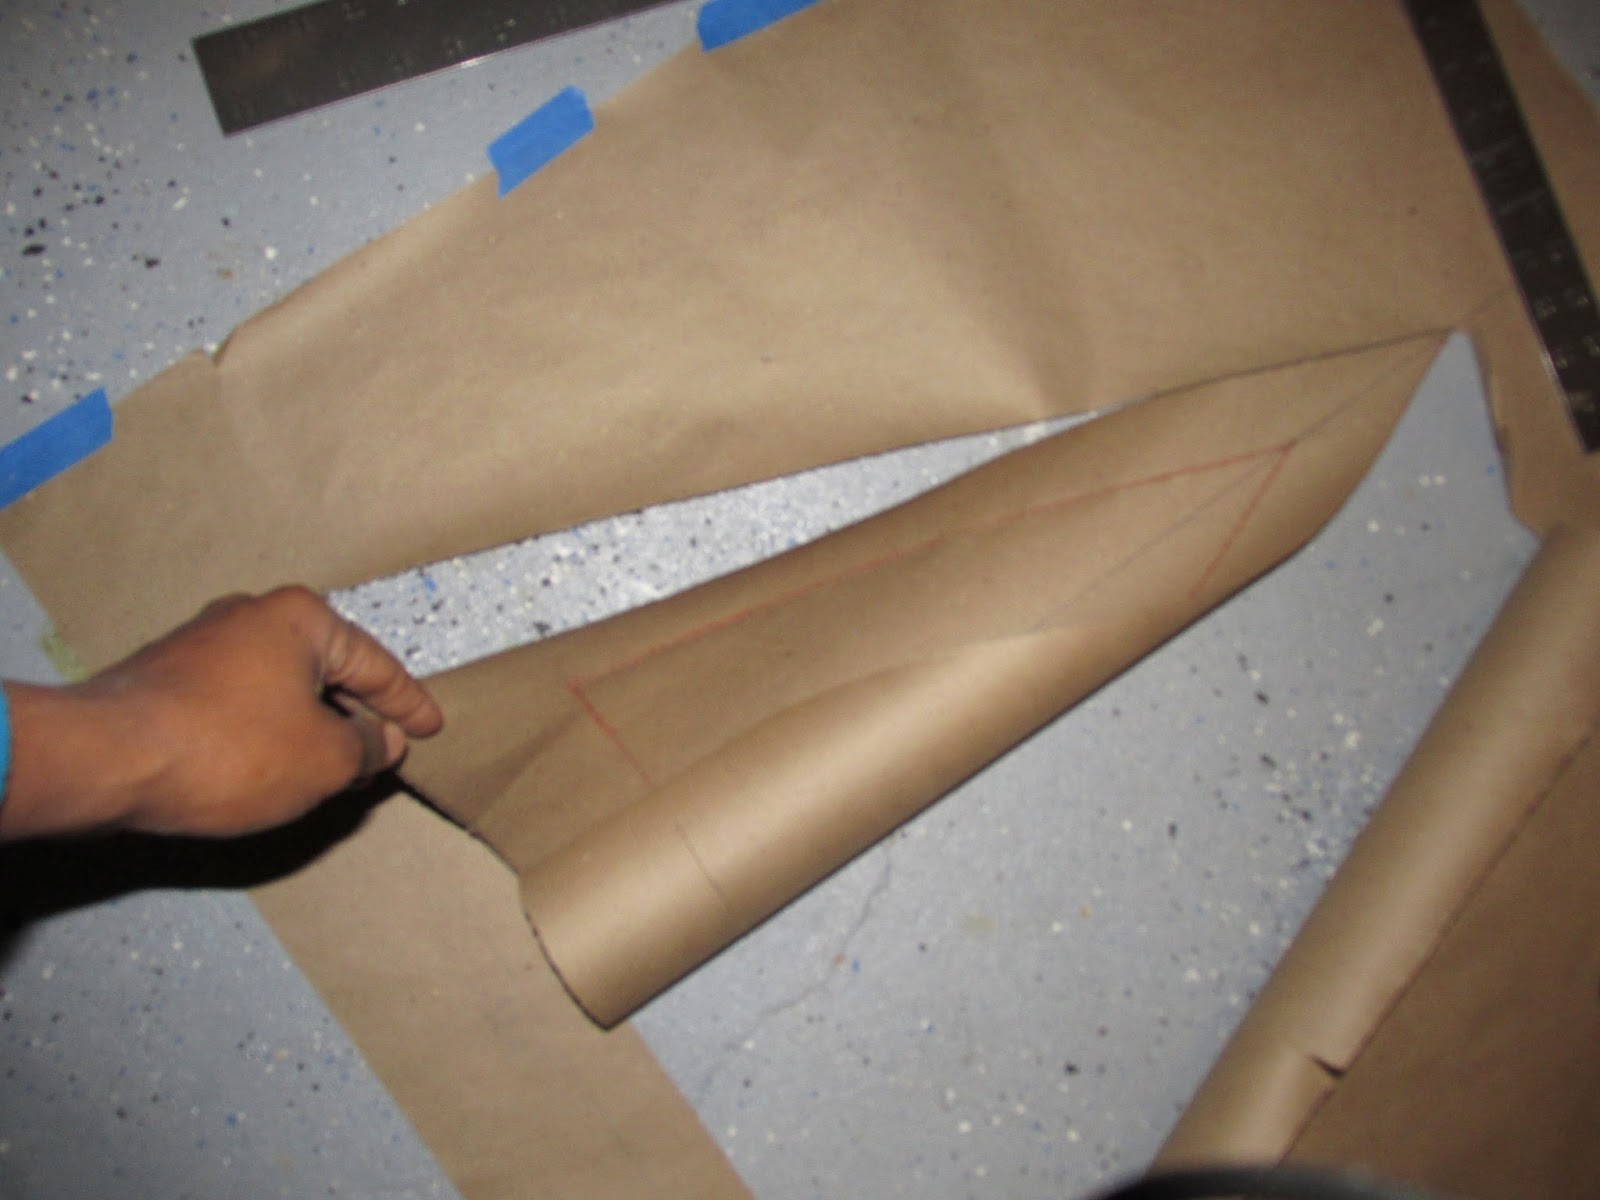
Now, let me just put this out there. I suck at angles. Yep I said it. Angles are the vein of my existence (too strong?). Anyway, it’s challenging for me. I can measure and measure and
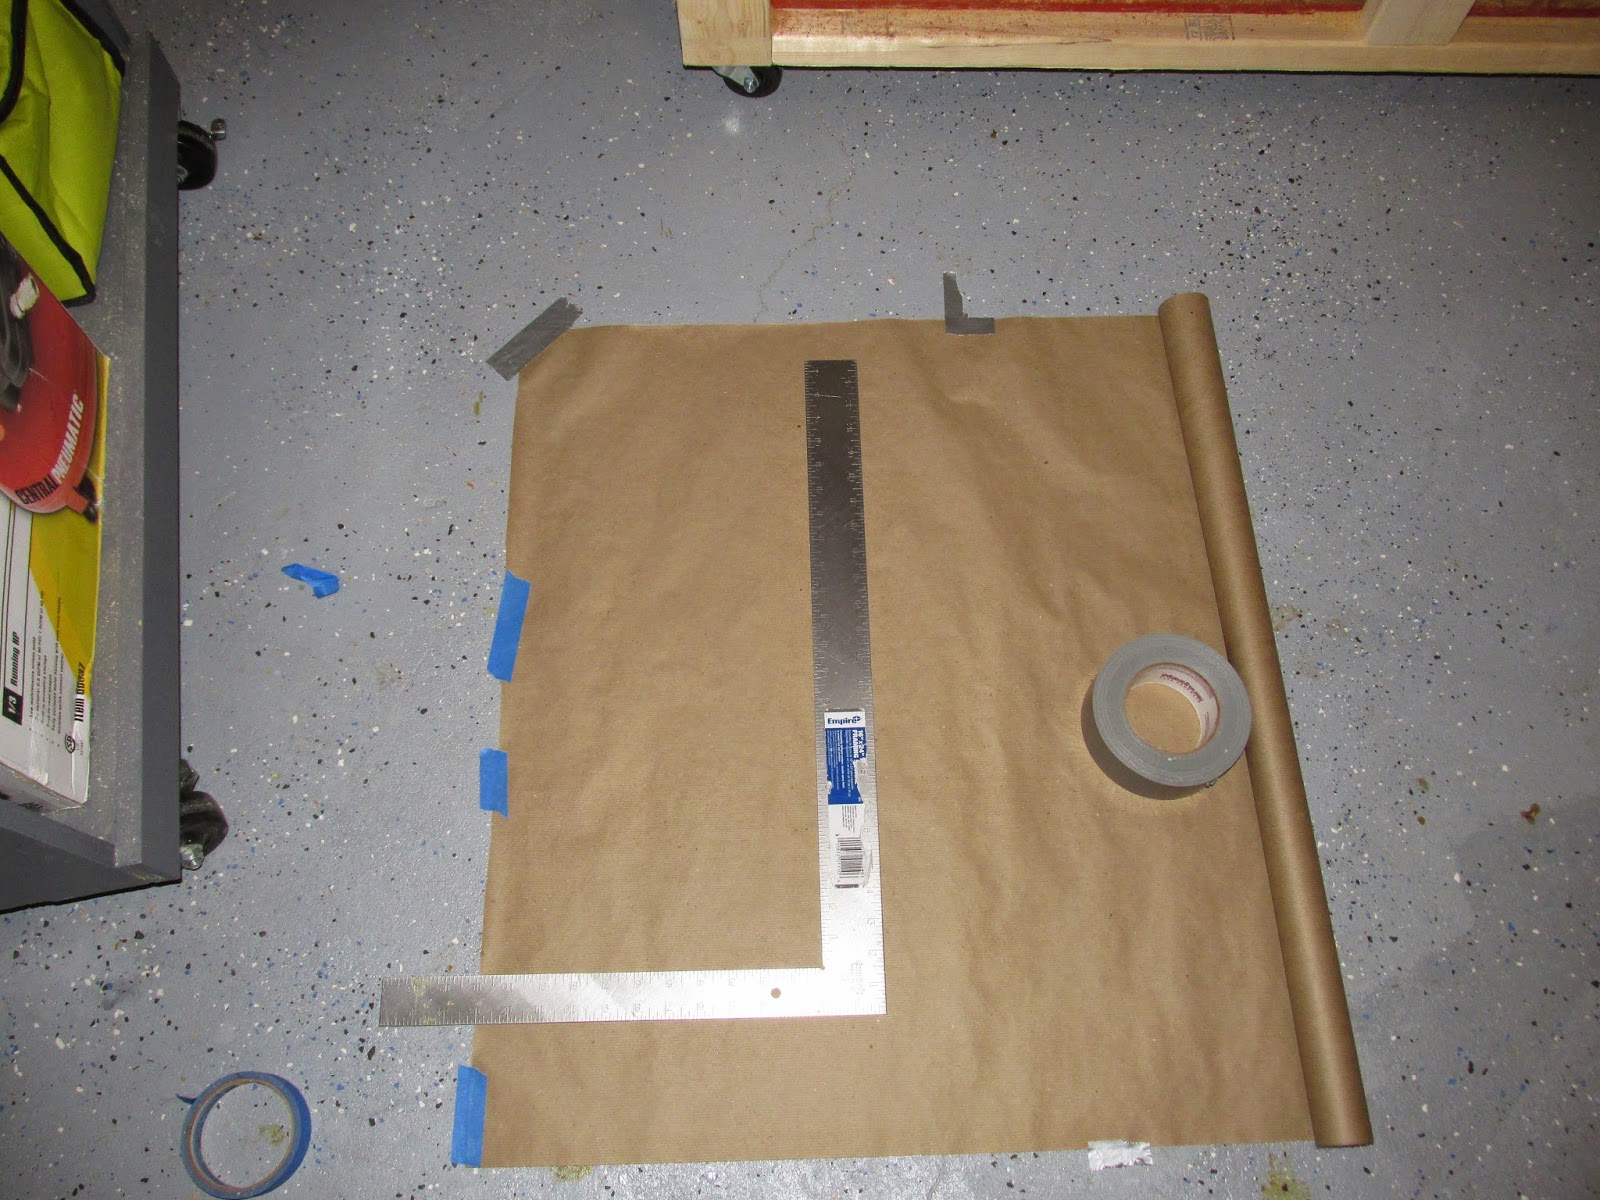
still cut wrong. I probably should preface that I sucked in geometry in high school. When working with angles, I work best when I draw out templates, either on a piece of paper or using tape. So first start with a template on cardboard paper to ensure the correct angles and the dimensions on the triangle. I’d hate for you to have all your pieces cut out and find you have an obtuse triangle….like I did the first time I tried this.
still cut wrong. I probably should preface that I sucked in geometry in high school. When working with angles, I work best when I draw out templates, either on a piece of paper or using tape. So first start with a template on cardboard paper to ensure the correct angles and the dimensions on the triangle. I’d hate for you to have all your pieces cut out and find you have an obtuse triangle….like I did the first time I tried this.
I drew everything out to scale using a Carpenters Square and lined paper.
 |

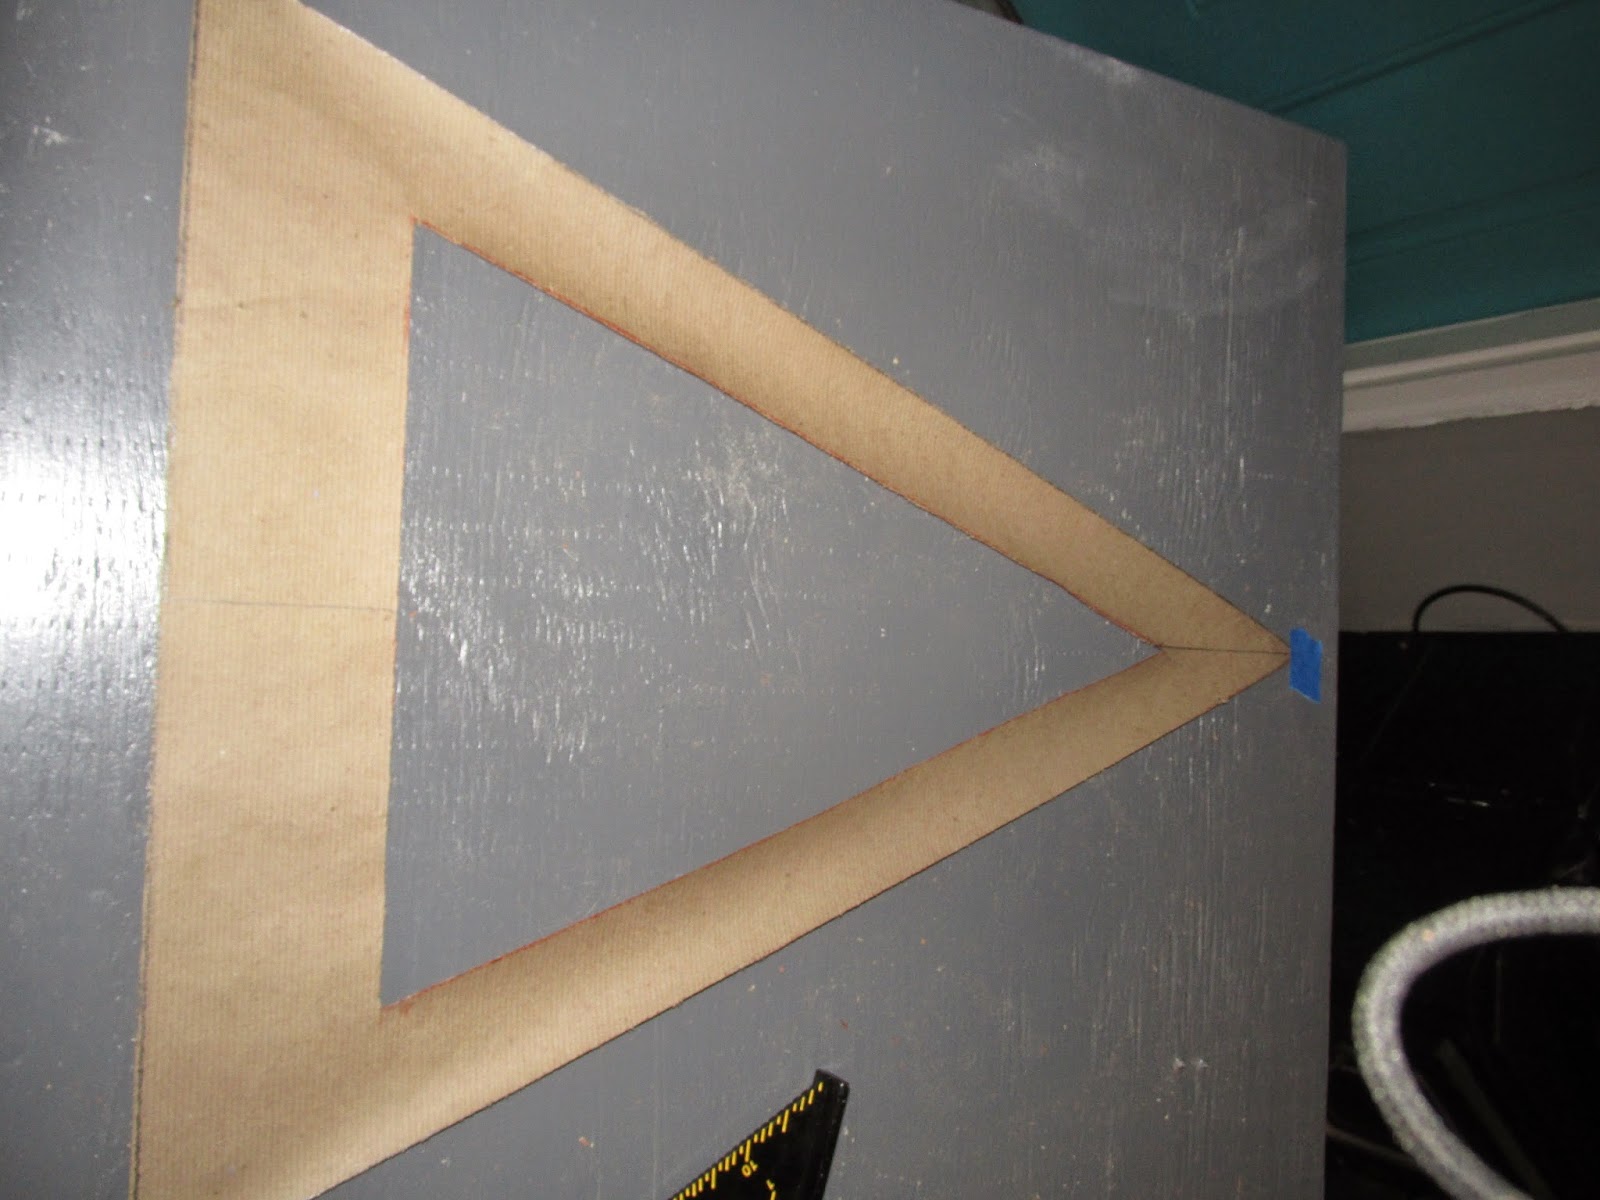
Step 1. Drawing a line straight down the middle. Then making a perpendicular line at the bottom, even on
either side of the vertical line.
either side of the vertical line.
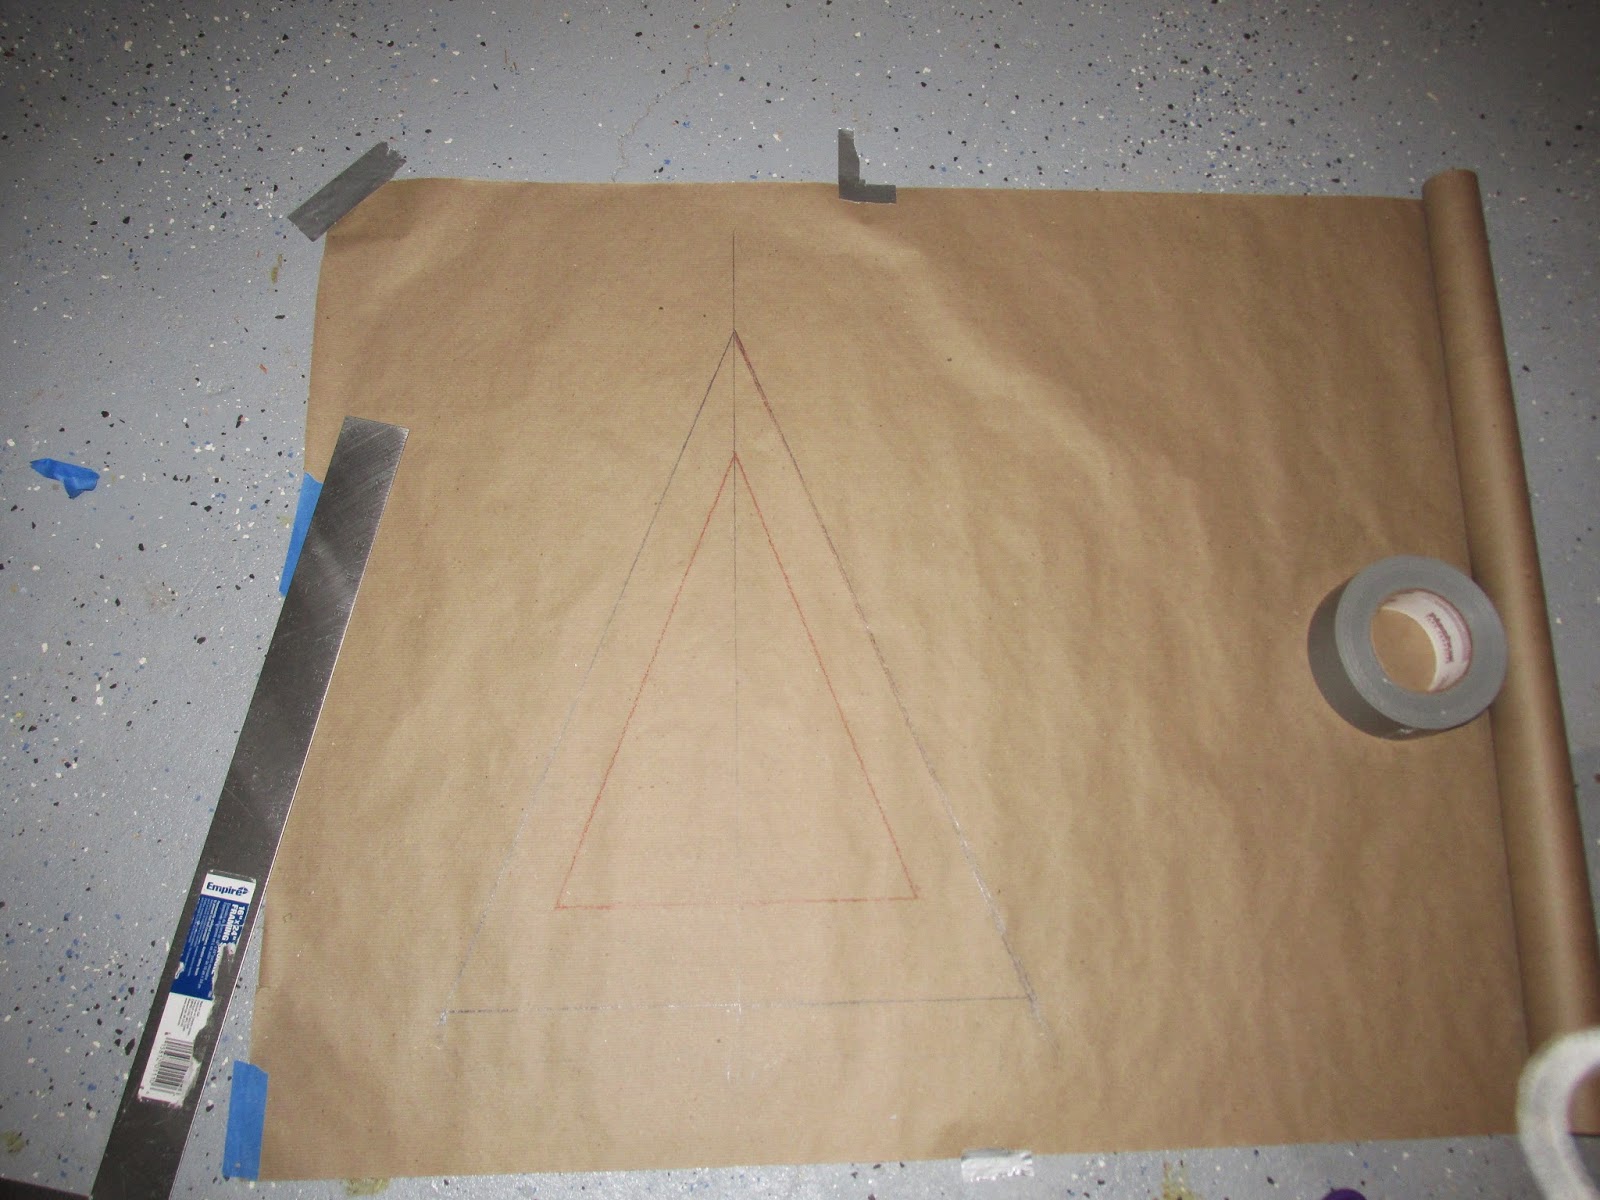
Complete the shape of the triangle and repeat this process
in the middle for a smaller template.
in the middle for a smaller template.

Using a utility knife, I scored along the edges of the
triangle using the carpenter square as a guide.
triangle using the carpenter square as a guide.
Once you’ve scored the paper it should just pull apart.
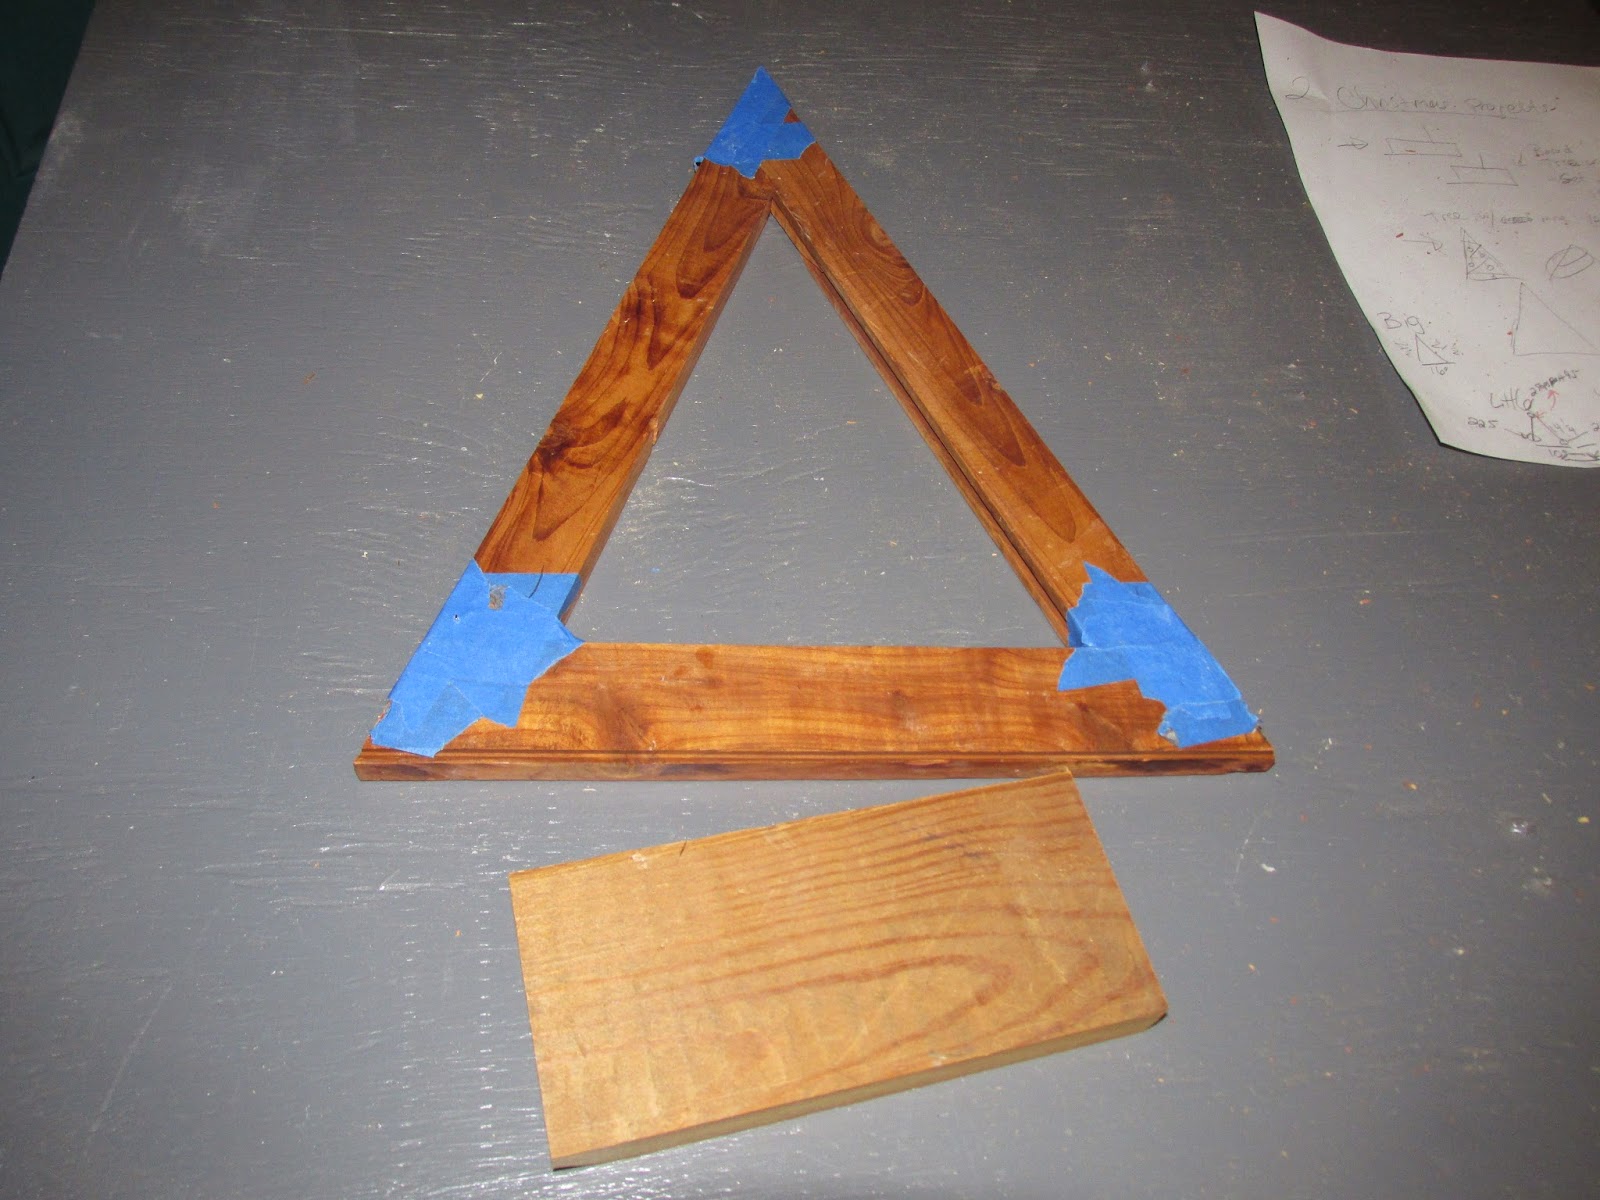
Take the larger template and use it to cut and mark the
board pieces to achieve the correct size and angles for the big tree. Then do the same for the smaller tree.
board pieces to achieve the correct size and angles for the big tree. Then do the same for the smaller tree.
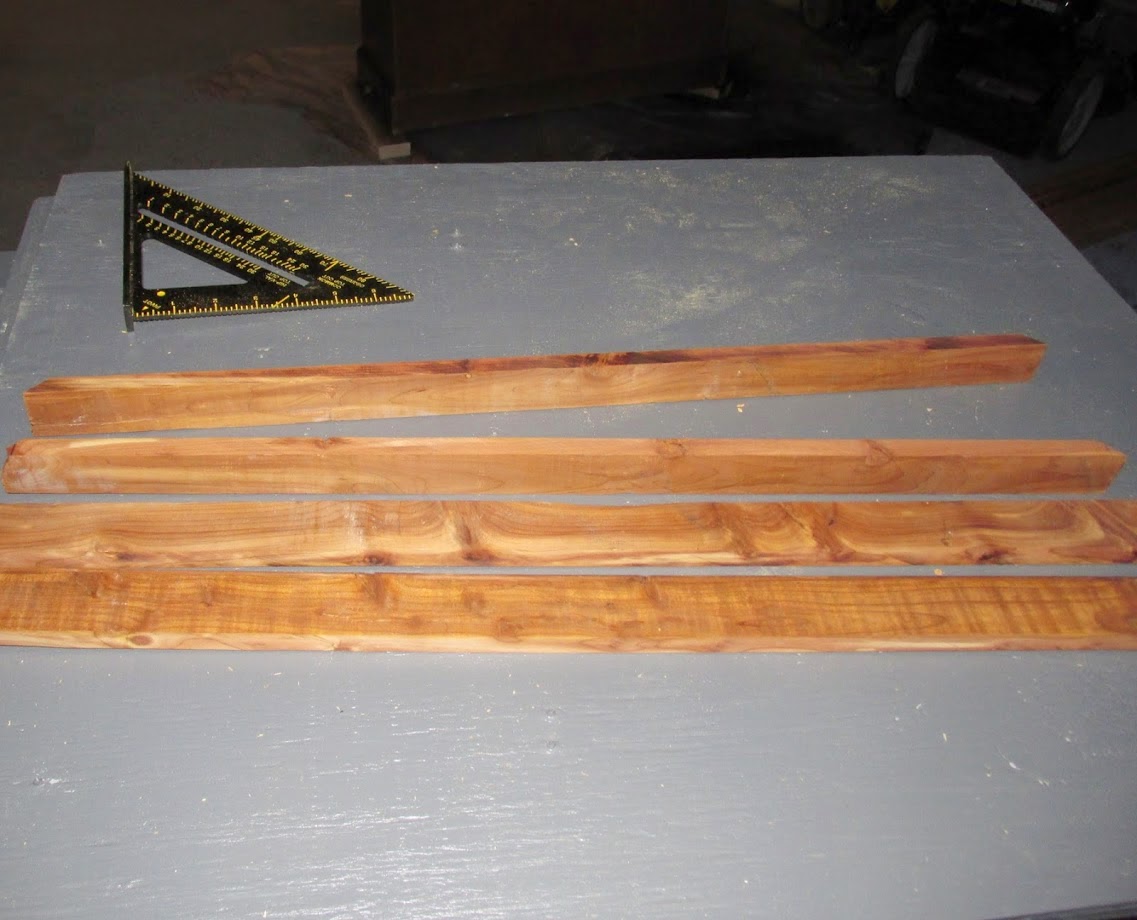
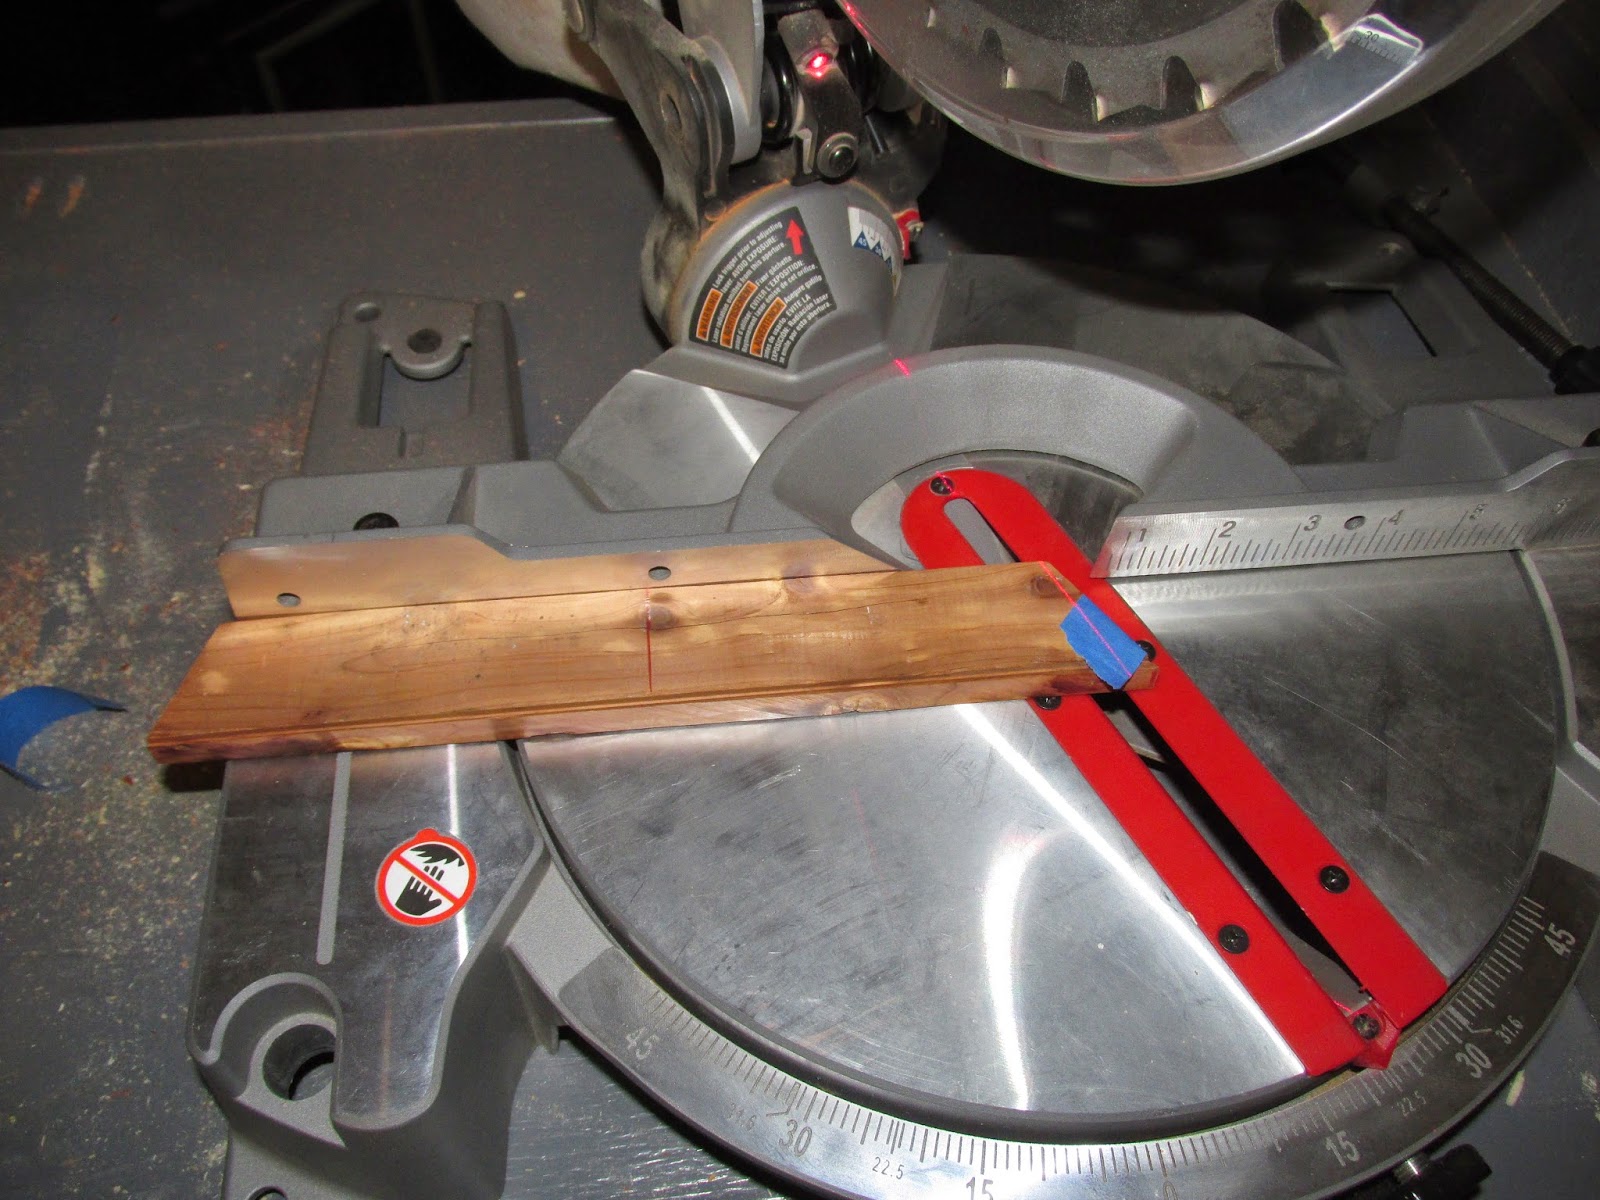
Now we can start cutting the pieces to size. I cut the flooring down to 1×2 pieces.
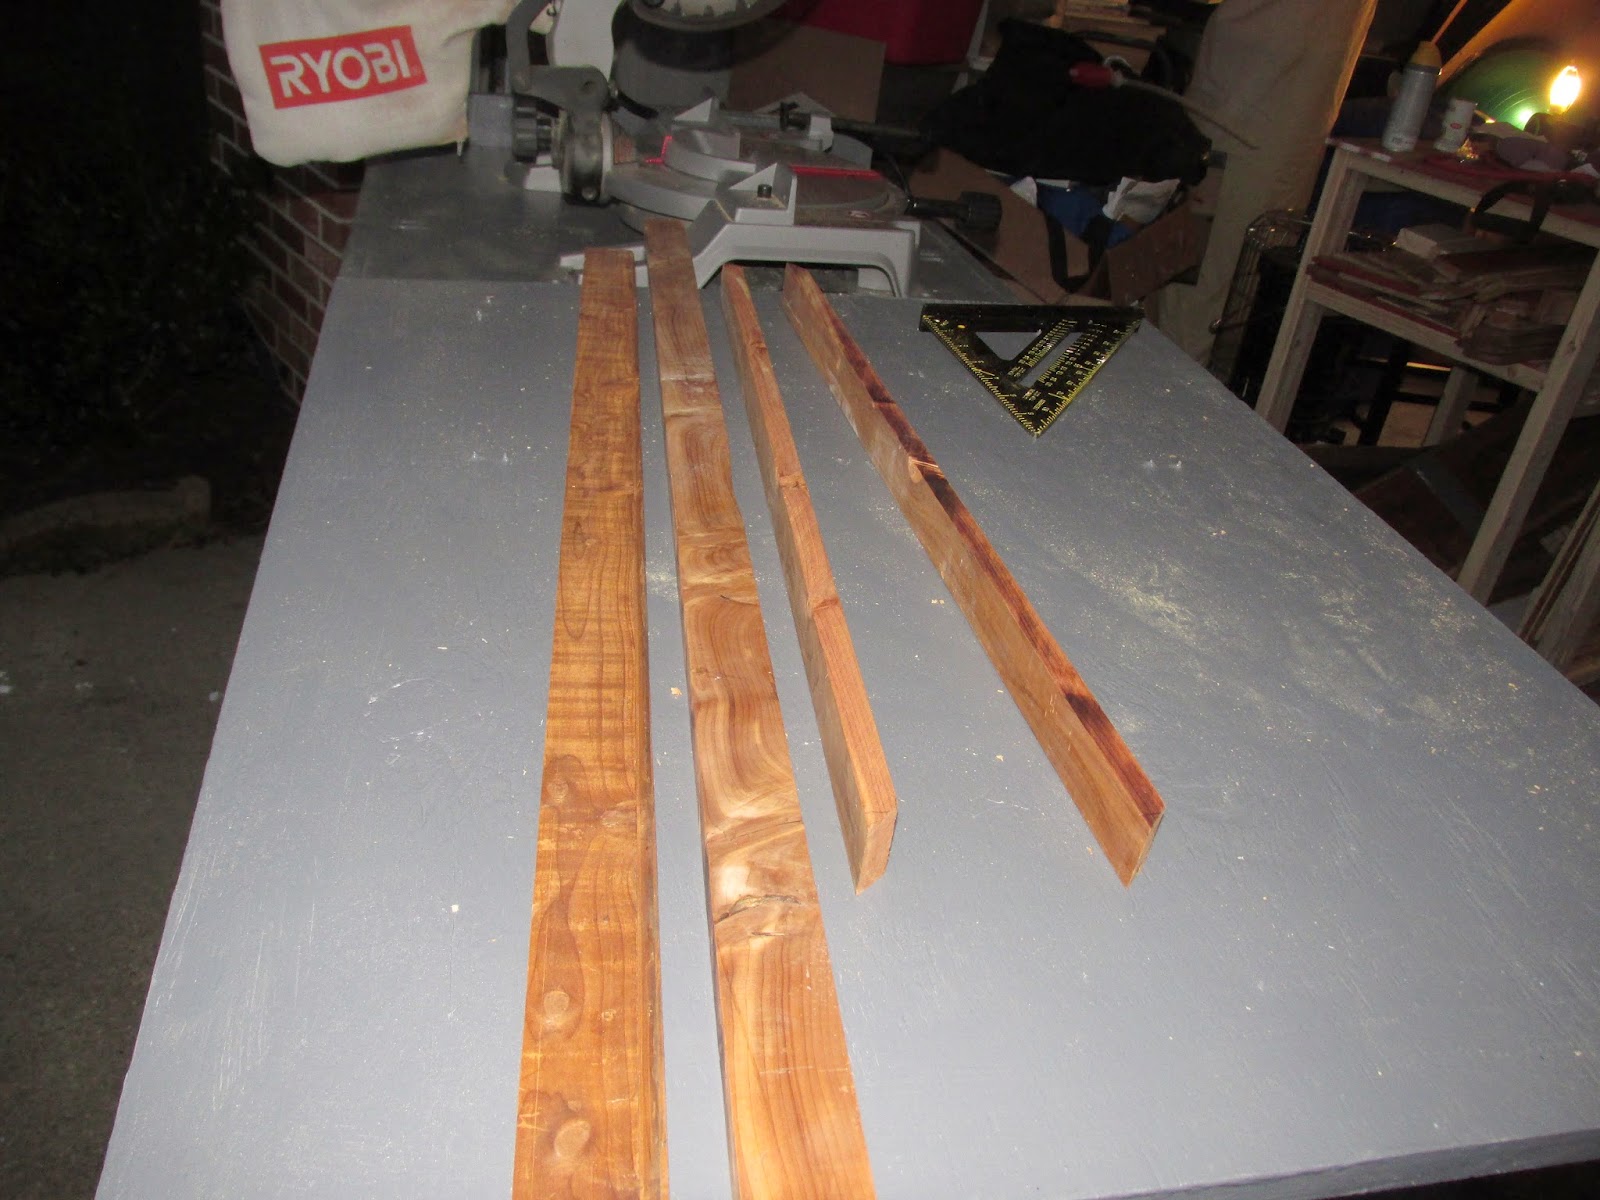

There are two angles being used to make these cuts. For the base of the triangle angles are 67.5
degrees. To achieve this angle the miter
saw should be set to 22.5 degrees.
degrees. To achieve this angle the miter
saw should be set to 22.5 degrees.

The
tip of the triangle is at 41 degrees, which means 49 degrees or about 2 notches
past 45 degrees on the miter saw base.

Cutting the base of the triangles.


Once the pieces are cut, I recommend drilling the holes for the eye screws on the side pieces, I, however, did not do this. I put the pieces together. (I recommend to make your life a little easier to pre-drill the holes for the eye screws prior to putting the pieces together
first.)
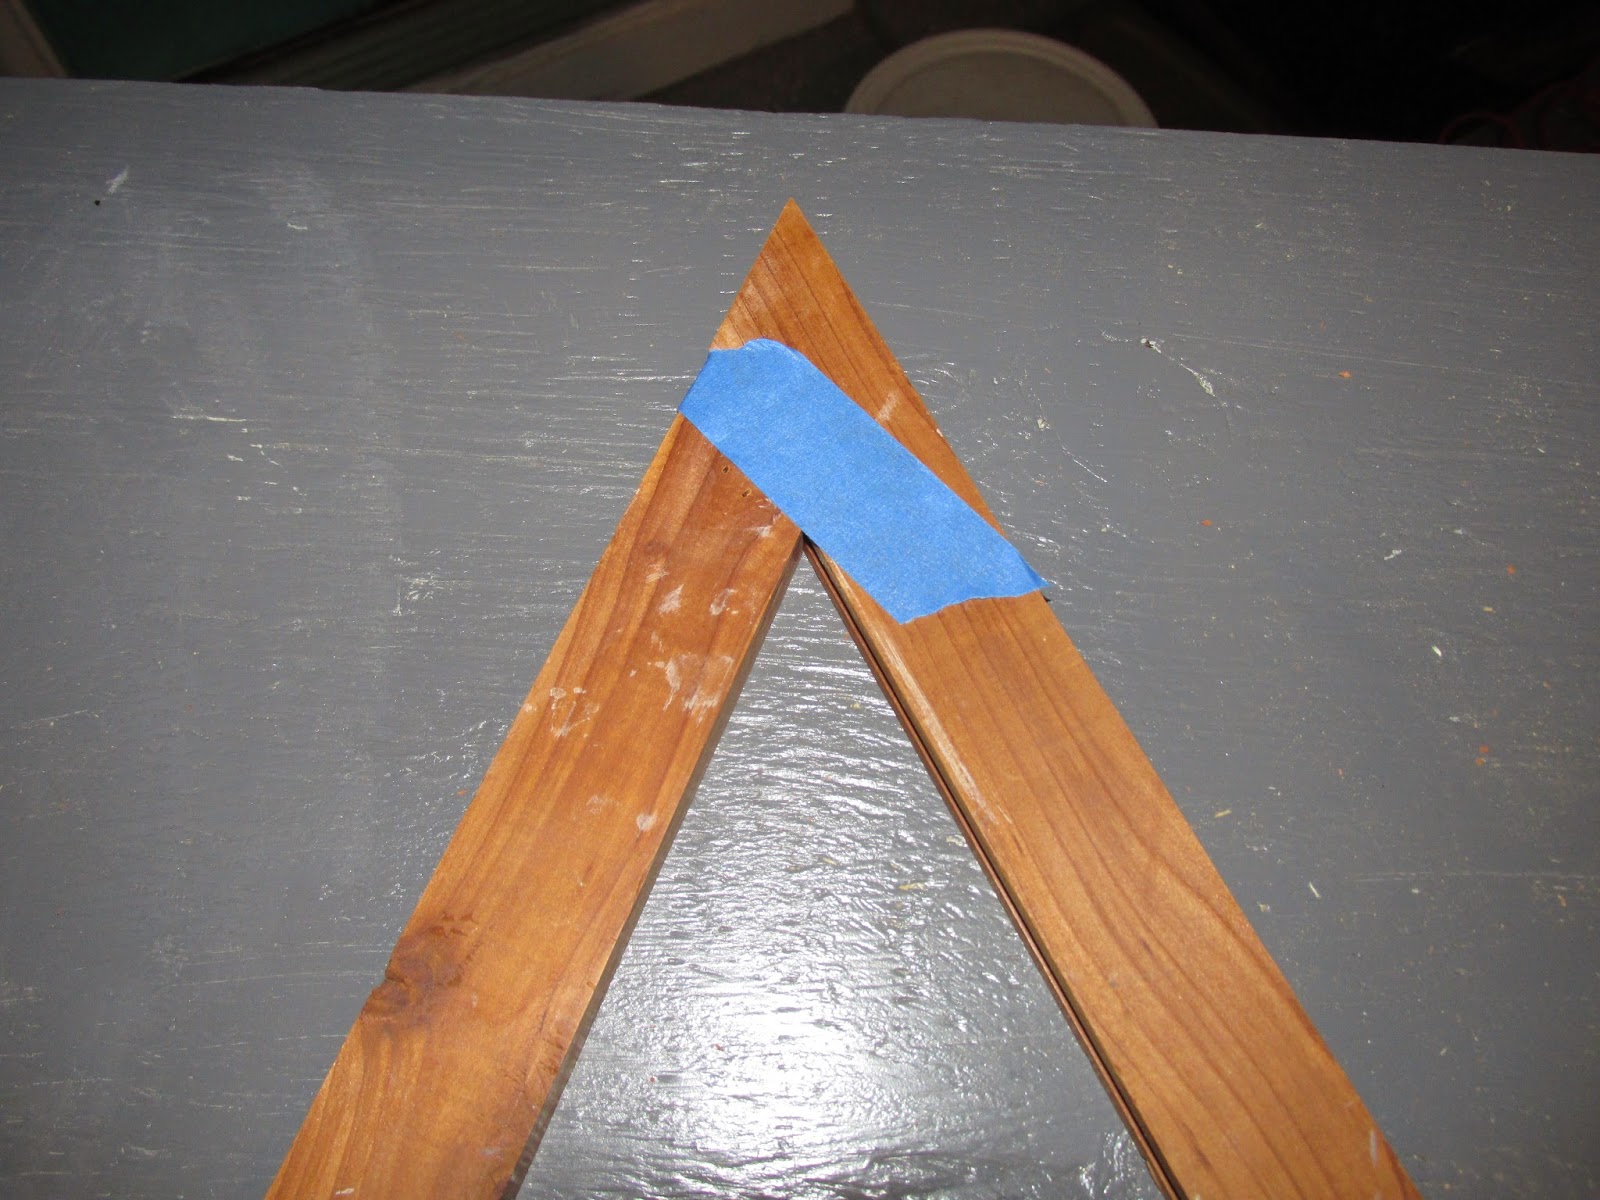
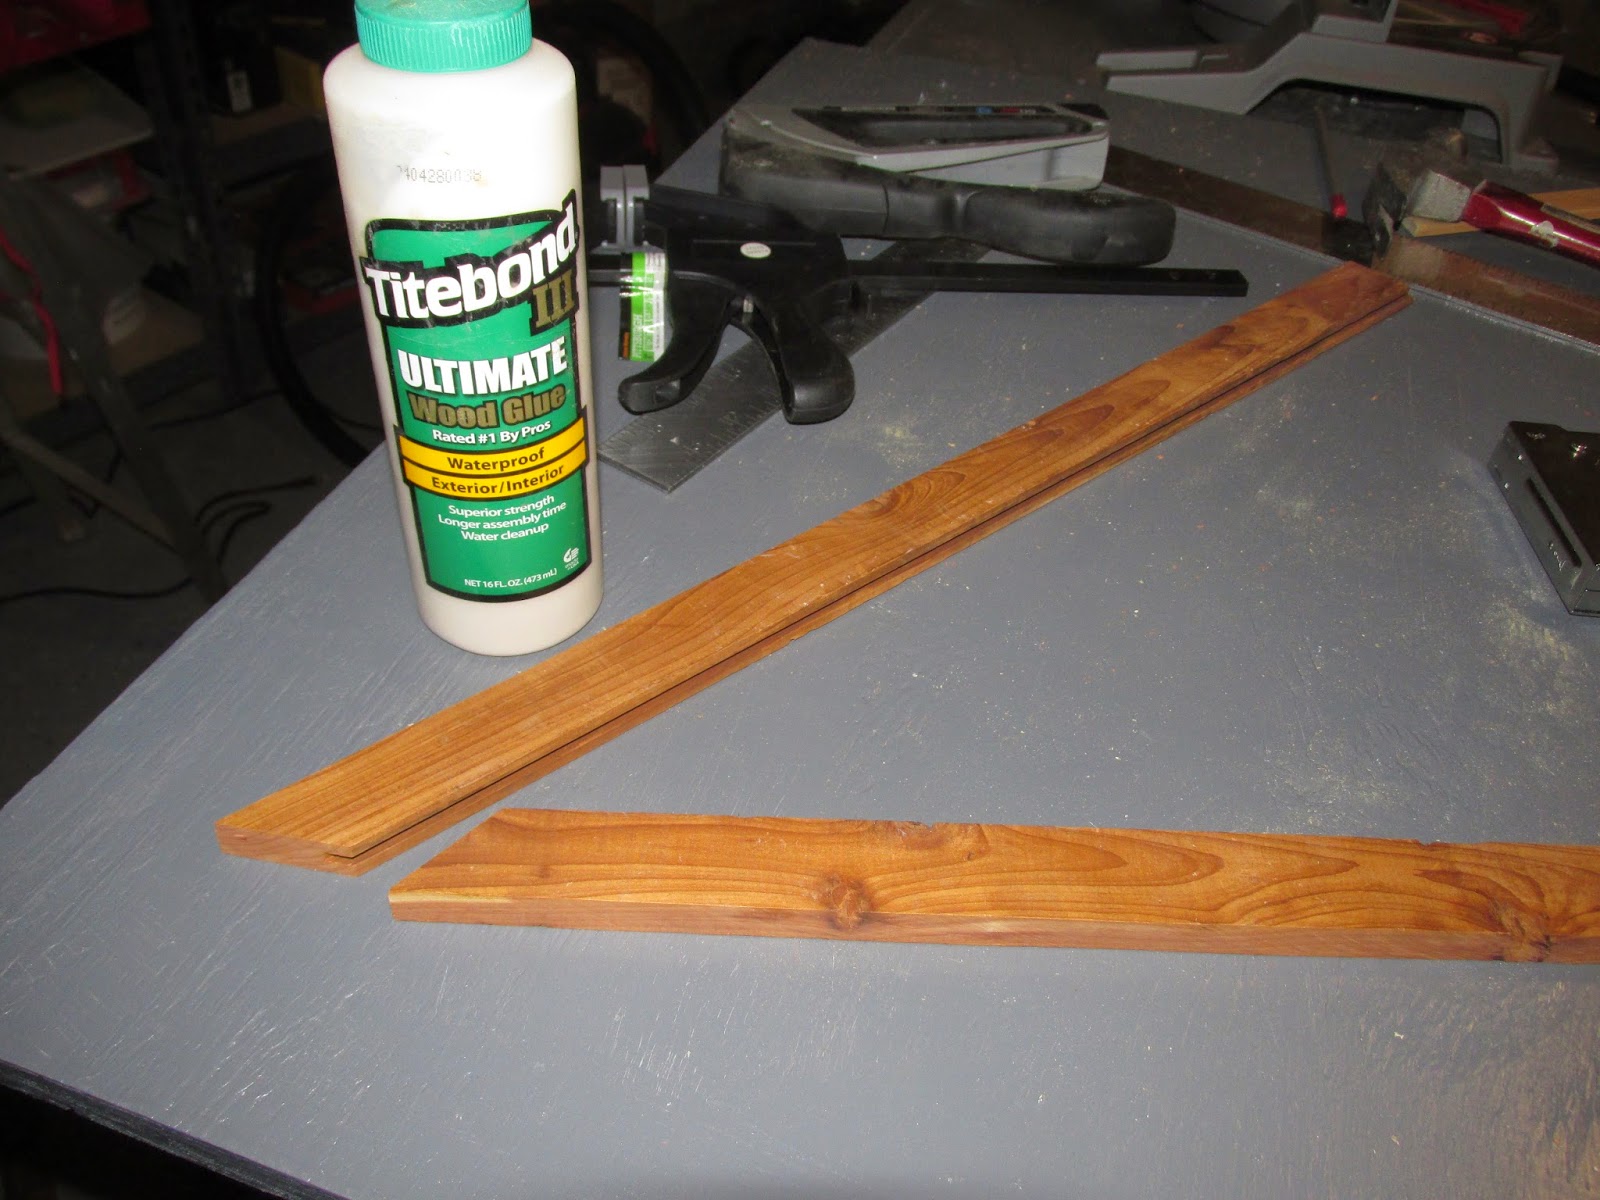
Using wood glue and a nail gun, put the pieces
together. Painter’s tape and spring clamp are helpful
during this process while the glue dries.
together. Painter’s tape and spring clamp
during this process while the glue dries.

Allow time for the glue to dry.
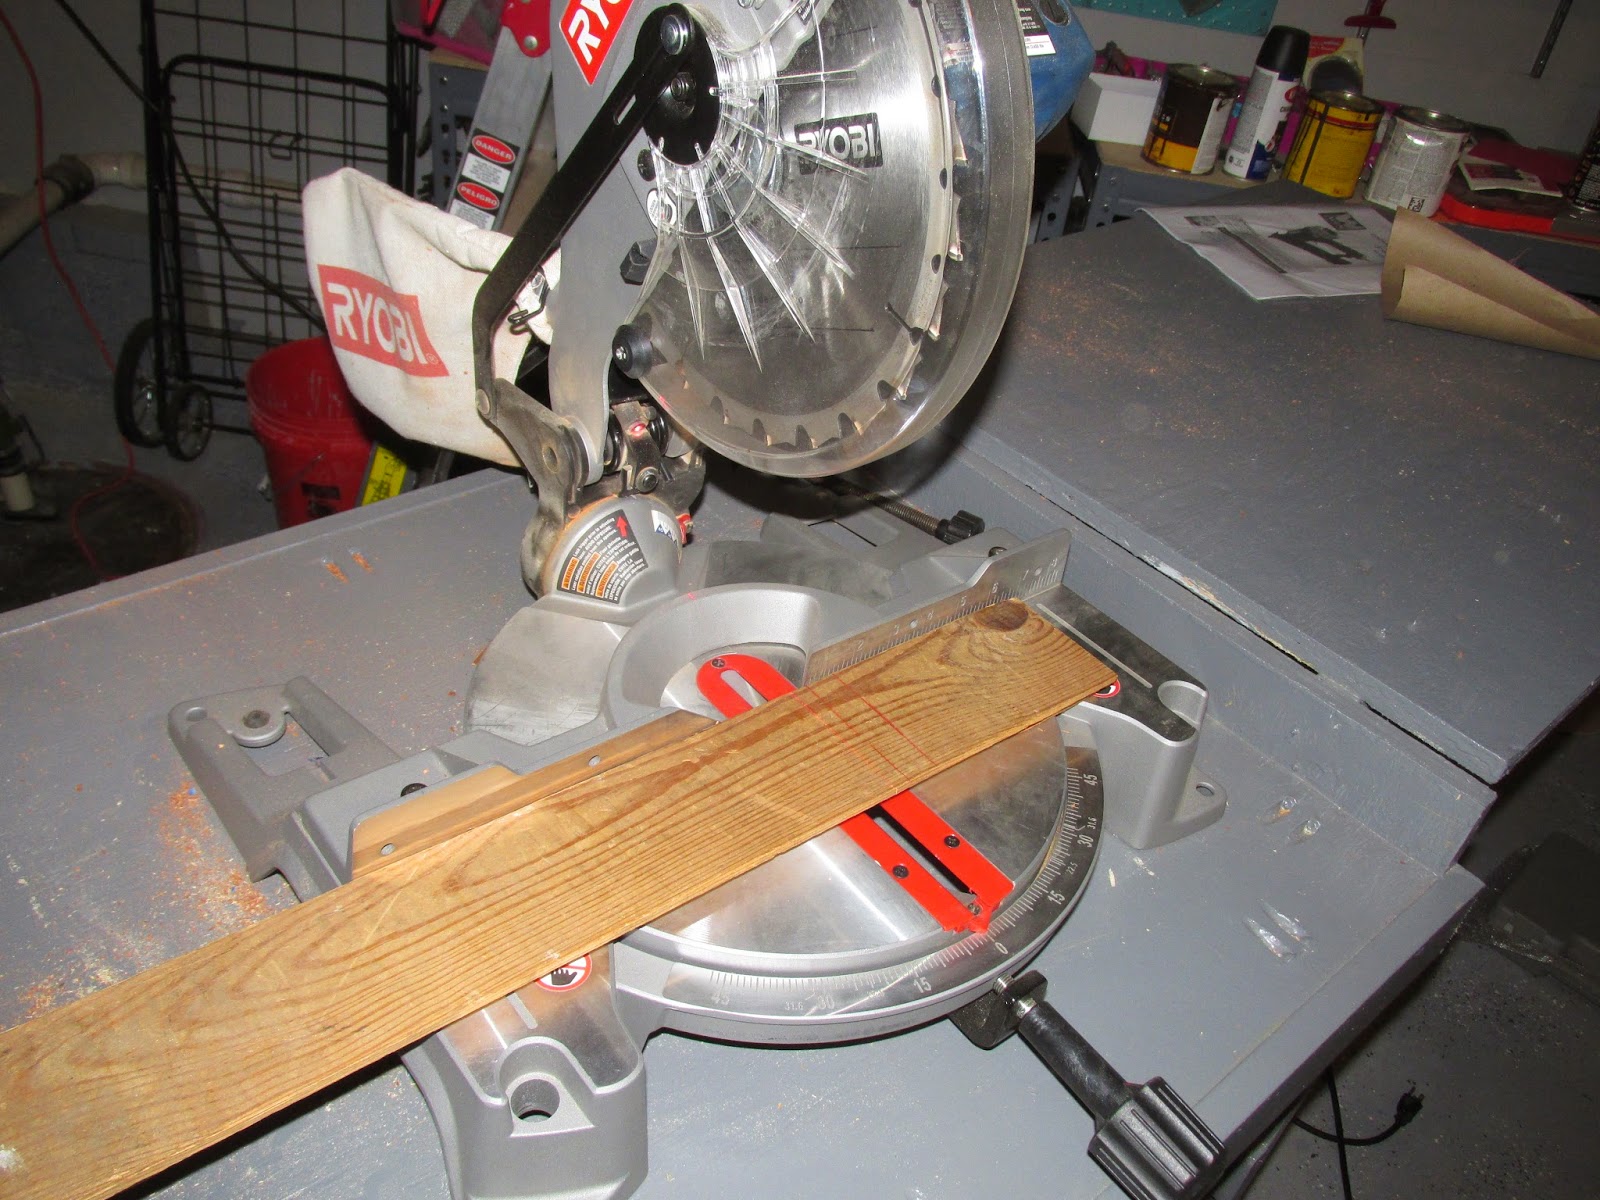
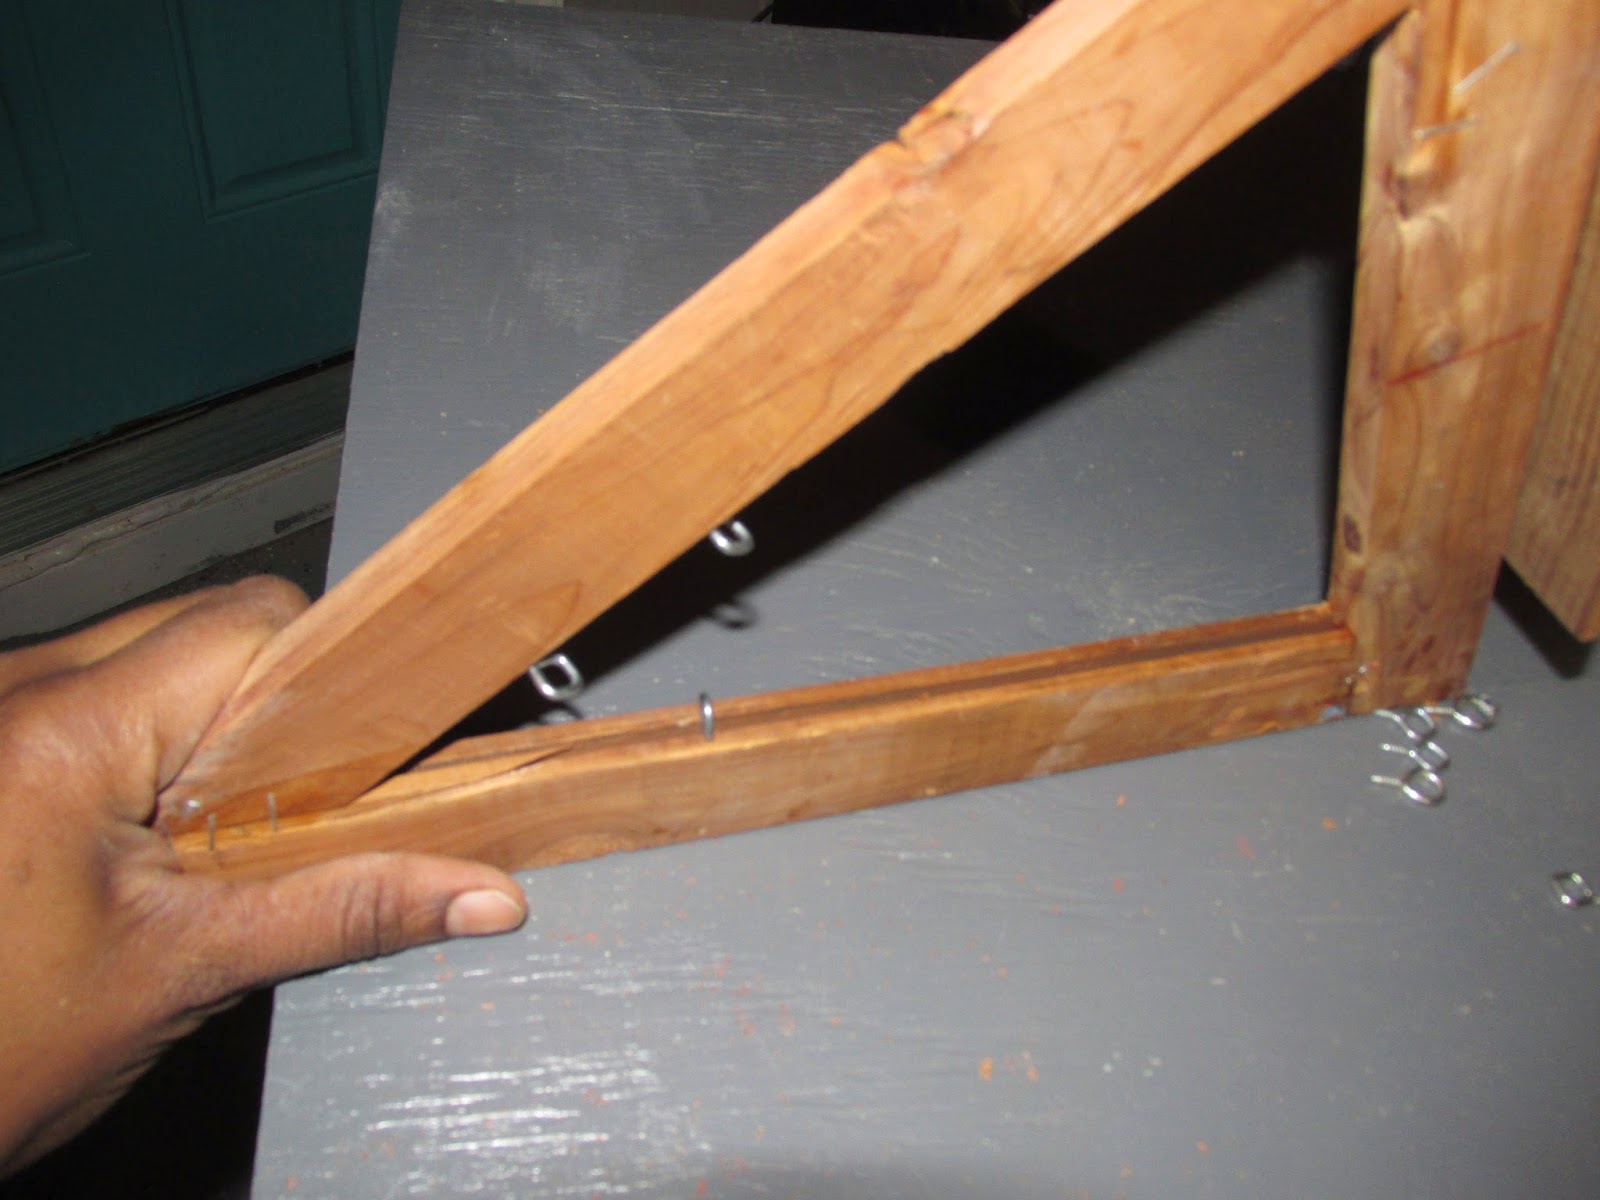
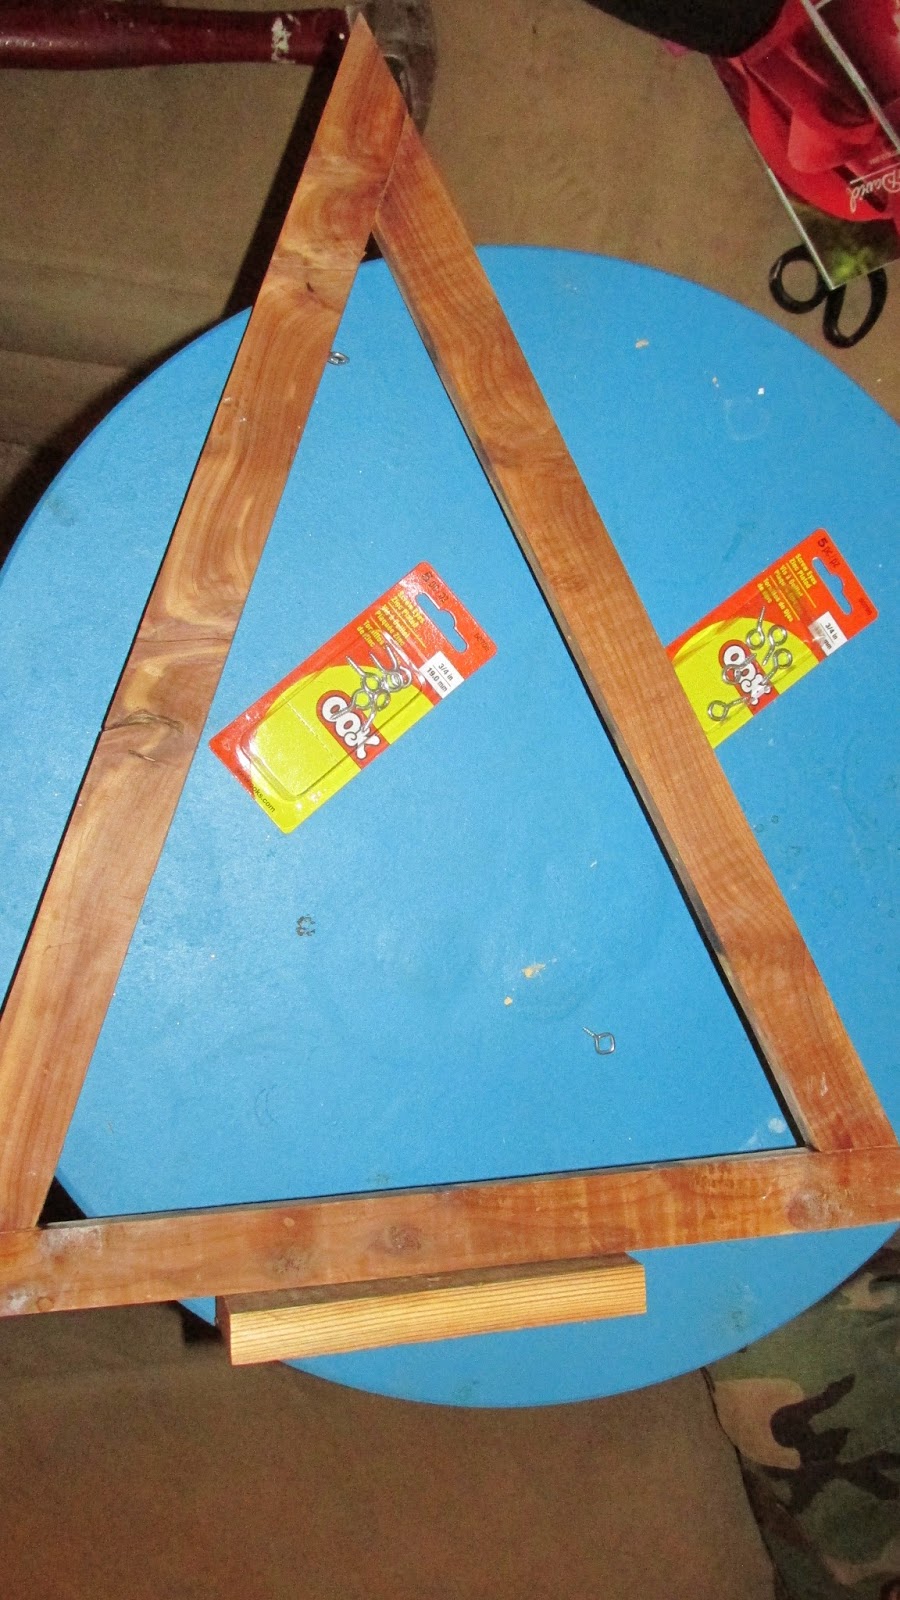
Cut 2 – six inch pieces to form the base for each “tree”.
Once the glue is dry and the pieces are secure, use a brad nailer/stapler to secure the “tree” to the base. A hammer and small finishing nails can be used
in place of a brad nailer/stapler.
in place of a brad nailer/stapler.

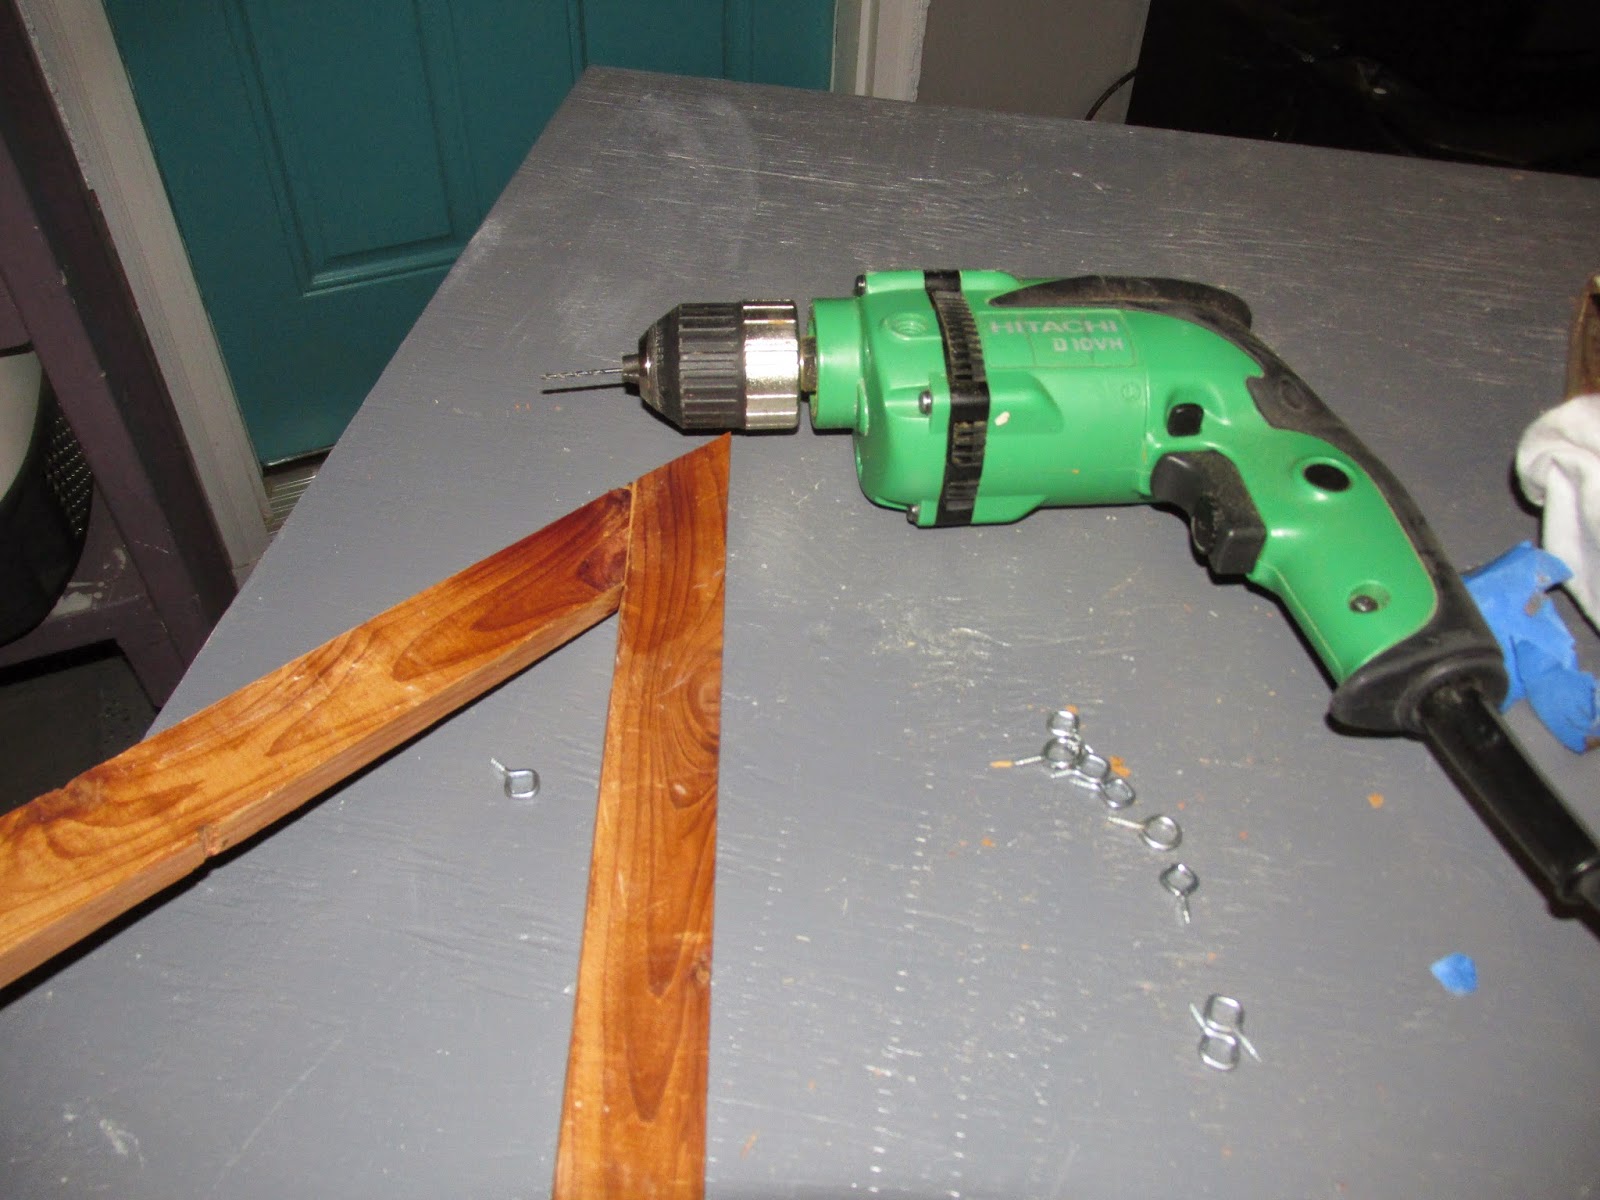
This is when I pre-drilled the holes for the eye screws. Pliers made it easier when screwing the eye screws into the inside of the tree.

Now you can string the burlap string through the loops of the eye screw.

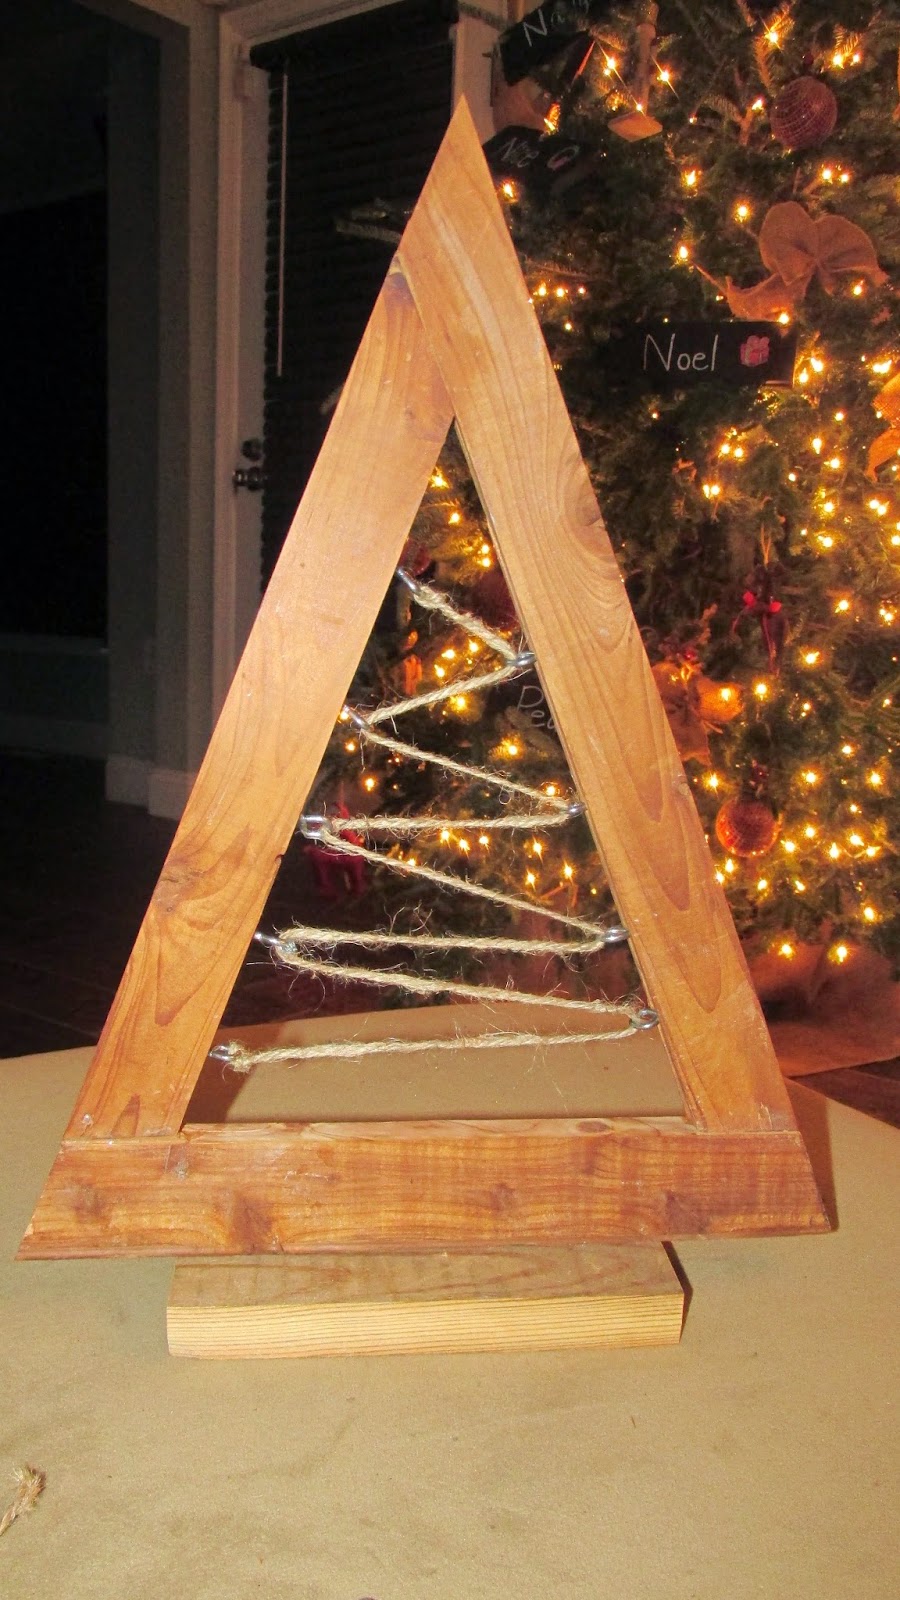
Repeat this process with both the trees.
Once you’re done, your tree is ready to be displayed. (Note: feel free to paint or stain the tree, it’s your creation after all. Have fun with it. The eye screws do not have to be lined up. You can create a zig-zag pattern like I did.)

So there you have it!
It’s an arts and crafts Christmas, complete with a Crate & Barrel hack.


I enjoy the formatting of your post. The headers and bold text make it a straightforward read.