DIY Miter Saw Cart: Ana White Style
Now I’ve always been in love with DIY and home improvement. I love decorating and making things with my hands. But recently, I discovered the joys of woodworking. I quickly realized that I needed to upgrade my tools to include a compound miter saw. That being said, I needed a more permanent place to store my saw and to safely cut longer pieces. I researched online and found plans by Ana White for a mobile miter saw cart that included additional storage, perfect for a small workshop.
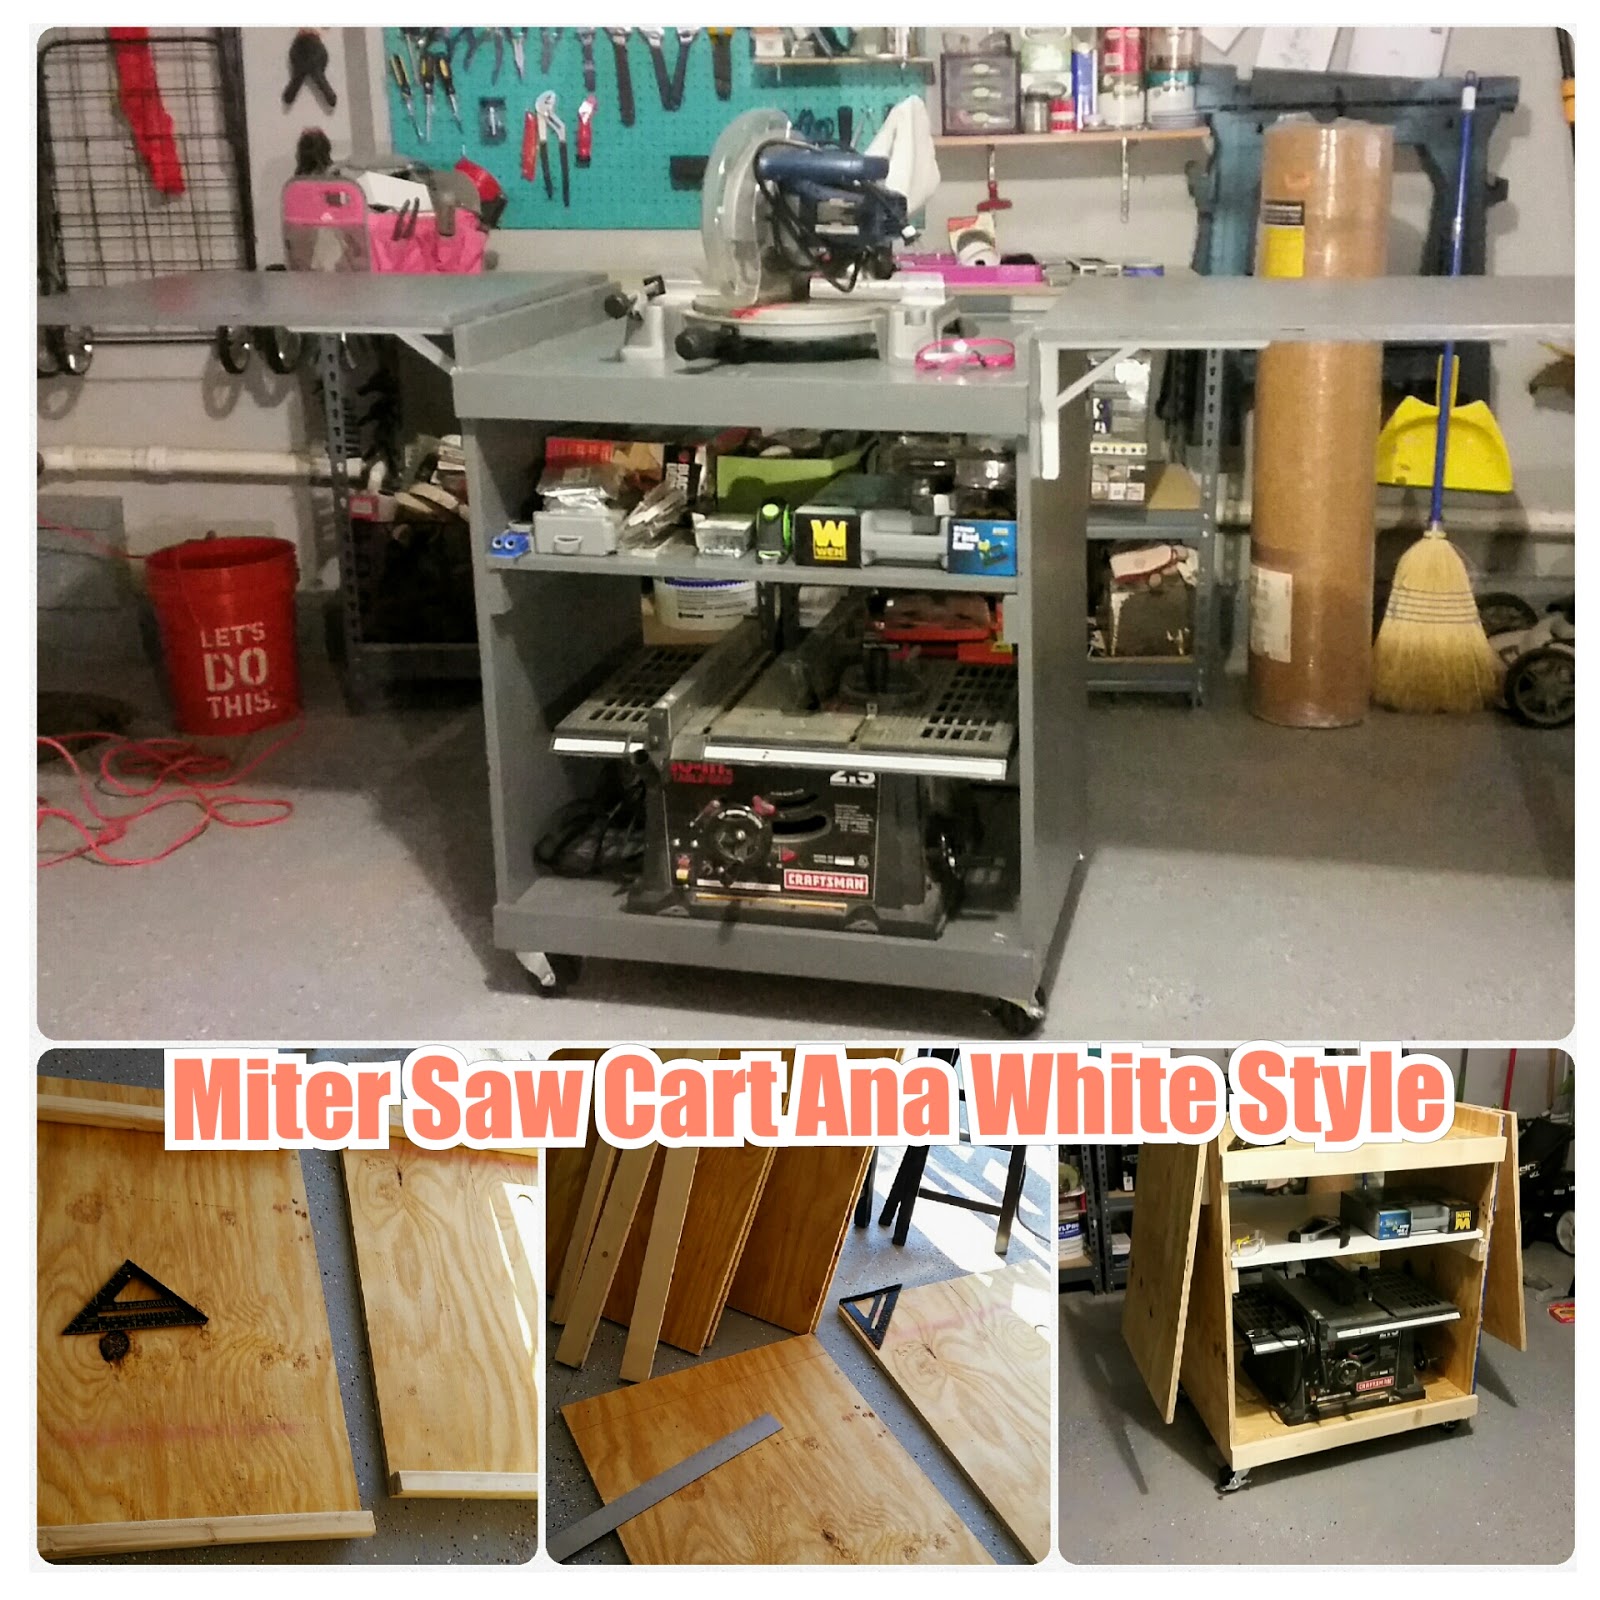
The plans provided by Ana White were really simple and easy to follow. The cart is completed using only 1 sheet of plywood. All of the big cuts (the cutting of the sheet of plywood) were done at the hardware store, which made it supper easy to transport in my car.
could do it again, I probably would have followed the advice of The DIY Girl and gone with some sort of piano hinge and wood beam support. But I’m quickly
learning, with every project I learn something new.
 |
| Unloading the wood after a trip to Lowe’s. |
 |
| Measure the height of the saw to the base to ensure a level cutting plane. |
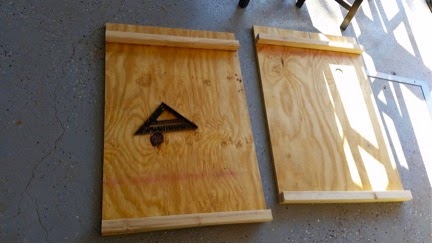 |
| Laying out the 2×2 pieces that act as shelf support for the top and bottom of the cart. |
 |
| Going crazy with the pocket screw jig. (You don’t need this many pocket screws. I just got my Kreg R3 Jr. Pocket Hole Jig System and was just having a good ole’ time. |
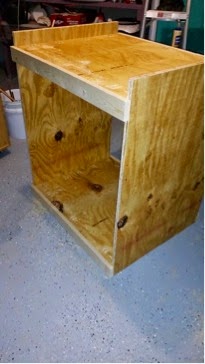 |
| Finally attaching the 1×3 support boards to complete the actual cabinet. |
 |
| This cart has a huge opening. It’s actually designed for a much larger miter saw. So I decided to add additional shelving. A girl could never have too much storage. |
 |
| It’s important to use locking wheels. The last thing you’d want happening is for the cart to move mid cut. |
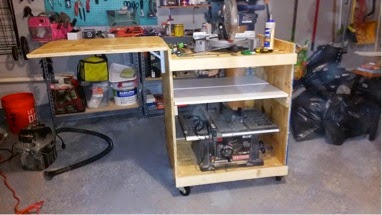 |
| The key to installing these hinges: an additional pair of hands. Please, phone a friend. It will save you a lot of grief and awkward side poses, propping up the board with your head. |
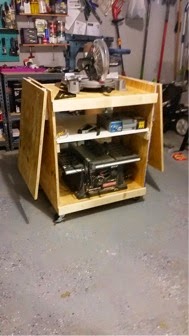 |
| Tah- Dah!!!! |
 |
| Okay now… Lets get to cutting |
over to Ana White.







Thanks for sharing this wonderful blog Timisha. Find out how this new saw can radically change the way you cut.
Thank you so much Clarence!
A debt of gratitude is in order for sharing this eminent online journal . Figure out how this new saw can fundamentally change the way you cut.
Nice share, I’m really appreciate your post. Thanks.
I bought a miter saw last year that I am afraid to use. Maybe this post of yours will convince me to give it a try.
Lori I hope this does. The thing about saws or anything with a moving blade, its not about feeling comfortable. I never want you to fee comfortable with a saw. I want you to about be confident. Be confident on your ability to safely use the tool. Be confident in knowing that you got this and to be honest it develops the more you use the tool.
Hi Timisha
Thanks for sharing. Few days ago my husband bought a Dewalt DW713 Compound Miter Saw. What Compound Miter saw you used for this project ?
I use the Dewalt DW713 Compound Miter Saw in class but at home I am using a 10 in Ryobi miter saw. I like it.It’s lighter and very user friendly. If your interested you can find it at Home Depot or Amazon.com Link: http://www.homedepot.com/p/Ryobi-14-Amp-10-in-Compound-Miter-Saw-in-Green-TS1345L/205105634
Nice share, I’m really appreciate your post. Thanks.
Thank you Karly! I’m glad you found it useful.
Thanks for sharing Timisha. It’s simple but very useful. I’ll do it for my new miter saw.
Awesome! I’m glad you found it useful 🙂
Thank you so much for sharing your wonderful project! The jars are looking awesome.
it really is a wonderful shelf. I think I will start my husband do it. you gave me a great idea. I think I should buy one milter saw.
You shared an excellent review Timisha. I read this tutorial step by step. Please keep up the effective work.
Thank you Matthew I appreciate your feedback.
Very nice. I like simple and this one is. Your design is great. I think I’ll made something similar. Thanks for sharing.
Thanks for sharing Timisha. I love your post, it really good and interesting.
Awesome!
Thank for sharing your wonderful project !, it’s useful
Thank you Charlene for taking the time to check it out. 🙂
Impressionnant! Merci de partager votre merveilleux projet!, C’est utile
Looks very modern, thank you for sharing, wish you success!
Thank you so much Jessica!
this is so great! I need to make myself one.
Thank you so much! It has really served me well over the years.