Deck Makeover | See The Gorgeous Before and After
In this gorgeous DIY deck makeover, see the inspiring before and after of this outdoor project filled with all sorts of easy to do DIY projects. Learn how to paint over a stained deck and get patio and deck decor tips.
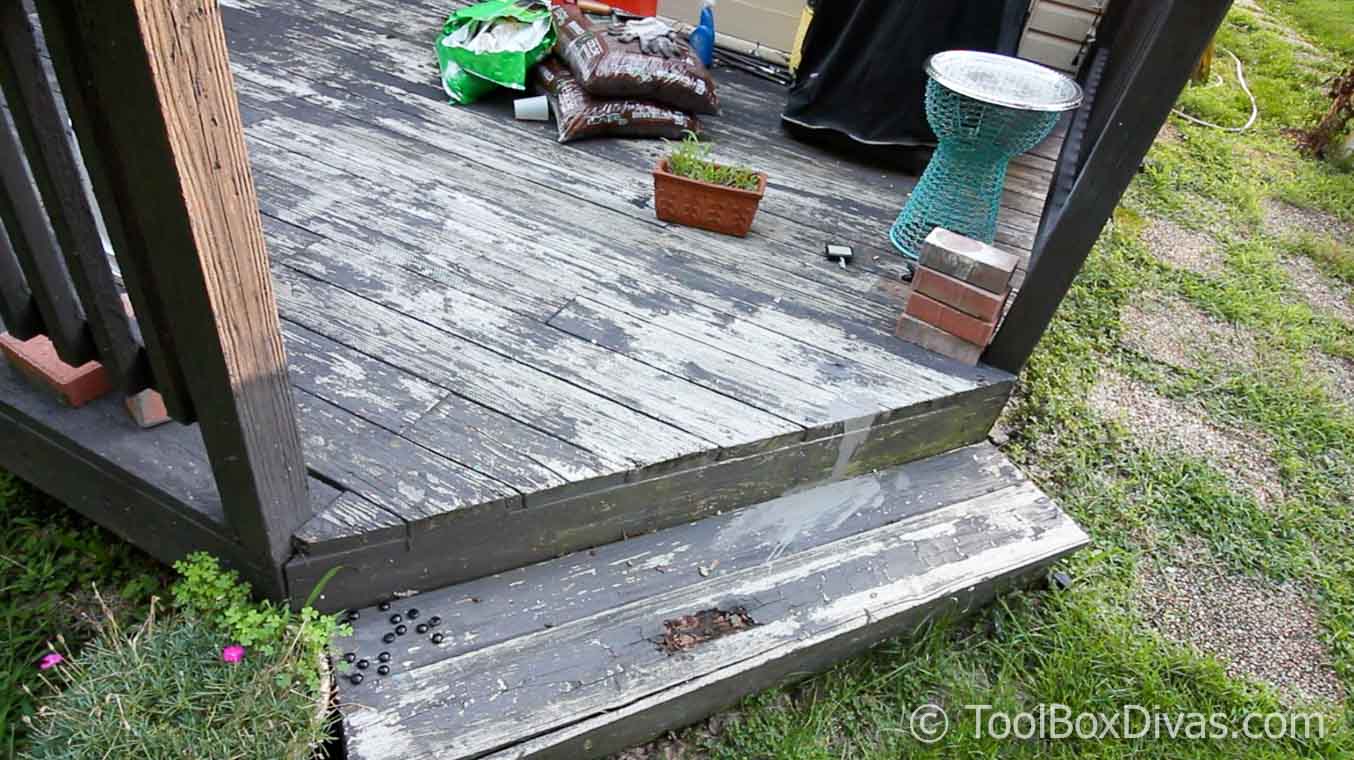
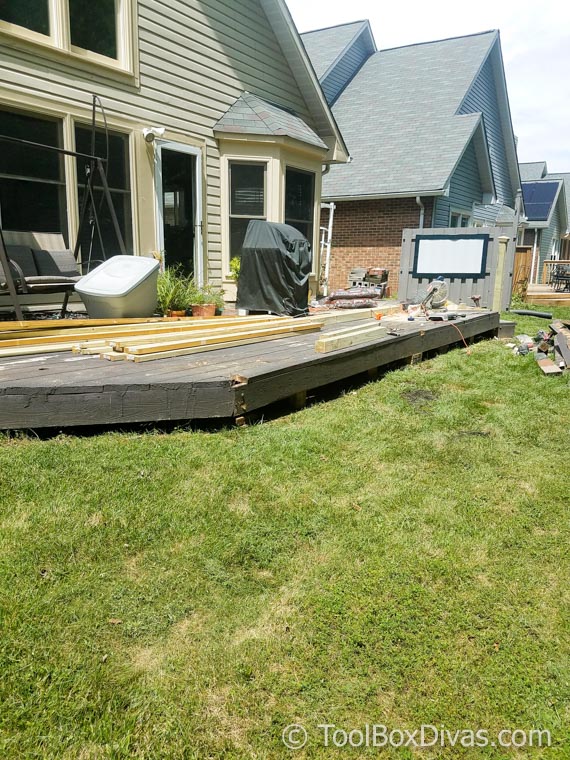
When I first bought my house the backyard looked like the previous owners were trying to start a farm. The deck, while not horrible, needed some care.
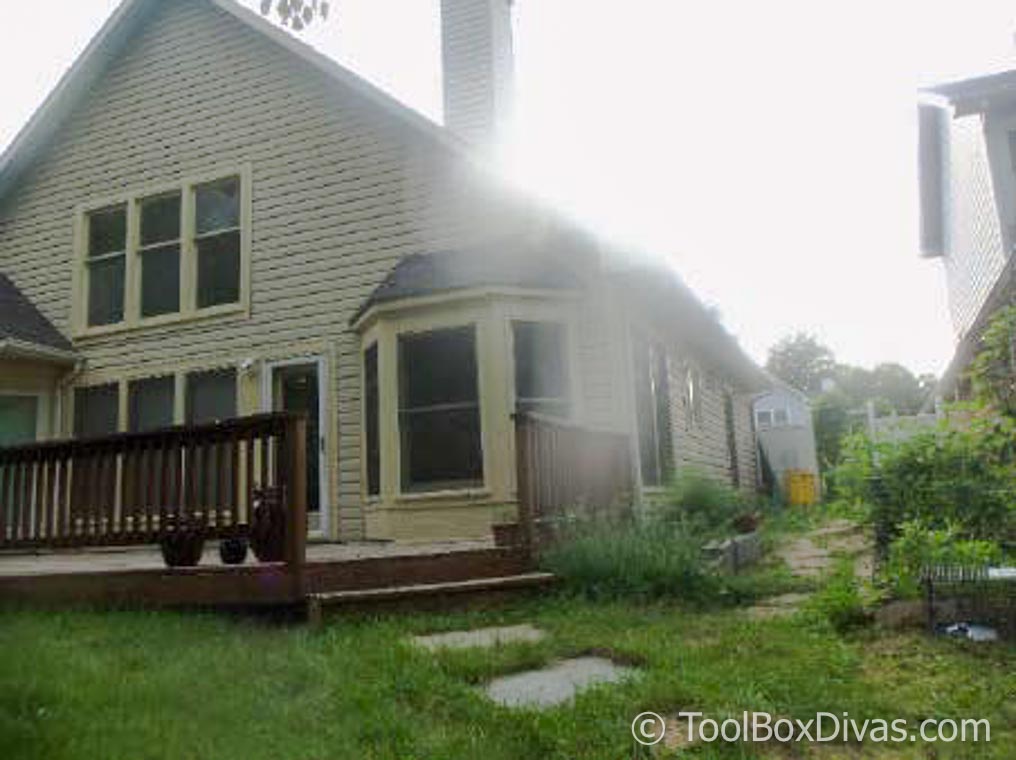
It took me months just to be able to see the soil on the side yard and a few more weeks to get the deck in order.
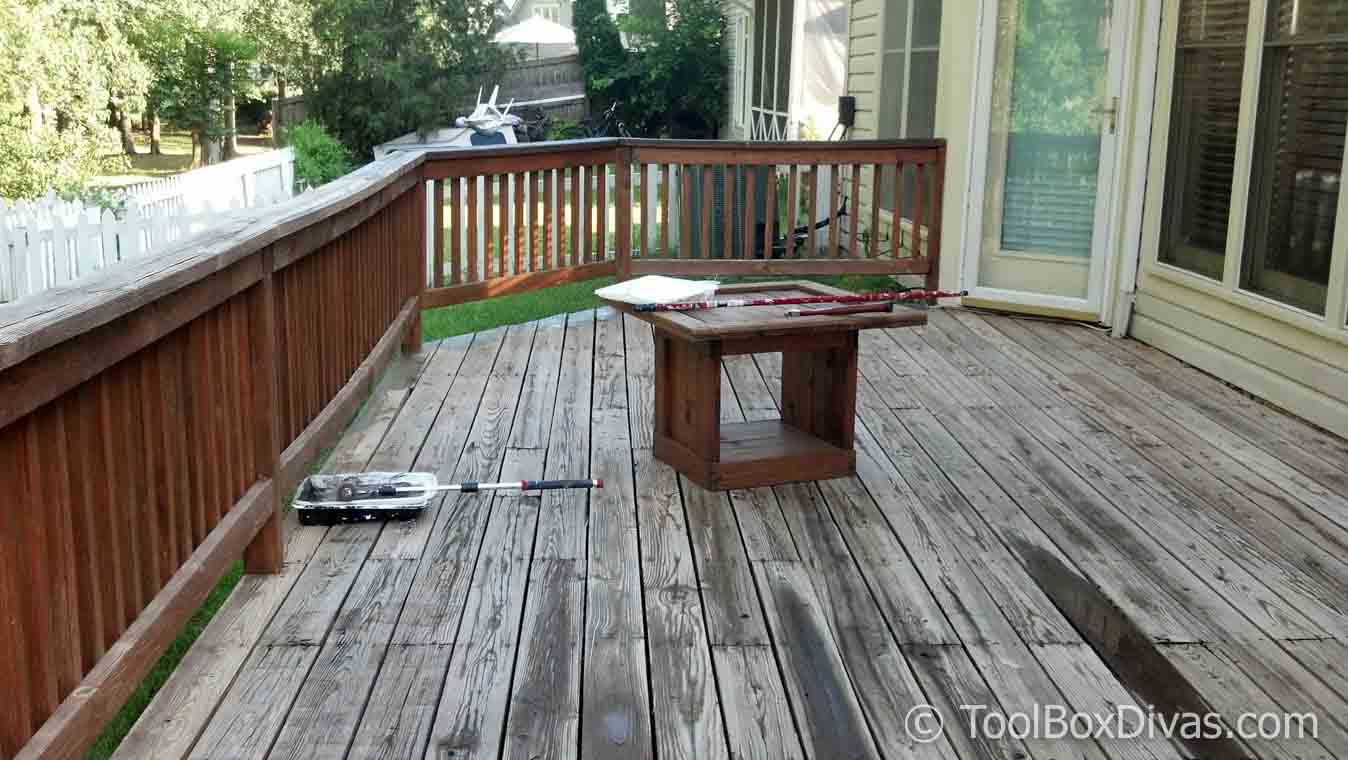
When I first tackled my deck I used a deck stain that was supposed to restore my deck. I went with a dark brown opaque stain. I found all the furnishing at my local thrift stores and spray painted them. It all looked great!
Until it started to chip and peel with the first year. I was beyond annoyed because of all the work it took to get this all done. I didn’t want to go outside and use my deck, much less host parties or cookouts.
Also, I noticed areas were some of the boards were rotting, like on the step. My deck and backyard was a huge embarrassment.
Planning
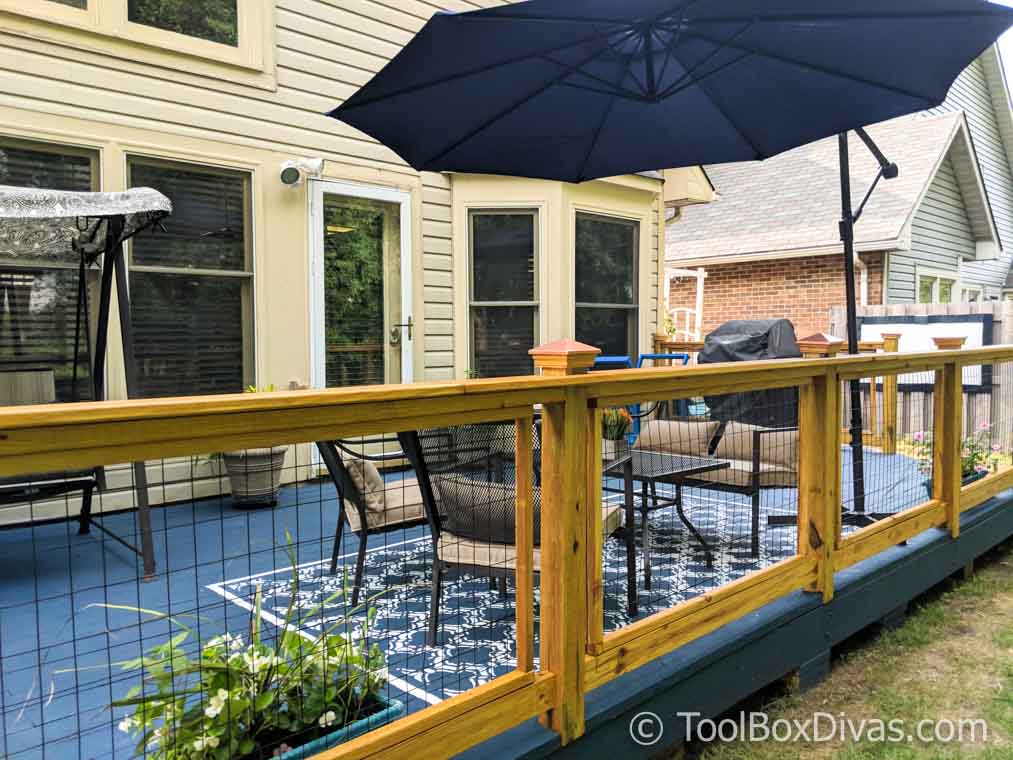
So I came up with a plan. I didn’t want to spend a ton of money and I felt like the base of the deck was still pretty sturdy. I decided to just change out the deck railings and work with the deck floor. For the rails, I took inspiration from the decks I saw using Hogwire panels that I saw on Pinterest.
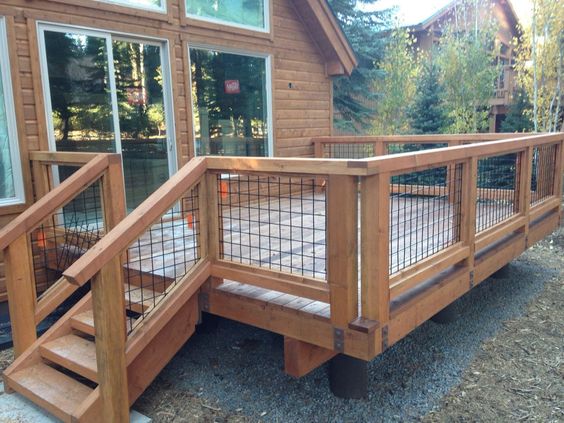
The only problem was Hogwire panels are crazy expensive. The cost of buying the panels would have put me over budget. So I came up with a plan in which I incorporated the look that I had envisioned with poultry wire.
My deck if ground level so it gave me the luxury of basically using whatever I wanted. This is not something I would have been able to use if I had a raised deck.
Demo Day
For this project, I was really lucky because a builder friend of mine was in between the start of his next job. So he offered to help me out for 2 days. Let me tell you, that was the biggest gift! I work full time, so if I had to do this on my own after work and on the weekends, this project probably would have taken 3 times as long. With help, the old railings were gone within 30 minutes.
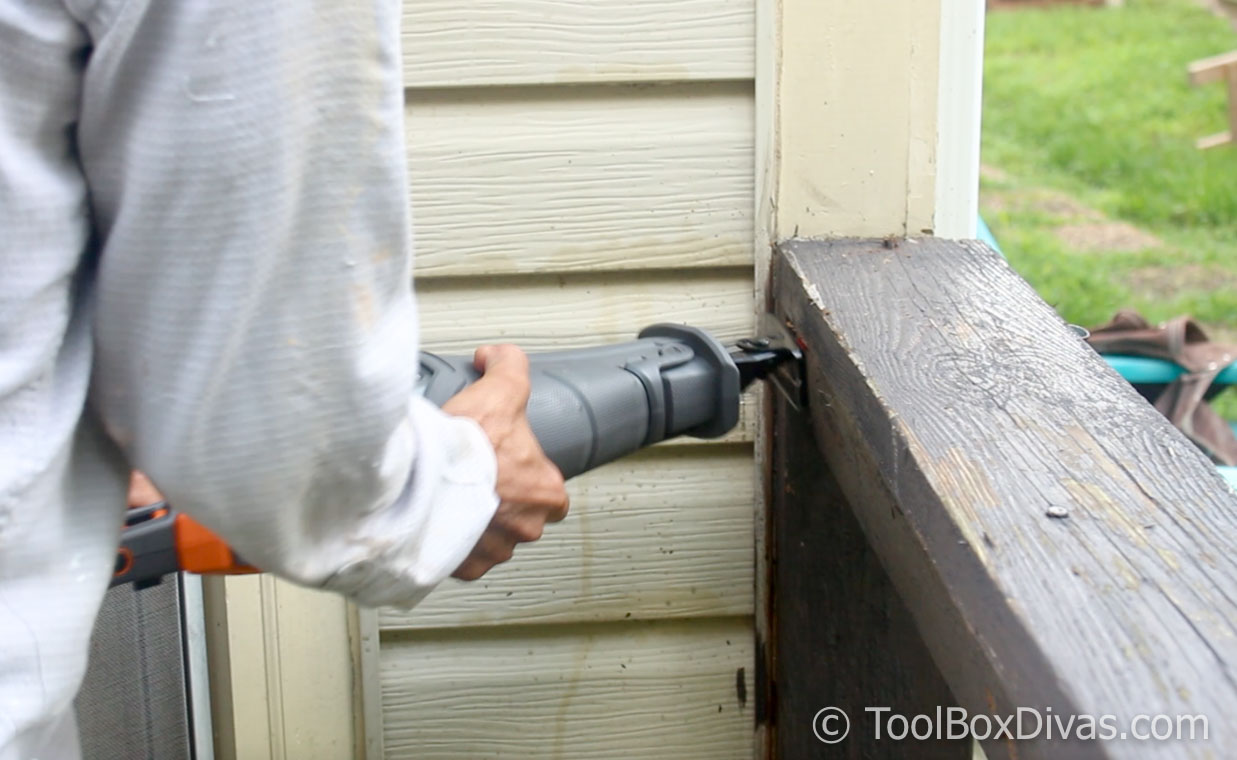
And at that point there was no turning back. This was definitely happening.
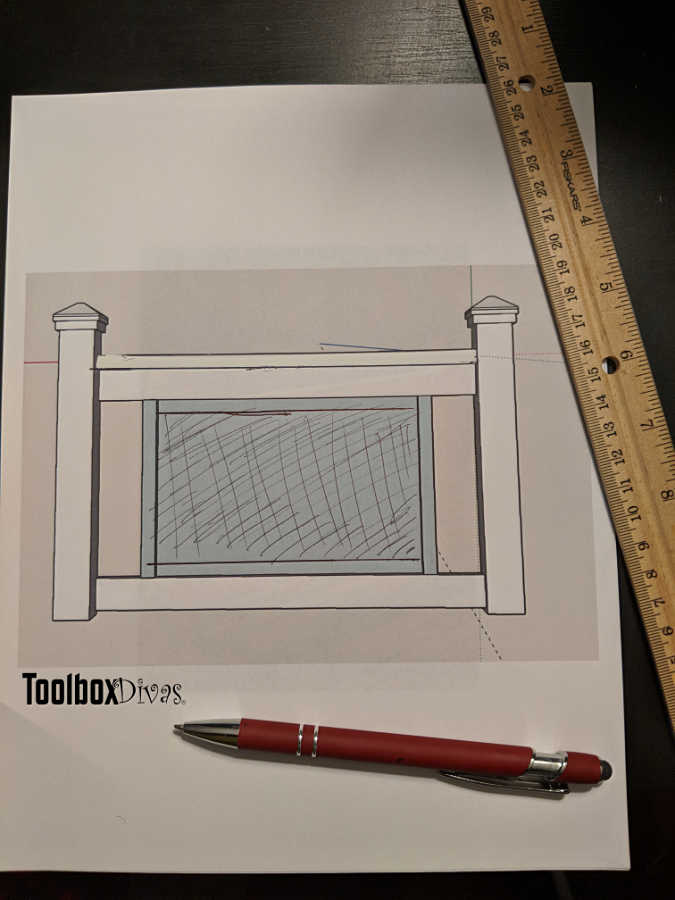
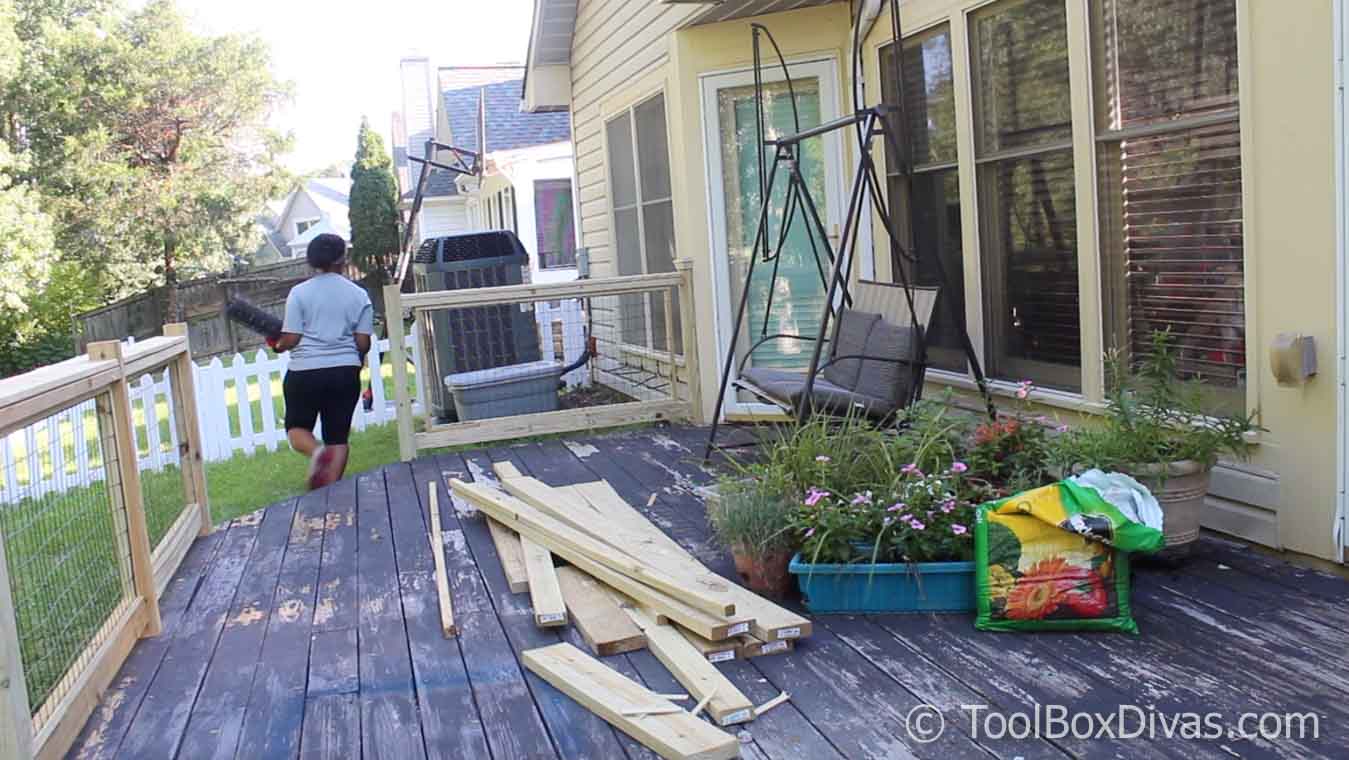
New Deck Rails
I wanted the new rails to allow me to still be able to sit out there and enjoy the view. We started by installing the 4×4 posts. I basically used the same plan as the old railings but added a few additional 4×4 posts for the sake of symmetry.
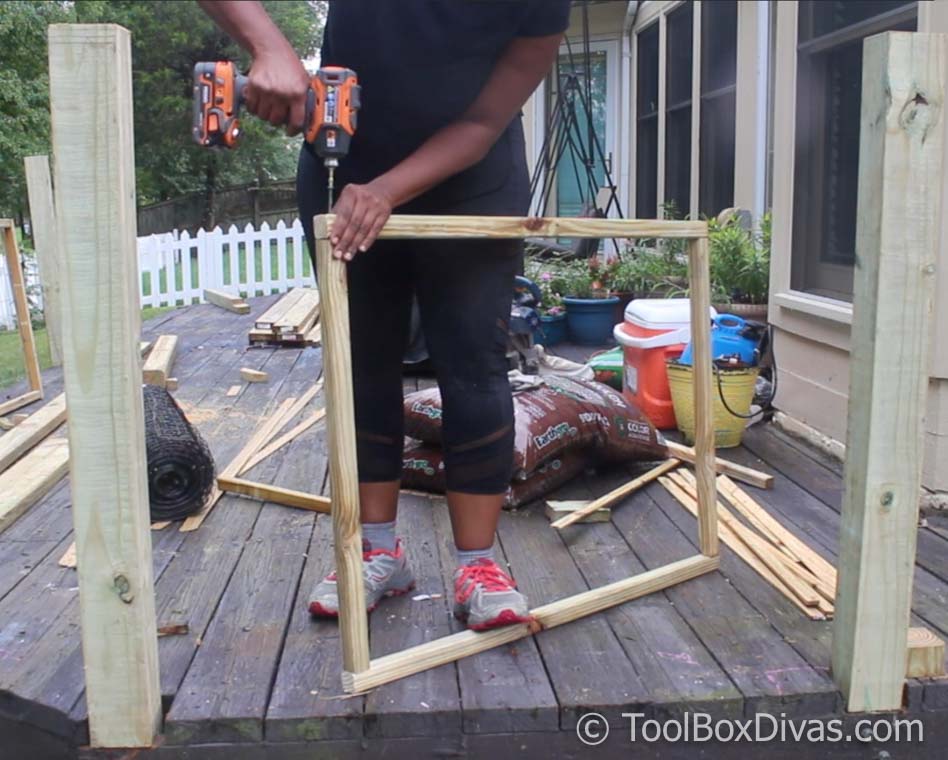
Then I made the panels using black PVC coated poultry wire.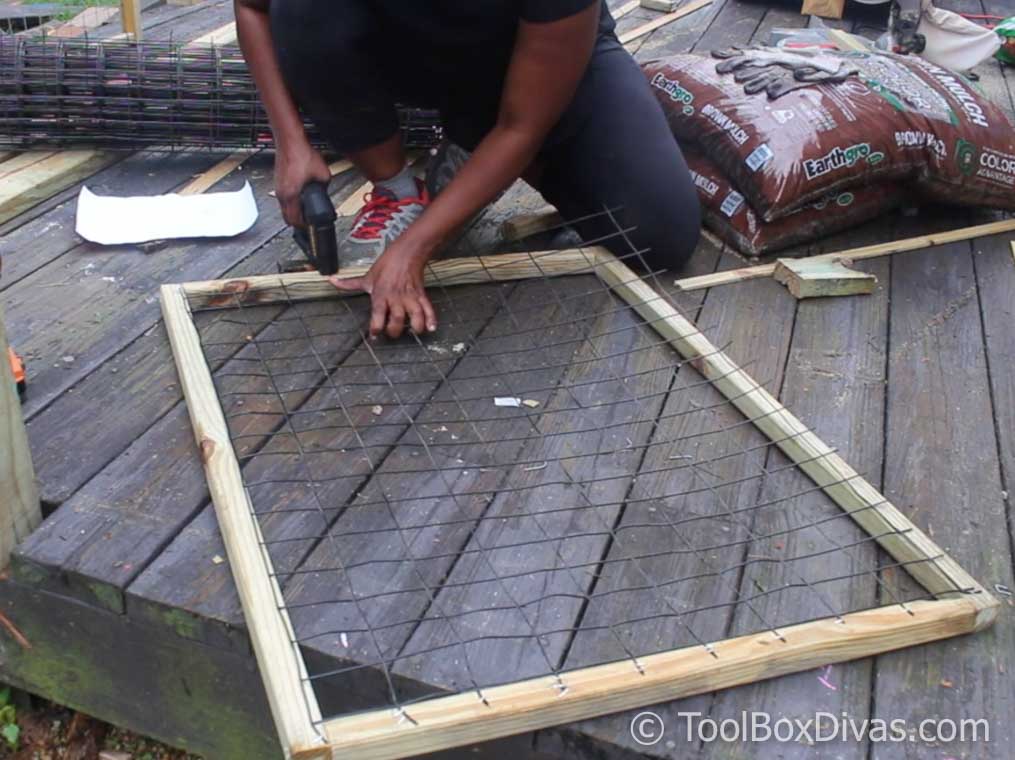
Panels were screwed in between each of the 4×4 poles.
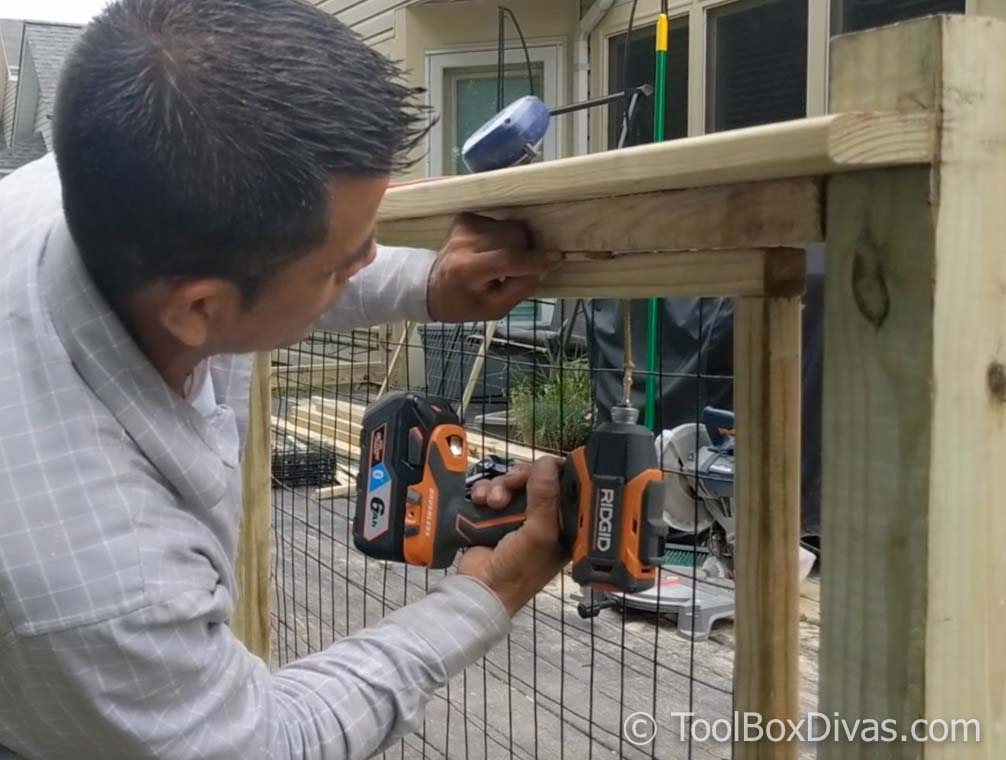
I capped off each post using DeckoRail Verona 4 in. x 4 in. Copper High Point Pyramid Post Caps.


I teamed up with The Home Depot on the deck rails. For all the details on the construction of these Hogwire inspired deck railings, click HERE for the complete tutorial.
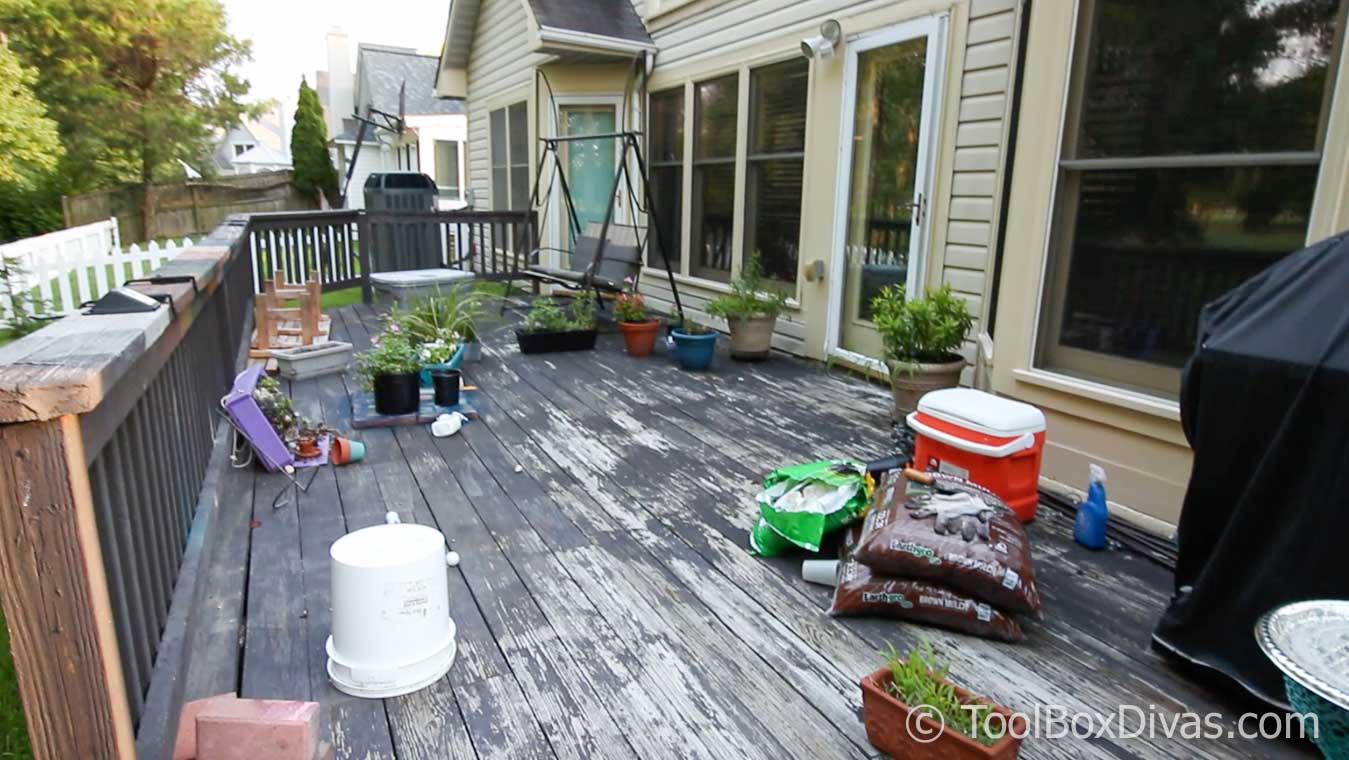
Repairing the Worn Out Deck Floorboards
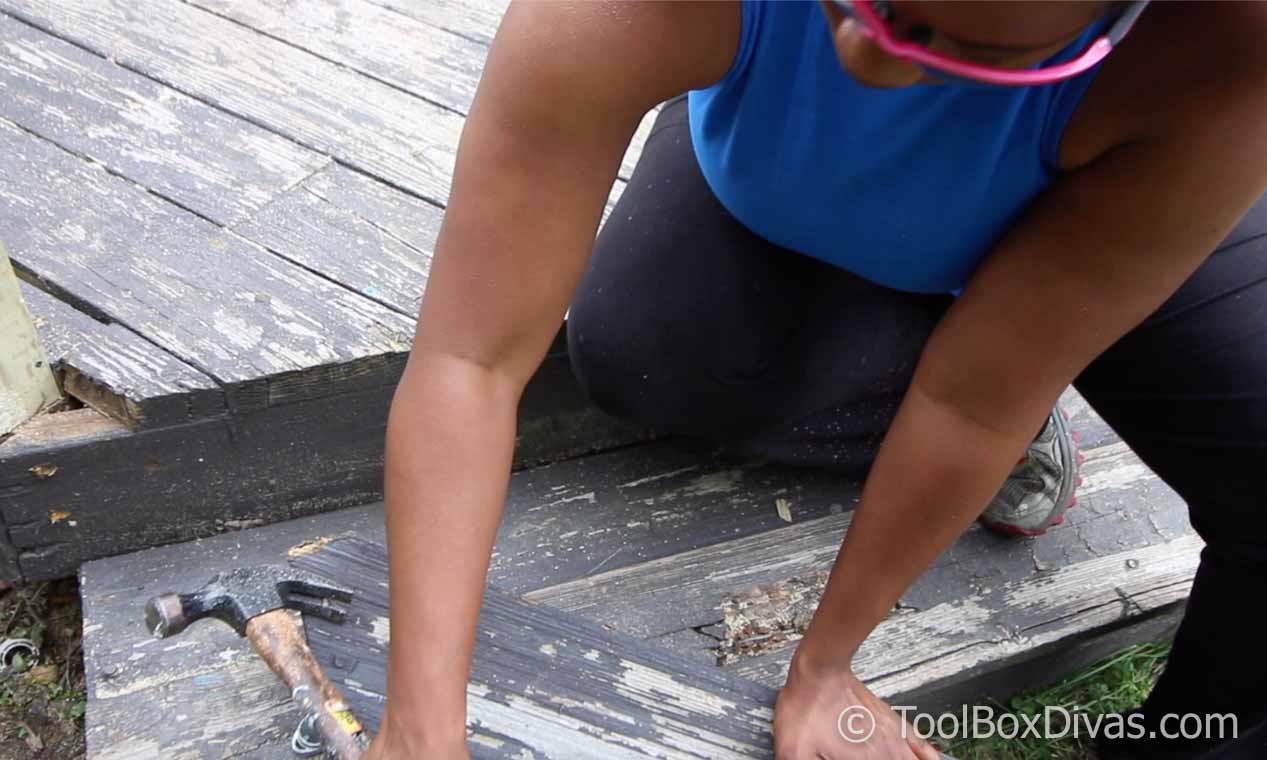
There were some boards that were worn out and damaged due to dry rot, like on the step. We replaced the top boards for the step.

Pre-Stain Preparations
Once the deck rails were in place I tackled the floor of the deck.
I first tried to yet again attempt to remove the old stain that I’d put down. I tried everything, including boiling hot water. The stain was so stubborn.
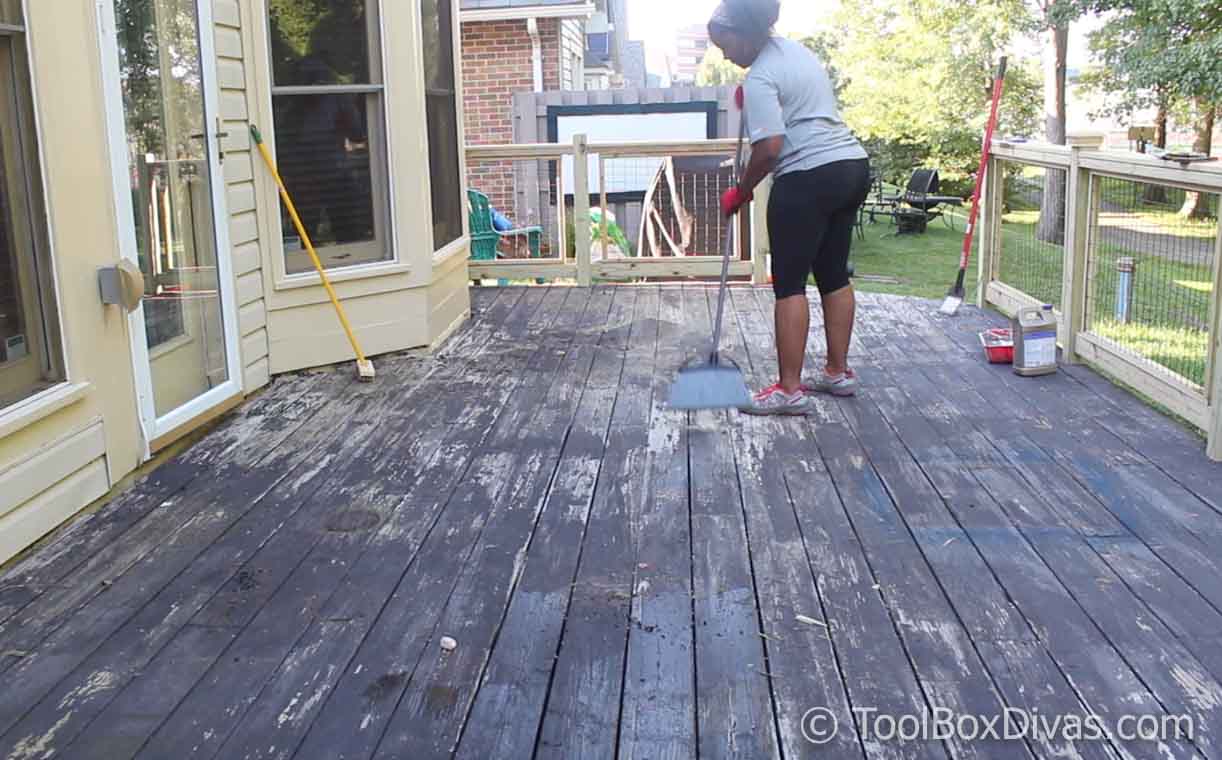

I was exhausted so I gave up. After all, you can paint over stain. You just have to clean the surface really well and treat it with a primer made for decks.
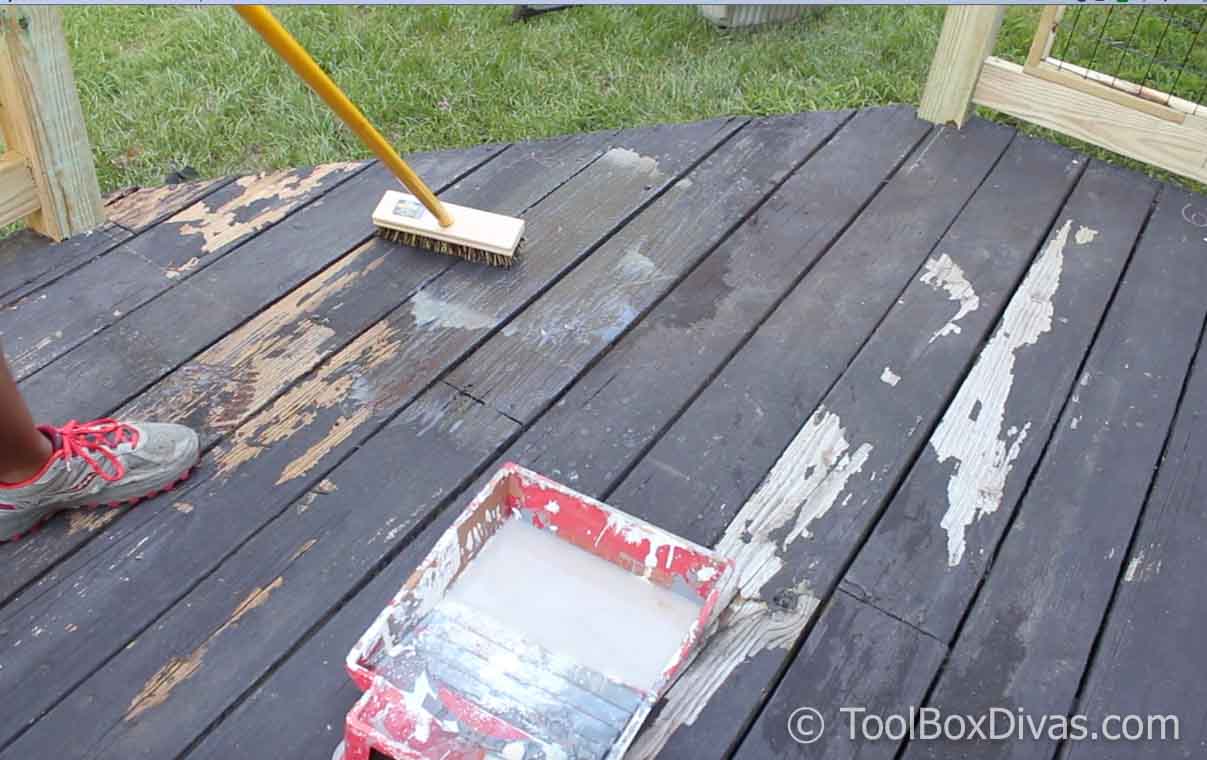
So I finished cleaning the deck, pressure washed it.
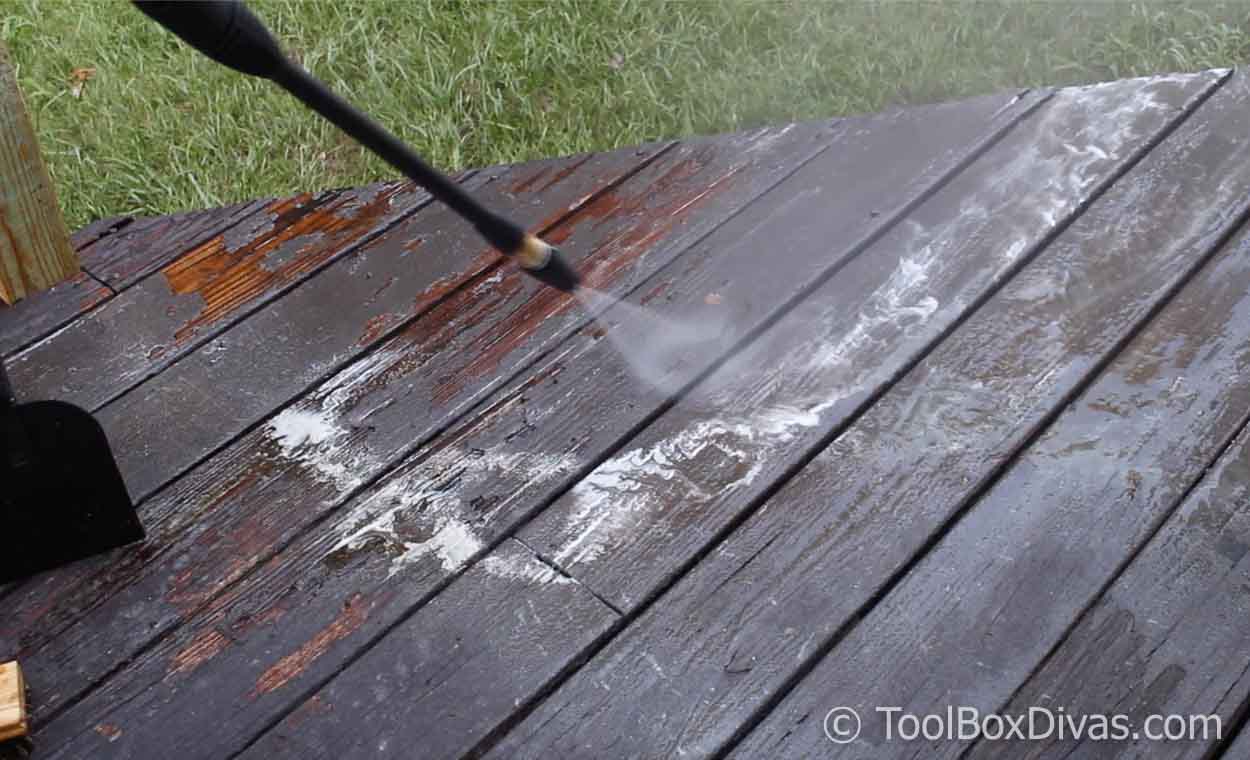
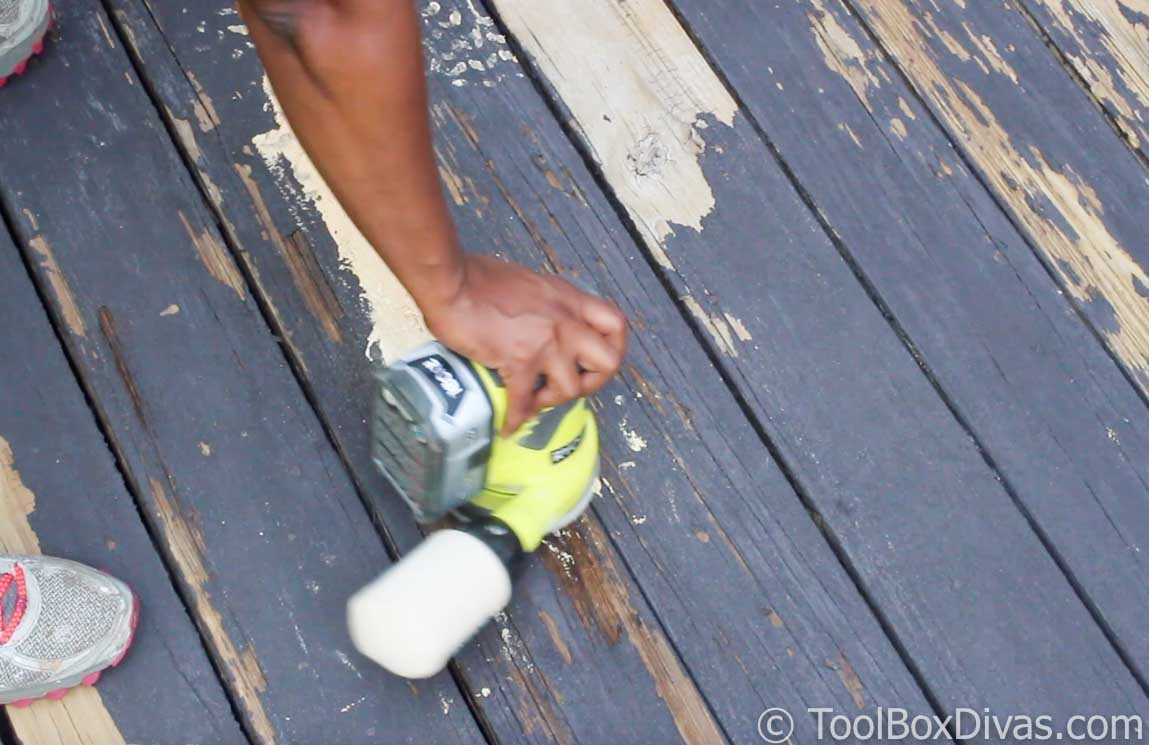
And touched up some small areas where the wood had chipped with exterior Bondo.
Staining
The previous stain that I used was a solid color treatment that was supposed to fill in all the imperfections of old worn out surfaces. After I primed the deck floor I decided to paint over the old stain using a solid stain. I used BEHR Premium Advanced DeckOver Smooth Solid Color Exterior Wood and Concrete Coating in the color Atlantic. I used this paint because it would correct the damage created by the previous stain and smooth out the surface. It’s meant to resurface weathered wood.
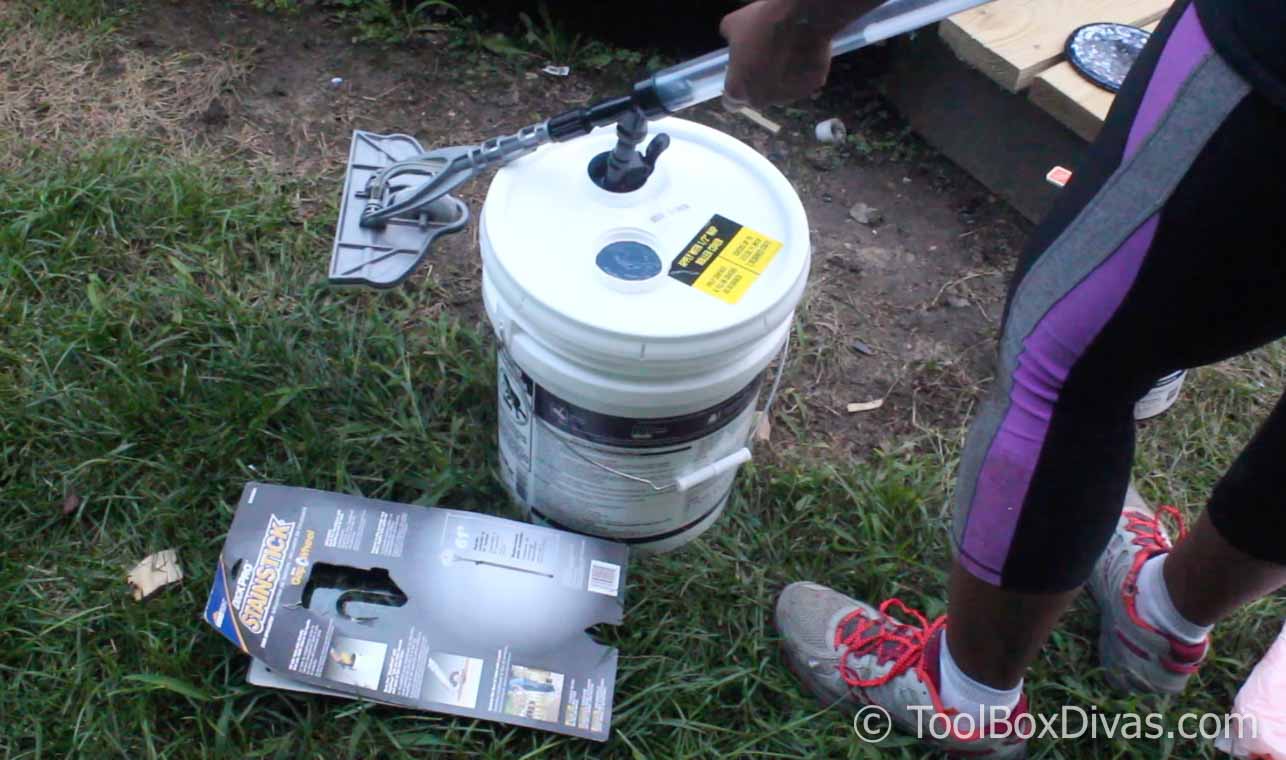
I started painting with the HomeRight StainStick with Gap Wheel Stain Applicator. However, I quickly changed a large extra wide roller brush because this stain was thick and I had a lot of ground to cover.

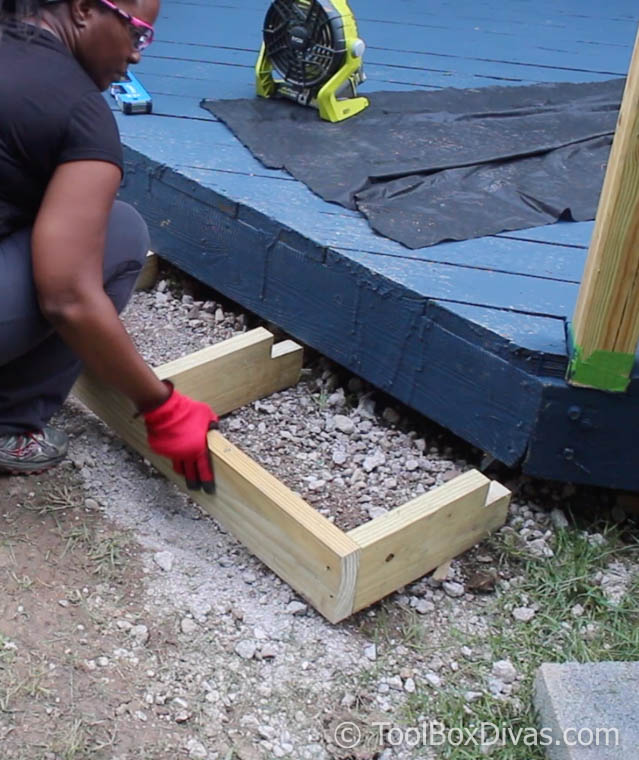
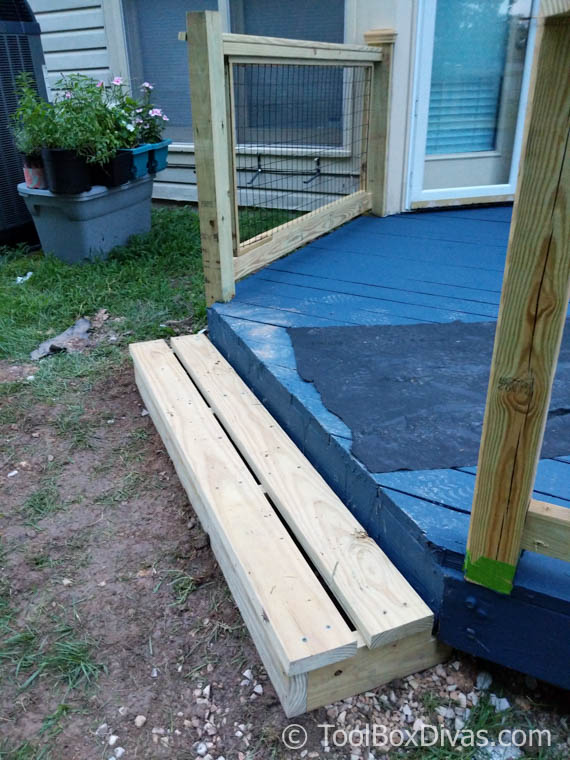
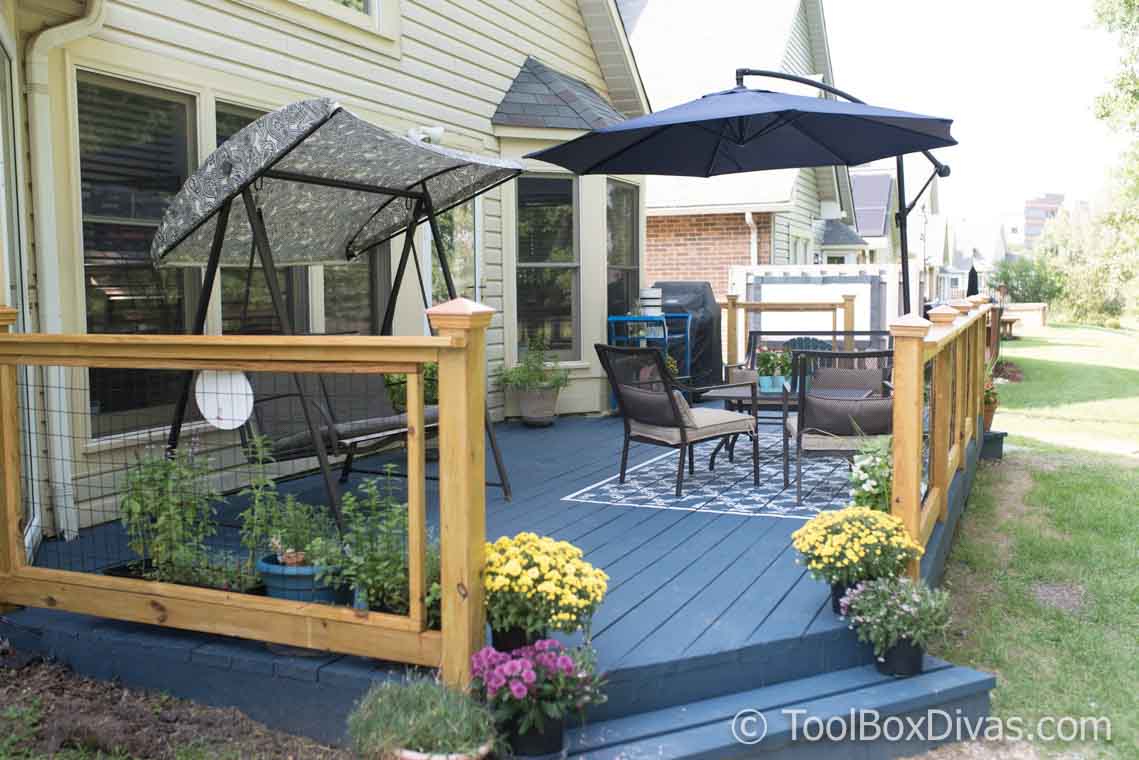
New Step
In creating new railings I took the opportunity to create a 2nd exit for the deck. I really didn’t like that I only had one way to exit or enter the deck. But with a new exit, I needed to build a step.
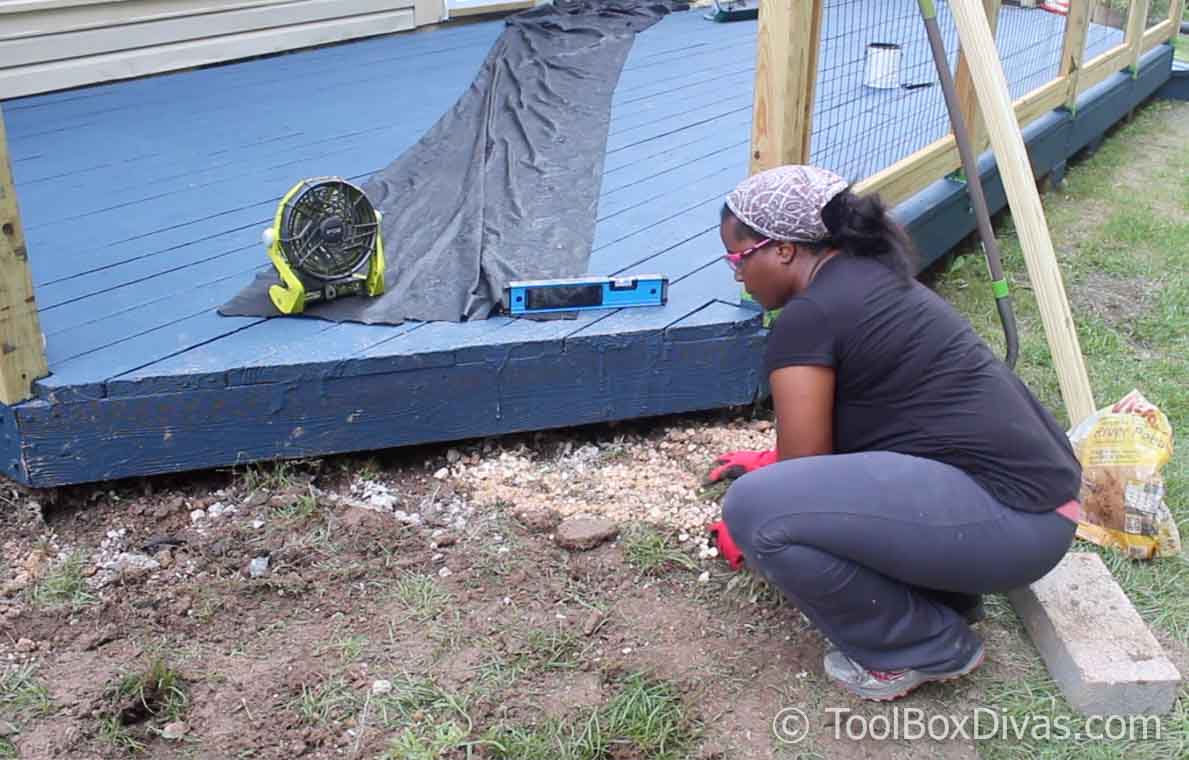
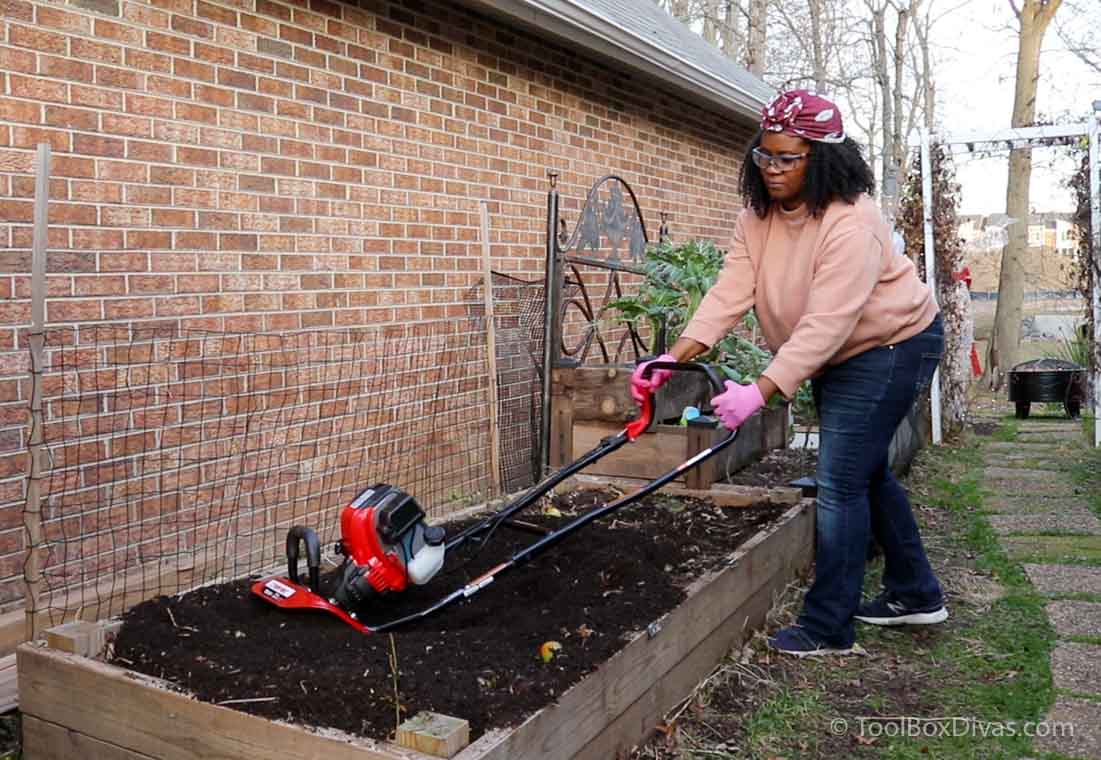
I had the level the ground and apply pebbles to the surface before placing the base of the step in place. It was also extremely hot. So THANK GOD for my RYOBI Portable Fan.
With the step done I simply painted it and I was done. Now the dilemma was decorating it.
Decorating the Deck
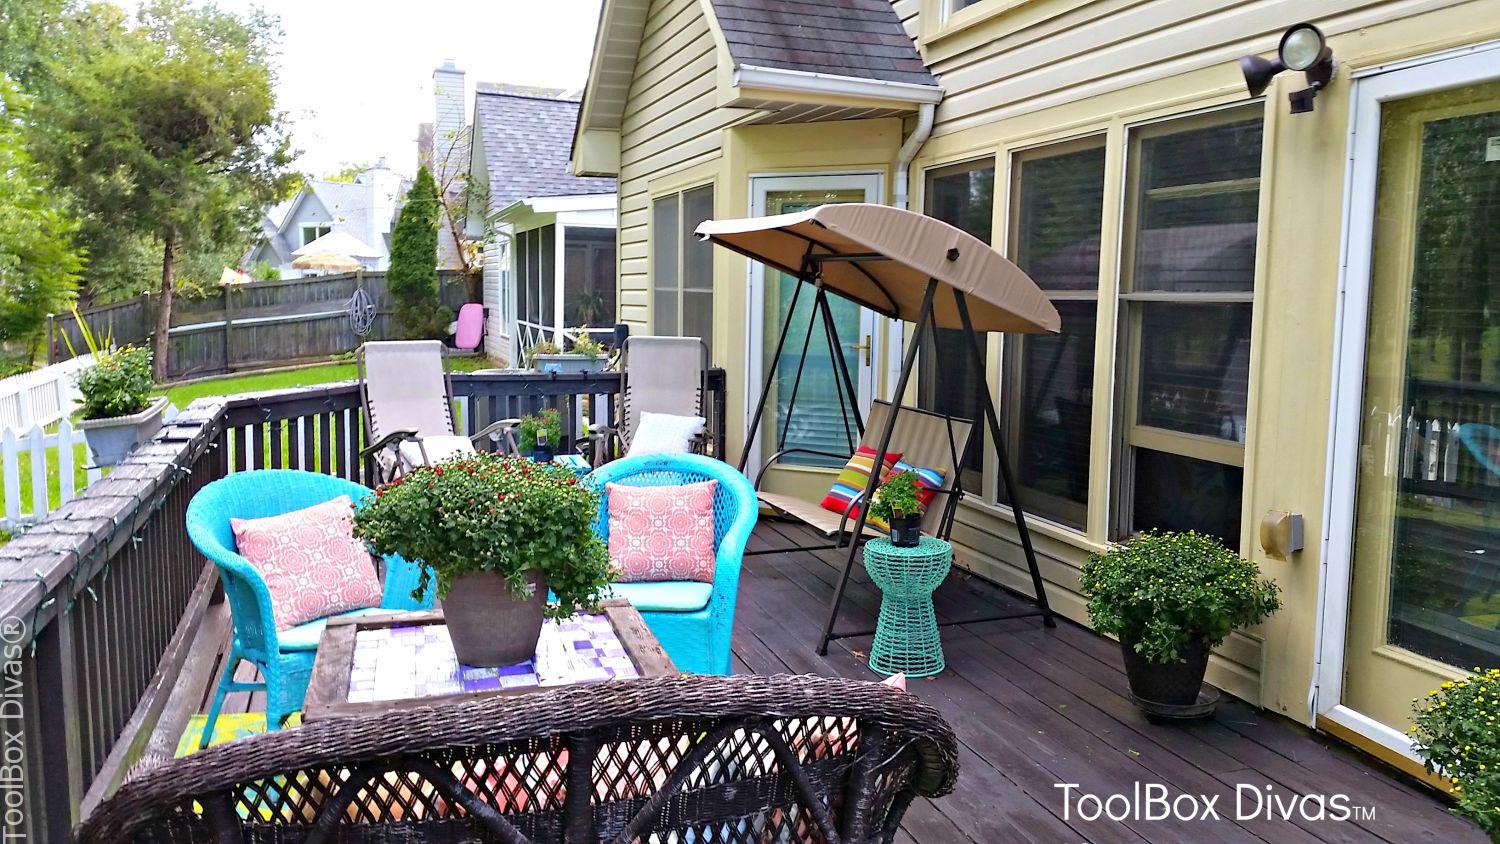
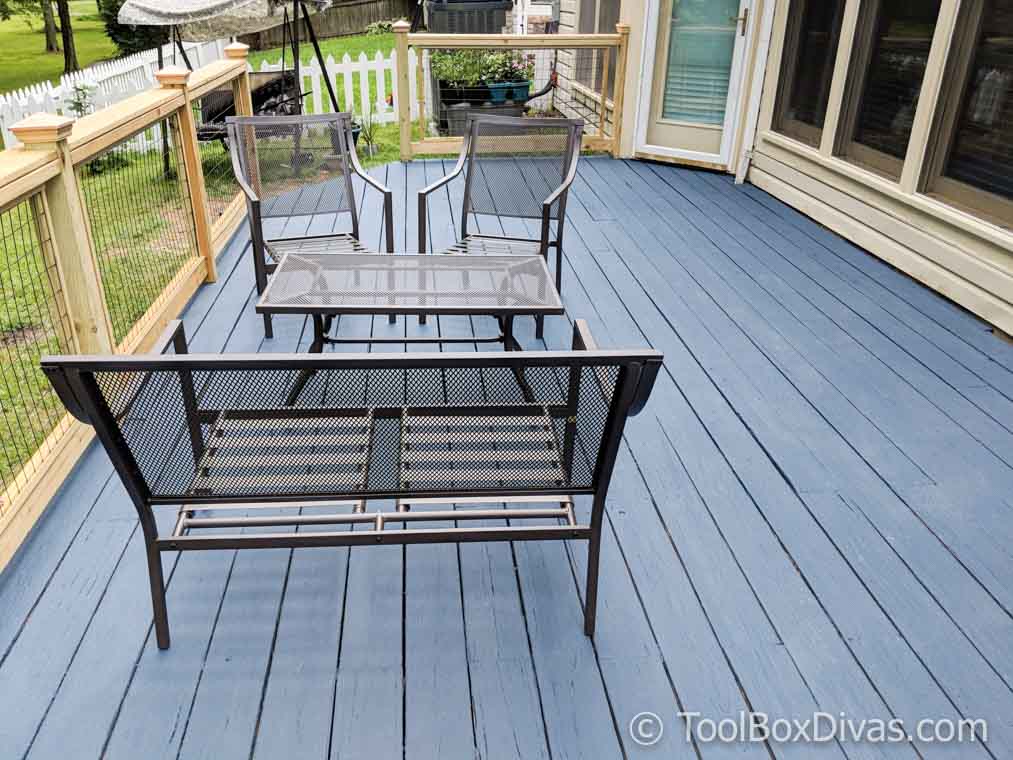
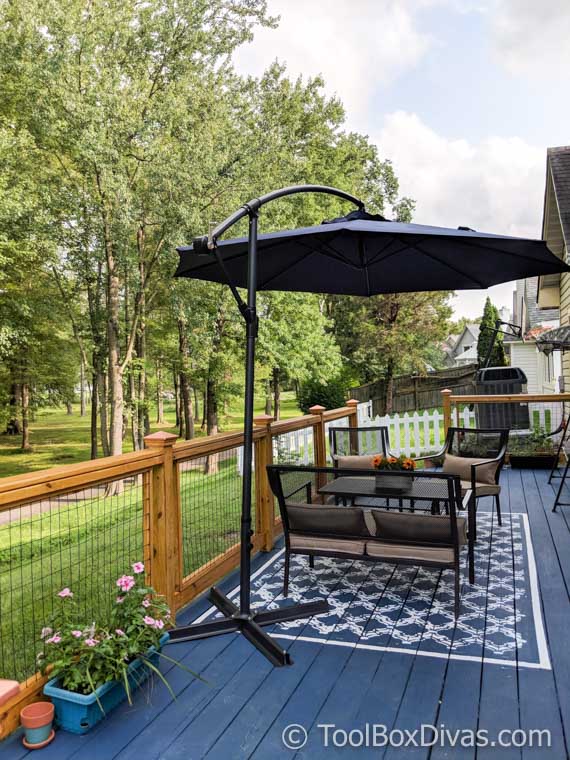
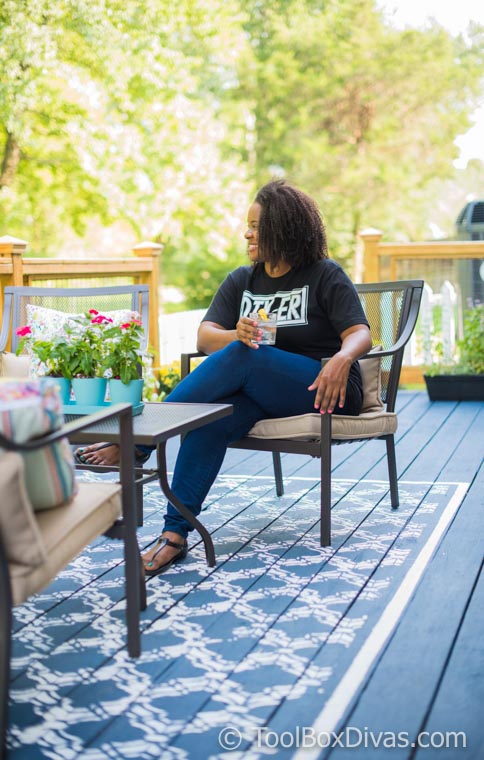
I wanted the deck to feel comfy and welcoming with loads of pops of color from plants and pillows. I also wanted a seating or conversation area. When I originally placed my furniture on the deck it kind of disappeared. It was like it was floating in a sea of blue.
So using some white exterior paint and a stencil from Stencil Revolution I created a “rug”. I actually don’t like exterior rugs because no matter what you do or how much you pay they always become discolored and fade or start to unravel. This is the ultimate weather friendly rug. In addition, its very budget friendly.
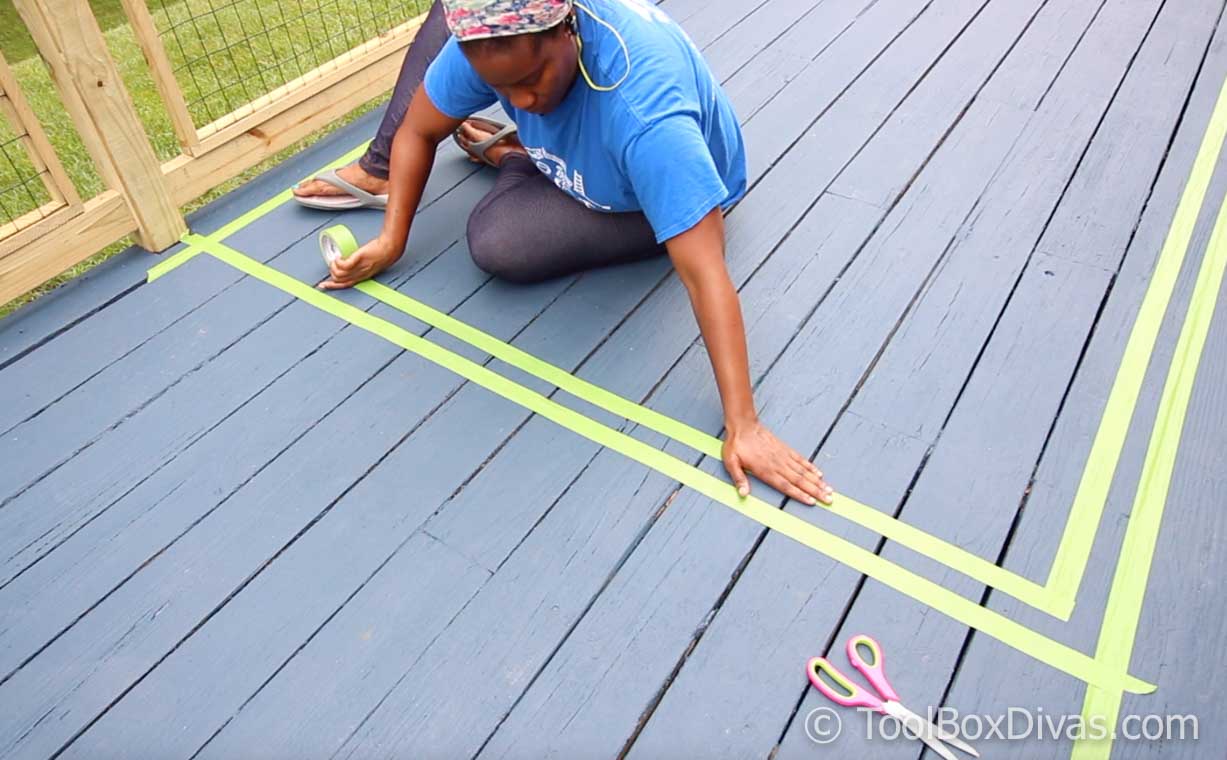
It’s a great alternative to the traditional exterior rug and I love the way it turned out. Check it out along with rest of my deck makover.
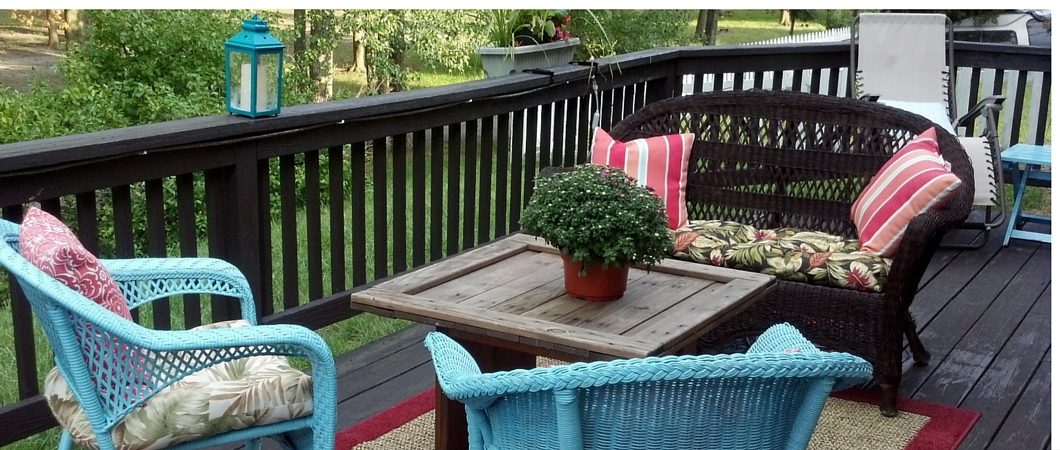
The Deck Reveal

While I reused some of my old furniture, I added a couple of new pieces, like the Mainstays Bellingham 4-Piece Patio Conversation Set and the Jordan Manufacturing 10′ Offset Umbrella.
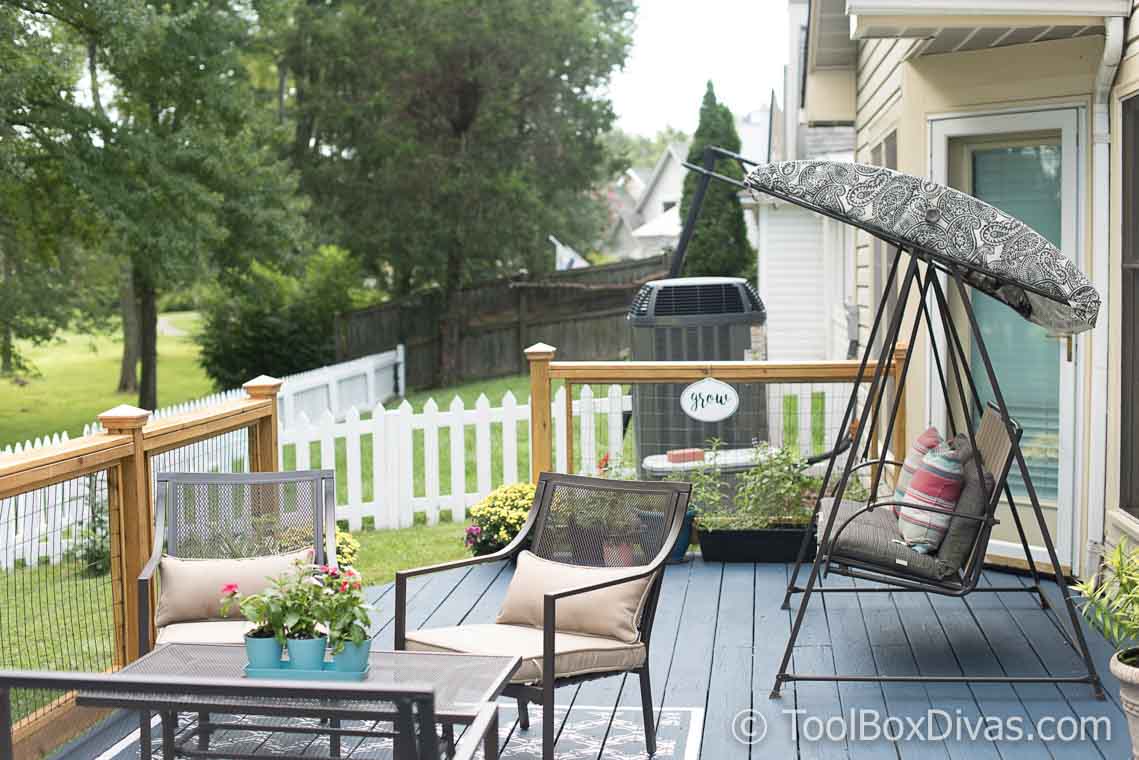
I brought back in all my plants. I love having flowering plants everywhere. There is something about all the pretty vibrant colors that brighten my day.
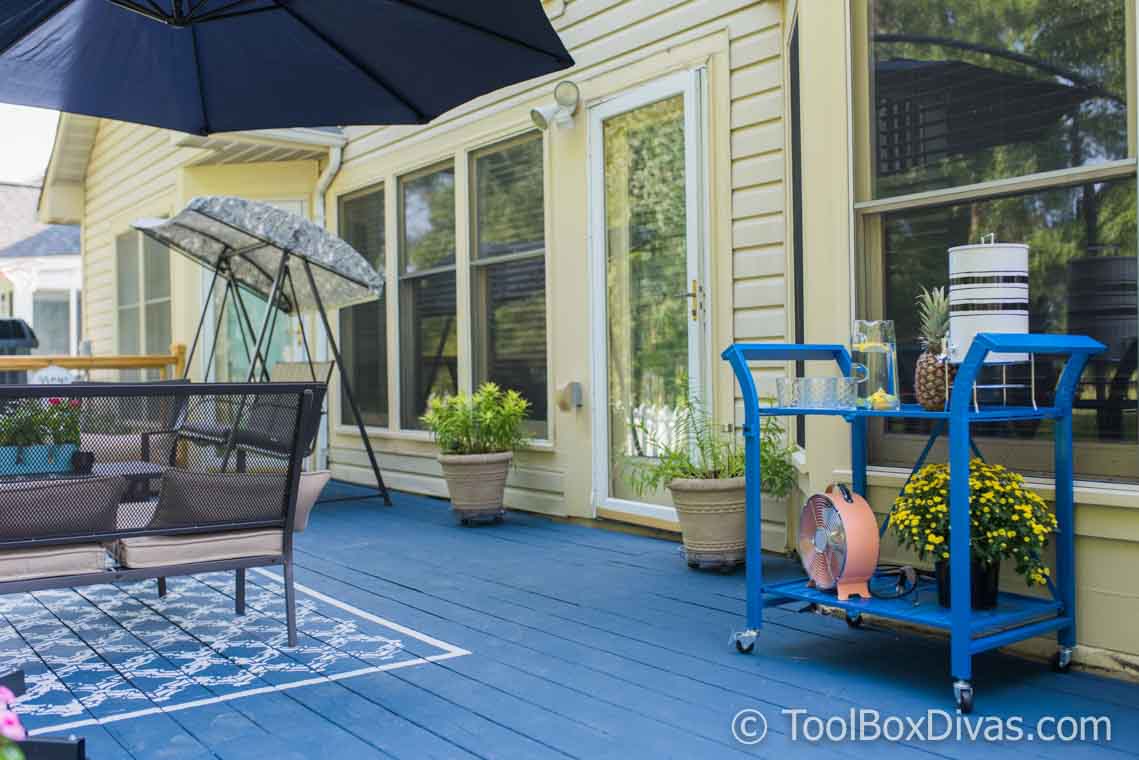
I found this really cool folding beverage cart at Homegoods.
Every time I walk out to my deck I have to pinch myself. It’s so calm and relaxing.
I’m finally enjoying my outdoor space again.
I hope my deck makeover provides some inspiration on budget-friendly deck decor ideas or tips for your patio this Summer. Now get out there and enjoy your outdoor space! ~T.
Items I Used in My Deck Makeover
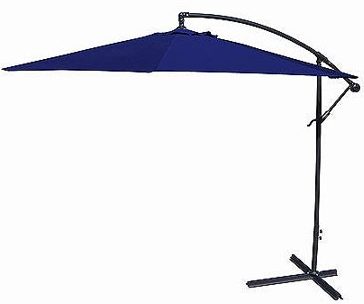 Jordan Manufacturing 10′ Offset Umbrella
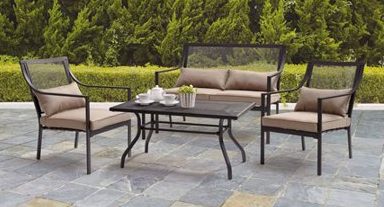 Mainstays Bellingham 4-Piece Patio Conversation Set
 Stencil Revolution Moroccan Detailed Stencil
 HomeRight StainStick with Gap Wheel Stain Applicator
 DeckoRail Verona 4 in. x 4 in. Copper High Point Pyramid Post Caps
 RIDGID 18-Volt Lithium-Ion Cordless Brushless
 Ryobi AirStrike 16-Gauge Cordless Straight Finish Nailer
For more outdoor inspiration check out these:


I blog quite often and I truly thank you for your content.
The article has really peaked my interest. I’m going to bookmark your website and keep checking for new
information about once a week. I opted in for your RSS feed too.
Thank you so much! I really appreciate the kind words and your support.
Awesome article and great finished product 🙂 DIY articles like these are so satisfying to read. You’re an honorary deck builder !
Thank you so much!
Such a detailed procedure, the way the article was written is quite entertaining, I enjoy my time reading this post! I hope I can manage to DIY my deck. Thanks for the share!
Great post! I love the color you picked out and the tip about repairing chips with Bondo. It reminds me of a lot of my own projects at https://www.massogliacontracting.com/
Thank you!
OMG I LOVE IT.
Very impressive, thanks a lot for sharing a helpful post with us.
Great! Thanks for sharing the wonderful information with us.