Discover the inexpensive Art of Woodburning
Woodburning – or pyrography – is a crafting hobby involving burning a design into wood. Before I started woodburning, I thought I’d never 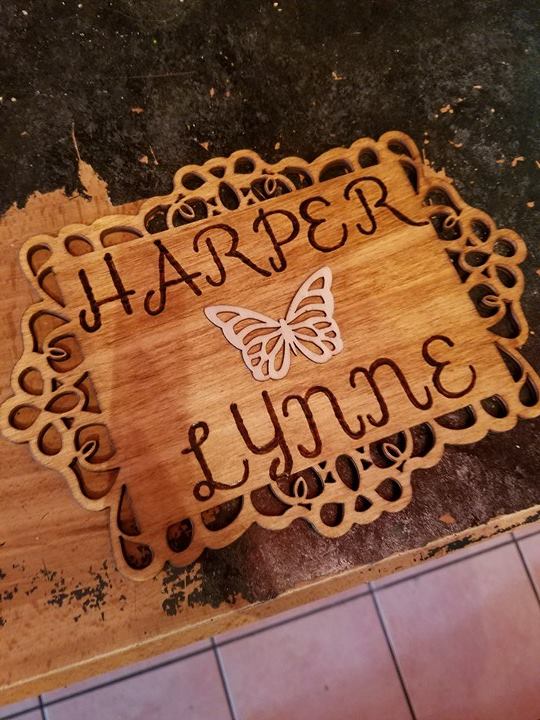 be able to get into a hobby like it. I figured the tools would be too expensive, there would be a difficult learning curve, and that I’d need some serious artistic skills to pull off such a complex craft project. Fortunately, I was wrong and it’s now one of my favorite crafts. I woodburned birthday gifts, my own wedding décor, and Christmas gifts. I even created a name plate for my dog’s crate. If you’re looking for a fun craft that you can afford and is relatively easy, then woodburning may be the crafting hobby for you.
It’s relatively cheap
It’s rare to find a new hobby that’s initially super cheap – everything costs money. However, on the list of crafting hobbies, woodburning really isn’t so bad. I figured a woodburning tool in itself would be really expensive, but it’s not. There are a ton of different tools to get, and some of the best woodburners range in price from $15 to $150, and there’s no reason to buy a super expensive tool to begin with. I’m still using my $30 tool and it’s been going strong for a few years now. The other things you’ll need aren’t very expensive either. Here’s a list of things you’ll need:
- Woodburning tool
- Wood
- Stain
- Gloss
- Sponge brush
- Sanding block
- Stencils/carbon paper
- Paint
Some of these things are just extras, but none of them are very expensive. For the wood, you can easily pick up plaques, boxes, or scrap wood from a local craft store like Michael’s. When I first started, I grabbed a tool, a sanding block, and some pieces of wood for $20 and BOOM I had a new hobby.
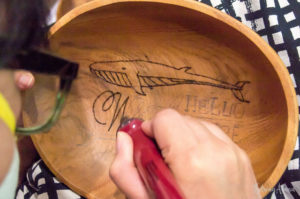
It’s actually easy
Some of my first woodburning projects looked like a toddler made them, but that’s all a part of learning a new craft. Before I began experimenting with stencils, image transfer, and staining, my projects were all free-handed and wonky. My line work was off and I used the wrong tip. However, once I learned what worked for me I began creating projects I was really proud of. Just grab a piece of wood and start drawing, then trace over that drawing with your woodburning tool. You’ll learn which tips are for fine line, which are for shading, and which are for filling in space. Shading techniques and tips will come along the way, and the internet is full of great resources.
You don’t have to be an artist
I am a relatively crafty person, but I’m not artistic and there is a very subtle but important distinction there. For this reason, I really love woodburning because I can use image transferring or stencils instead of trying to rely on my own drawing abilities that are super limited. If you can’t do lettering, just use lettering stencils. If you can’t draw an image, just trace one onto your wood using carbon paper or by transferring it onto your wood by printing it off and using the flat tip of your tool. Once the image is transferred, just trace the image with your tool. Or, focus on woodburning things that are easily replicated like geometric designs or symbols easily recognized in pop culture. It’s easy to create a really cool project without having to draw your own designs which was really important for my love of woodburning.
It makes great gifts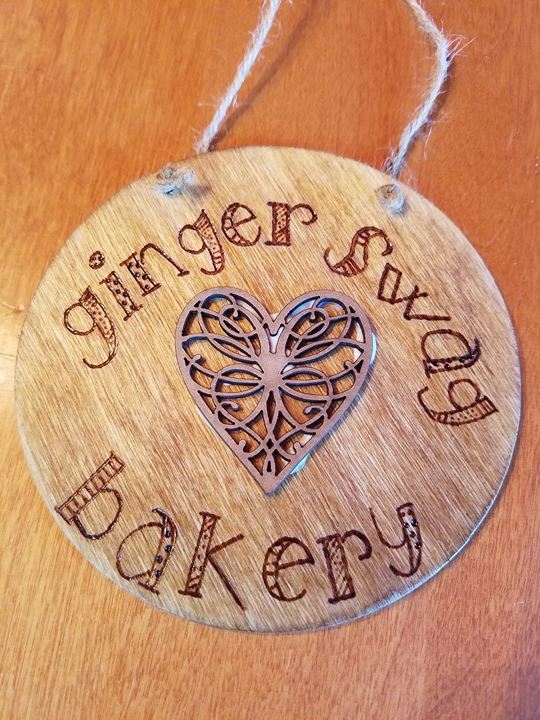
I make tons of woodburning gifts and they are always well received even if they aren’t professional or drawn by hand. People love having a homemade and original gift that they can’t get anywhere. I’ve made a ton of name plaques as wedding gifts depicting their names and wedding date. I’ve made Christmas ornaments, necklaces, and jewelry boxes. It’s a cost effective and personal gift that your loved ones will enjoy receiving as much as you love making. The steps to woodburning are as easy as this:
- Sand wood surface (I use a sanding block with fine grit depending on the wood)
- Apply design (by drawing, copying, or image transferring)
- Burn the design
- Shade/paint (wait for the paint to dry)
- Sand
- Stain (wipe sawdust before staining – then use according to its instructions)
- Apply clear coat (according to its instructions – I use a sponge brush for stain and clear coat)
- Sand
- Done!
It’s fun!
I have a blast creating a variety of projects with my woodburning hobby and I’m usually begging for an excuse to create something for someone. It’s fun, cathartic, and a great hobby to do with a friend or with a glass of wine… or both – I’m usually doing both. You’ll learn which type of wood works best for your projects, and be sure to find the right wood that will last if you’re creating a piece that will stay outside such as a “welcome” sign or address plaque. You’ll love watching your art getting better, your technique becoming easier, and your projects looking more complete.
If you’re looking for a new and fun crafting hobby to get into, woodburning can be the hobby for you. Not only is it easy and relatively cheap, it also doesn’t require you to be an artist and it’s great for making gifts. Even though it may look intricate and complex, it is a crafting hobby that anyone can be great at. So whether you’re burning your original art or tracing an image, it’s still a piece that’s uniquely yours.
 Chelsy is a writer from Montana who is now living in Boise, Idaho. She graduated with her journalism degree from the University of Montana in 2012. She loves woodburning, making jewelry, and doing virtually any other craft she can find on Pinterest. Follow her on Twitter!

I’ve yet to try wood-burning but you’ve inspired me. Always looking for a new technique to add to the tool box.
And thank you for the link to my image transfer project. Much appreciated.
Thank you so much David. I’m so glad to hear that you enjoyed the article and are even inspired to try it out. 🙂