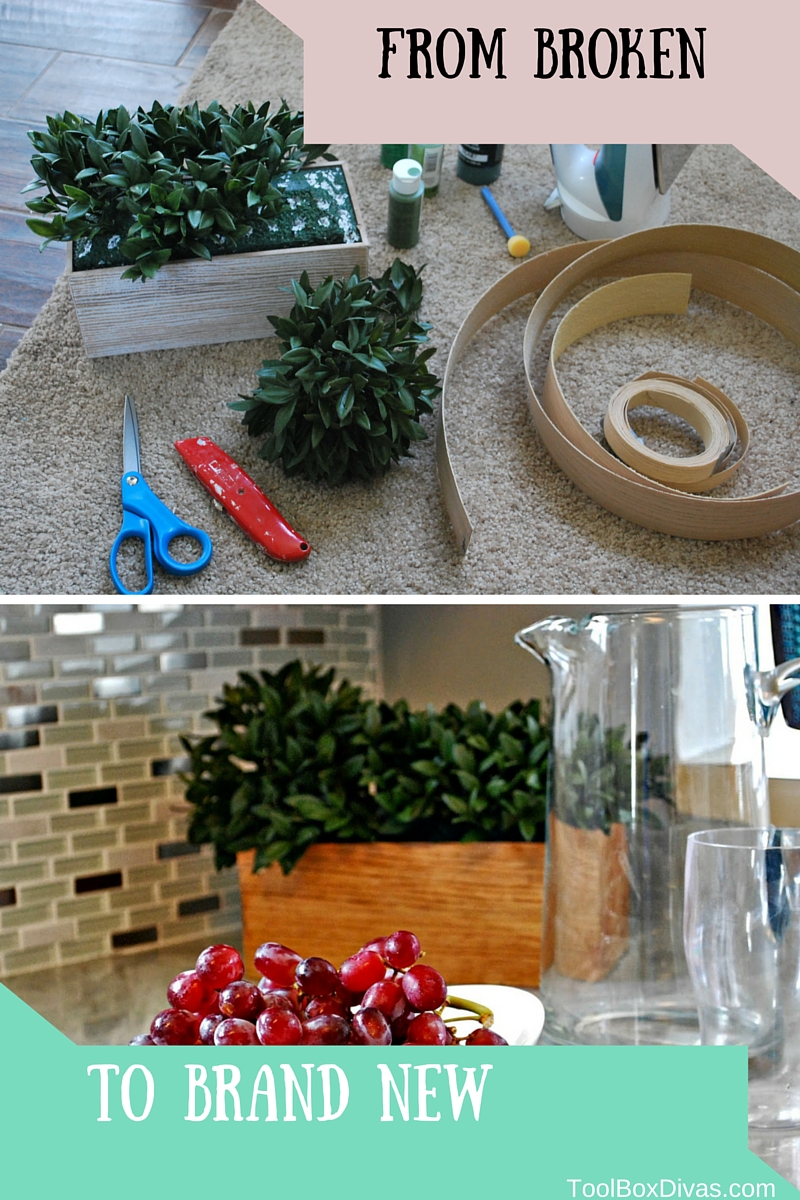
What can you really get for $3? The story of a planter
You know its funny, in the kitchen, we rarely think of what’s in the backdrop.
The center of attention is normally the delicious food. We forget the kitchen needs a little attention to its decorative details as well. This can be accomplished of course in the detail of the cabinets, the counters and jeweled backsplashes. But it’s also about the accessories. Not too much. A little really goes a long way in the kitchen. But little elements here and there bring life to a kitchen. So while out shopping at one of my favorite stores, TJ Maxx, I spotted what looked like a broken branch from a floral display. Huh, I thought. I bet there is a planter box on the floor missing a great big chunk of greenery. And as I turned the corner, there it was, a broken beat up planter that had seen better days. I flip it over to check out the price…$3 WHATTTTT?!! OK I’ll take this, and go back to pick up the broken branch.
Consider this the next time you see something in the clearance area that looks a little beat up.
At first glance this planter looks like it probably should be trashed. But I saw potential. It was the perfect shade of green for my kitchen given my current color scheme. The box however, was not exactly the right color tone. The box was covered by a wood like paper. I wanted a wood look and tone but knew that wouldn’t be achieved by simply painting the planter box. So I went to my workshop and pulled out some old wood veneer iron-on edging I had bought from Lowe’s when I originally tried repurposing my kitchen cabinets.
That paired with various shades of green and black acrylic paints and I was ready to bring new life back into this piece.
First I cut the strips of veneer to the size of the box.
Then Iron the veneer on to the box being sure to not get to close to the wax leaves. I still need to use this iron for its intended purpose (To iron everyone Else’s clothes).
Because this is an edging it has to be lined up to cover the width of the box. Don’t worry about lining anything up perfectly. Wood is perfectly imperfect and so is this planter.
Once the veneer was adhered (does that rhyme?) to the planter box, I sanded down the edges and corners paying close attention to the seams.
Stain the veneer with your stain of choice.
I followed by applying a clear polyurethane to speed up the drying process.
Once the planer box was repaired I turned my attention to the floral bed. This is a simple greenery. It’s attached to the planter box by a large piece of foam. In a disposable plate I mixed the shades of greens and black. Using the stencil brush blot the foam with the paint mixture filling in all the holes and white areas that were missing pieces of the arrangement.
Once that was done I was able to reattach the missing branches to the arrangement by sticking it into the foam.
And there you have it. This $3 TJ Maxx Clearance area find, now restored to what I think is a better state of being, a decorative element of my new kitchen.
Till Next Time ~T.
DIY of how to repair a broken planter box. Low cost solution to decor.
Recently I had the pleasure of attending a friend’s baby shower. I debated over what I should give her. I wanted to give her something meaningful that she and her child would enjoy. While pinning the morning away, waiting on my car to be serviced, I came across the most wonderful pin on Pinterest, DIY…
Outdoor rugs can be expensive and keeping them clean is time consuming. Learn how to make your own DIY deck rug with paint. It’s the perfect low maintenance solution to adding interest to your outdoor space and you can do it in a weekend! After making over the back deck, I knew I wanted a…
Have you ever gone through a home décor magazine and ogled at the flawlessly designed houses? Maybe it was the luxurious furniture, porcelain or marble tiles or general interior finishes that caught your eye—but then reality hits when you realize how big of a budget you might need to replicate the same look. Beautiful floor…
Learn how to make a set of wooden solar lanterns to add to your outdoor living space. In this blog post, I’ll be going over how to build a set of modern wooden solar lanterns. These are great for lighting up your yard or patio and make a nice addition to any outdoor space. They’re…
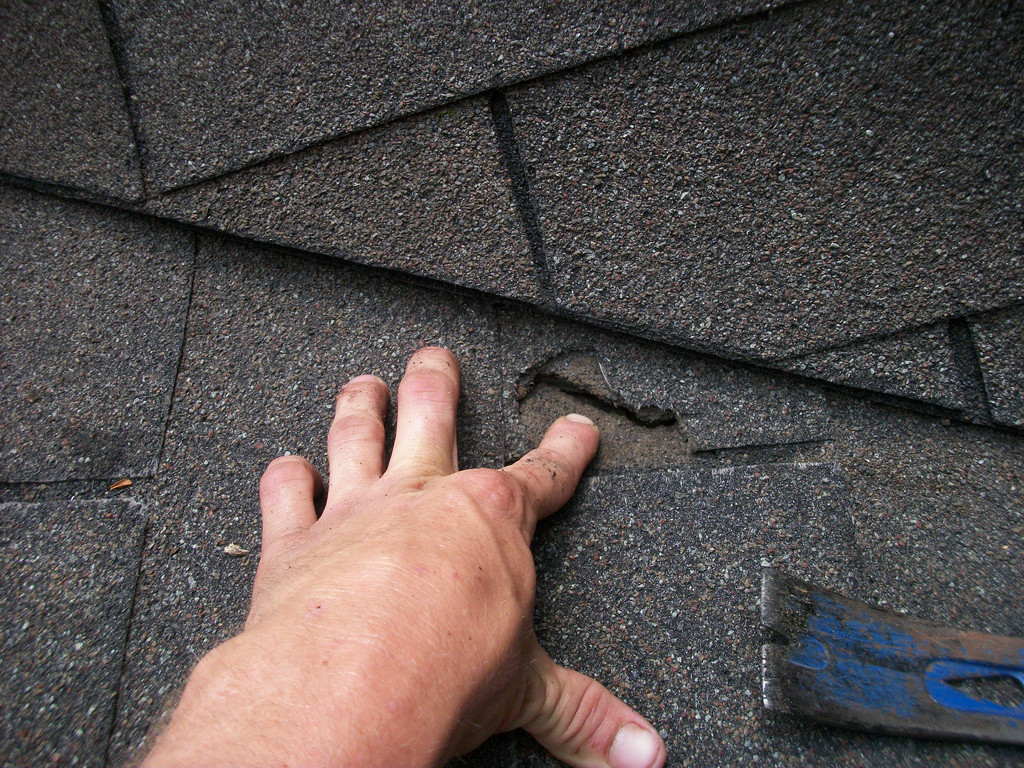
Applying shingles to your roof may appear to be a daunting task for those who are trying it out for the first time. It’s best to consult a roof expert who has spent many years, providing quality roofing shingle services to his customers so that you know you’re doing everything right the second time around….
Introducing the new ToolBox Divas Youtube Channel. Subscribe today and learn home maintenance home improvement skills. Be the ToolBox Diva of your home and create the home you love. Are you a ToolBox Diva? Subscribe Today!
 You know its funny, in the kitchen, we rarely think of what’s in the backdrop.
.JPG "Simple Craft DIY project. Planter box refinished using wood Veneer and stain")
.JPG "Simple Craft DIY project. Planter box refinished using wood Veneer and stain")
.JPG "Simple Craft DIY project. Planter box refinished using wood Veneer and stain")
.JPG "Simple Craft DIY project. Planter box refinished using wood Veneer and stain")
.JPG "Simple Craft DIY project. Planter box refinished using wood Veneer and stain")
.JPG "Simple Craft DIY project. Planter box refinished using wood Veneer and stain")
.JPG "Simple Craft DIY project. Planter box refinished using wood Veneer and stain")
.JPG "Simple Craft DIY project. Planter box refinished using wood Veneer and stain")
.JPG "Simple Craft DIY project. Planter box refinished using wood Veneer and stain")
.JPG "Simple Craft DIY project. Planter box refinished using wood Veneer and stain")
.JPG "Simple Craft DIY project. Planter box refinished using wood Veneer and stain")