Dining Room Renovations
Hey Toolbox Divas!!!
How have you guys been? I feel like I’ve been gone for way too long. But I’m back and kicking off my latest room makeover. I’ve decided to take on the project of redoing my dining room. This has been on my list since the first day I moved in to my home. But like many projects on that ever growing “To Do” list, it kept getting pushed to the side for one reason or another. Also to be quite honest I had no clue what direction I wanted to go in the space. I guess I suffering from a severe case of Design Block… Much like writer’s block, I was stuck. So I put it off till later. Well I am happy to report that later is now. Haha I made the decision that I was going to face this big stone design blockade head on.
I looked to my go to design resources (Pinterest, Decorpad & Houzz) for some much needed design inspiration. I even took a design style test through Havenly.com which told me I currently into “rustic glam.” So I ask…what exactly is rustic glam? Of course I ran straight to Google and this is what I found according to contributing blogger, Sarah Langtry with Remodelaholic, “Rustic Glam is a fusion of weathered wood, chippy furniture and worn pieces with bright whites, clean lines & lots of sparkle!”
Huh! Here I thought I was Transitional, mixed with a little bit eclectic and coastal stylings. Who knows?! But I like the concept of mixing weathered wood with bright and shiny things. So I’ll roll with it.
So in the beginning I first bought the place I started with a space that was… well… 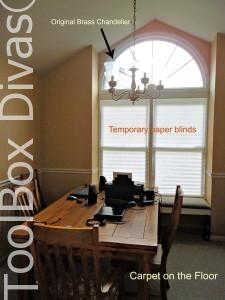 dark and “mustardy.” Yep, that’s a word. I just made it up. It had the original builder’s grade brass circa 1980s chandelier, the worst beat down carpet brown carpet you could find and temporary paper shades that were obviously not used for temporary purposes.
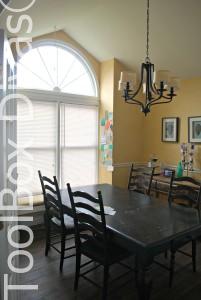
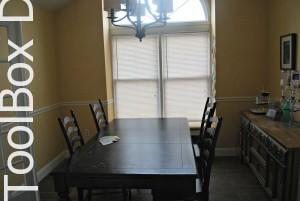
As you can see I hadn’t really done anything to the room. I replaced the lighting for a more modern fixture. I replaced that horrible carpet with the same flooring I have primarily throughout the lower portion of my house. It’s a porcelain wood like tile that gives the impression of hand scraped wood planks. And I took down those paper shades and put in generic vinyl blinds.
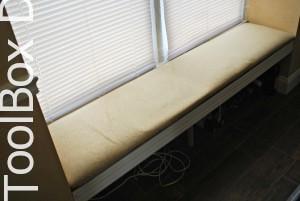 Oh and I secured the “window seat.” You see what was there was a faux seat. Just what is a faux seat you might ask. Haha, well a board running from wall to wall with no support beam what so ever. So if you sat on it and weighed more than 20 lbs, you would fall flat on your bum.
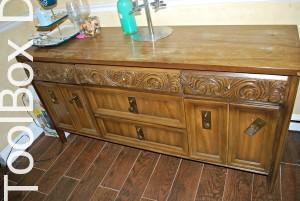 I have this crazy old buffet that I picked up from a thrift store ages ago for about $40. My plan has always been to refinish it.
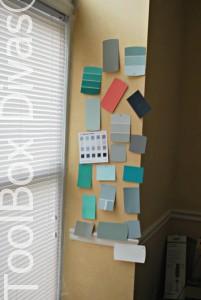
I have struggled for some time on possible color schemes for the room. I didn’t want to go totally safe. But I didn’t want the color to be so crazy that it would clashed with the adjoining rooms (the great room and the kitchen).
INSPIRATION
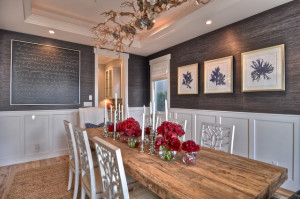
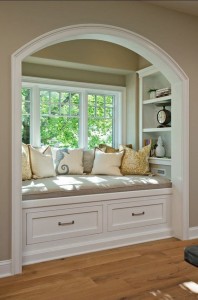
So as I search the web and interior design studios for inspiration I’m getting excited. I’m excited because although I have no real idea where this is all headed, I know that at the end of this I’ll have a room that is all mine. I just love decorating. 🙂
And so it begins….. I have no clue how long this will take given the fact that I work a full time job and I have other life, family obligations. But stick around its sure to be an exciting time.
Till next time. ~T.




Oh my gosh! I would LOVE to have a window seat with bonus storage. I would want to do hidden doors though. Maybe something on the front that just appeared as two different panels (maybe even include magnets to help keep the doors sealed with kiddos opening and closing them). Or maybe the door should be on the top and kept hidden under the pillow. Hmmm…. I wonder how that could be pulled off….. 🙂
Wow Hahaha Maybe I should have gotten some ideas before I started my window seat project. I actually just finished it. I hope to have the post up soon on how I did it. I wanted something with drawers. And this was my 1st experience making drawers. OMG I had no clue what a challenge it was going to be. You should consider doing the window seat. You can accomplish it with some stock cabinets or even an Ikea bookcase hack.
Awesome ideas! I can only IMAGINE how challenging it would be to make drawers and all those other accommodations. If I’m going to take on any sort of project, it needs to be simple. Give me a few years and I might be ready to take on drawers… Just be sure to give a VERY THOROUGH tutorial on that window seat of yours. 😉
Love the plan. Can’t wait to see it all come togehter. I love the inpiration pics.
Thank you! I finally picked out a wall color. I should have this all wrapped up in the next few weeks. Stay tuned. 🙂