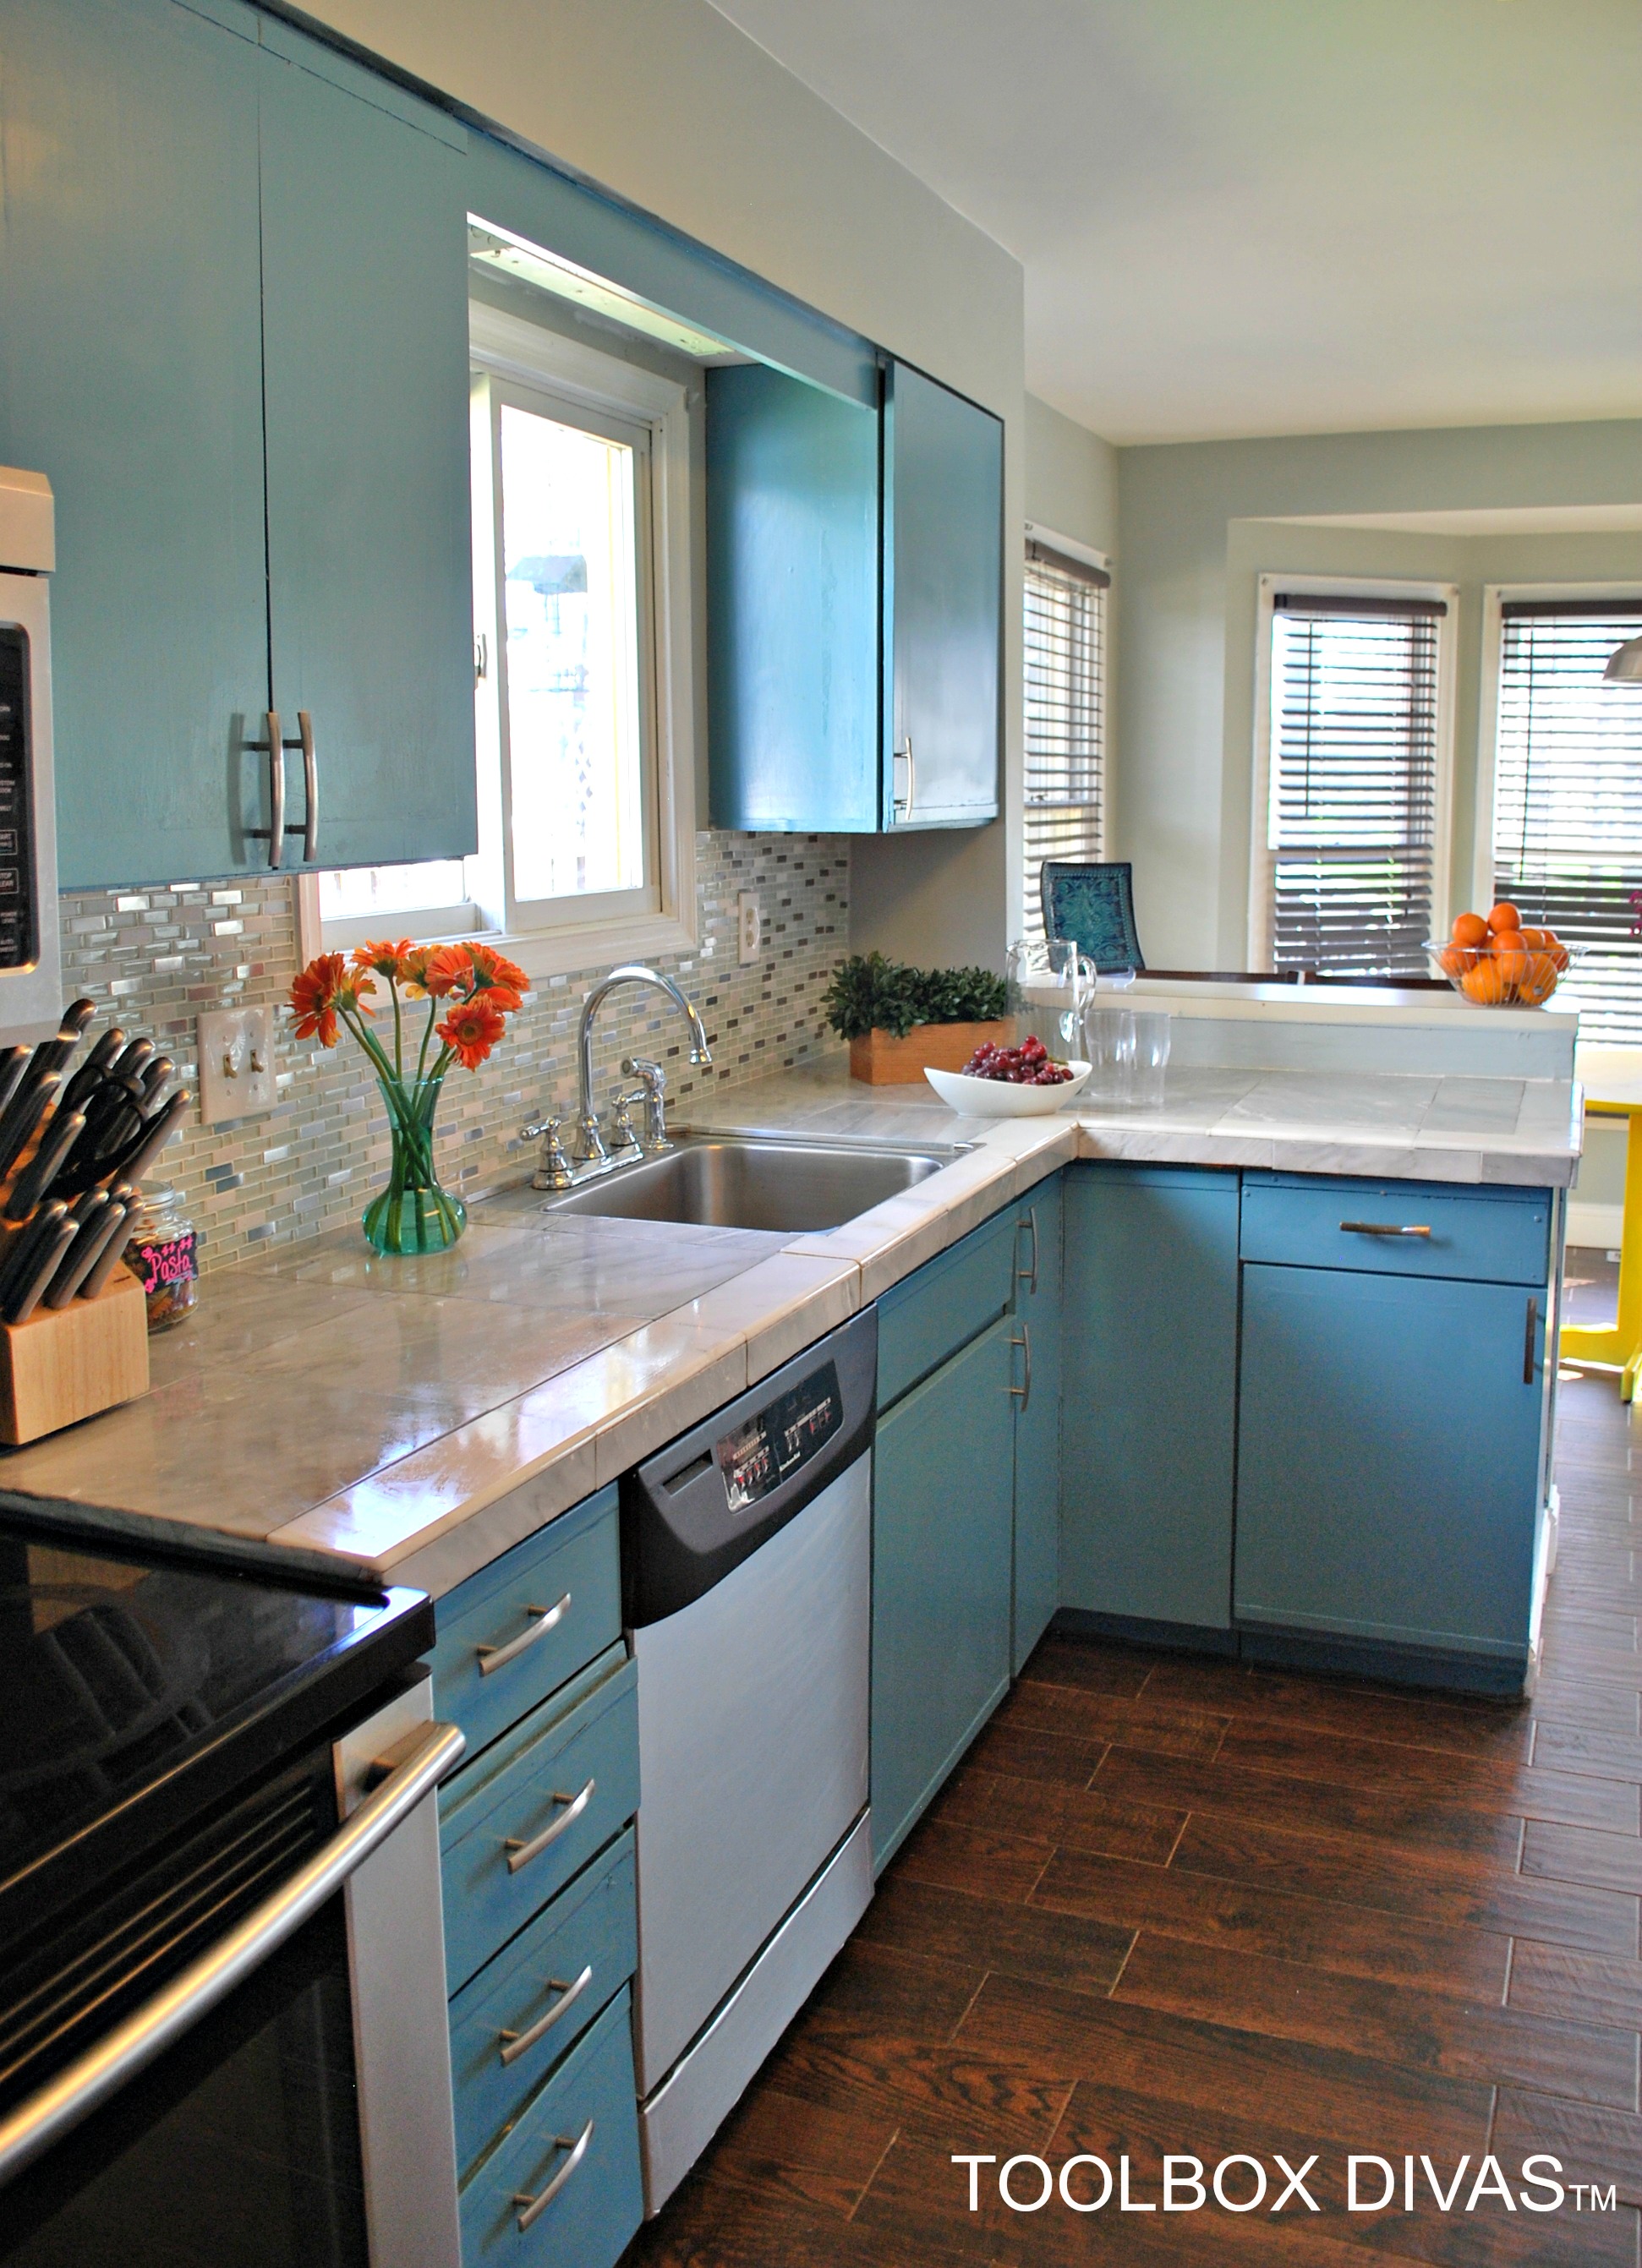
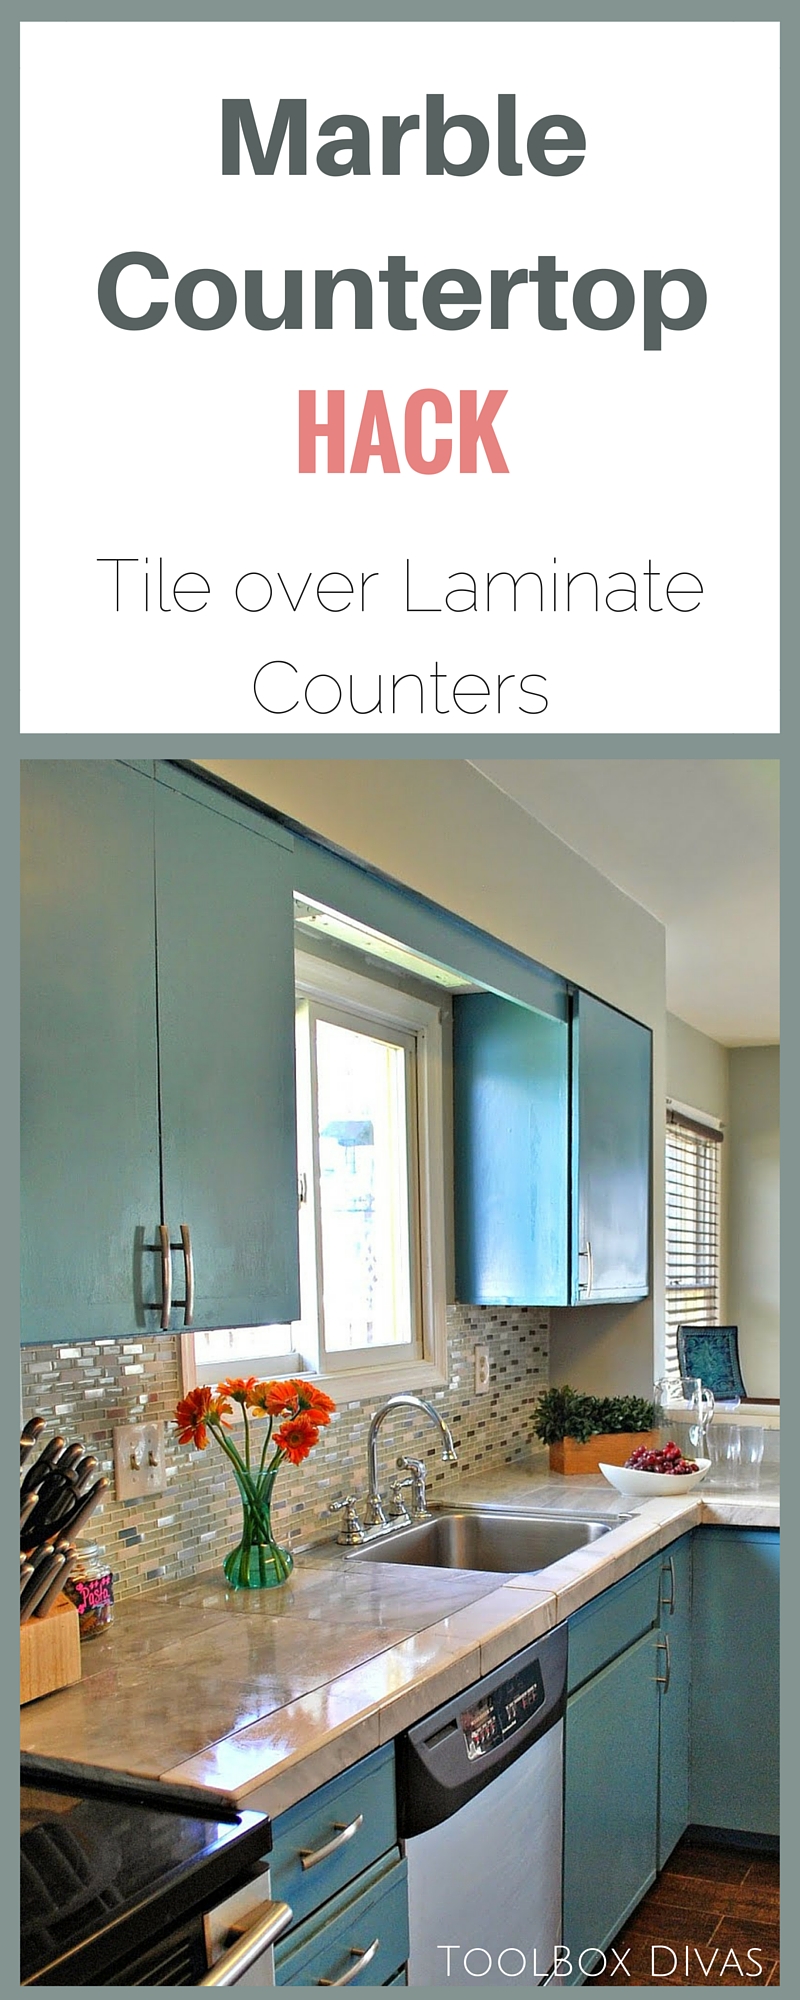
Marble Countertop Hack: How to Tile Over Laminate Countertops
Let’s face it, marble, particularly carrera marble countertops are highly desirable highly expensive. 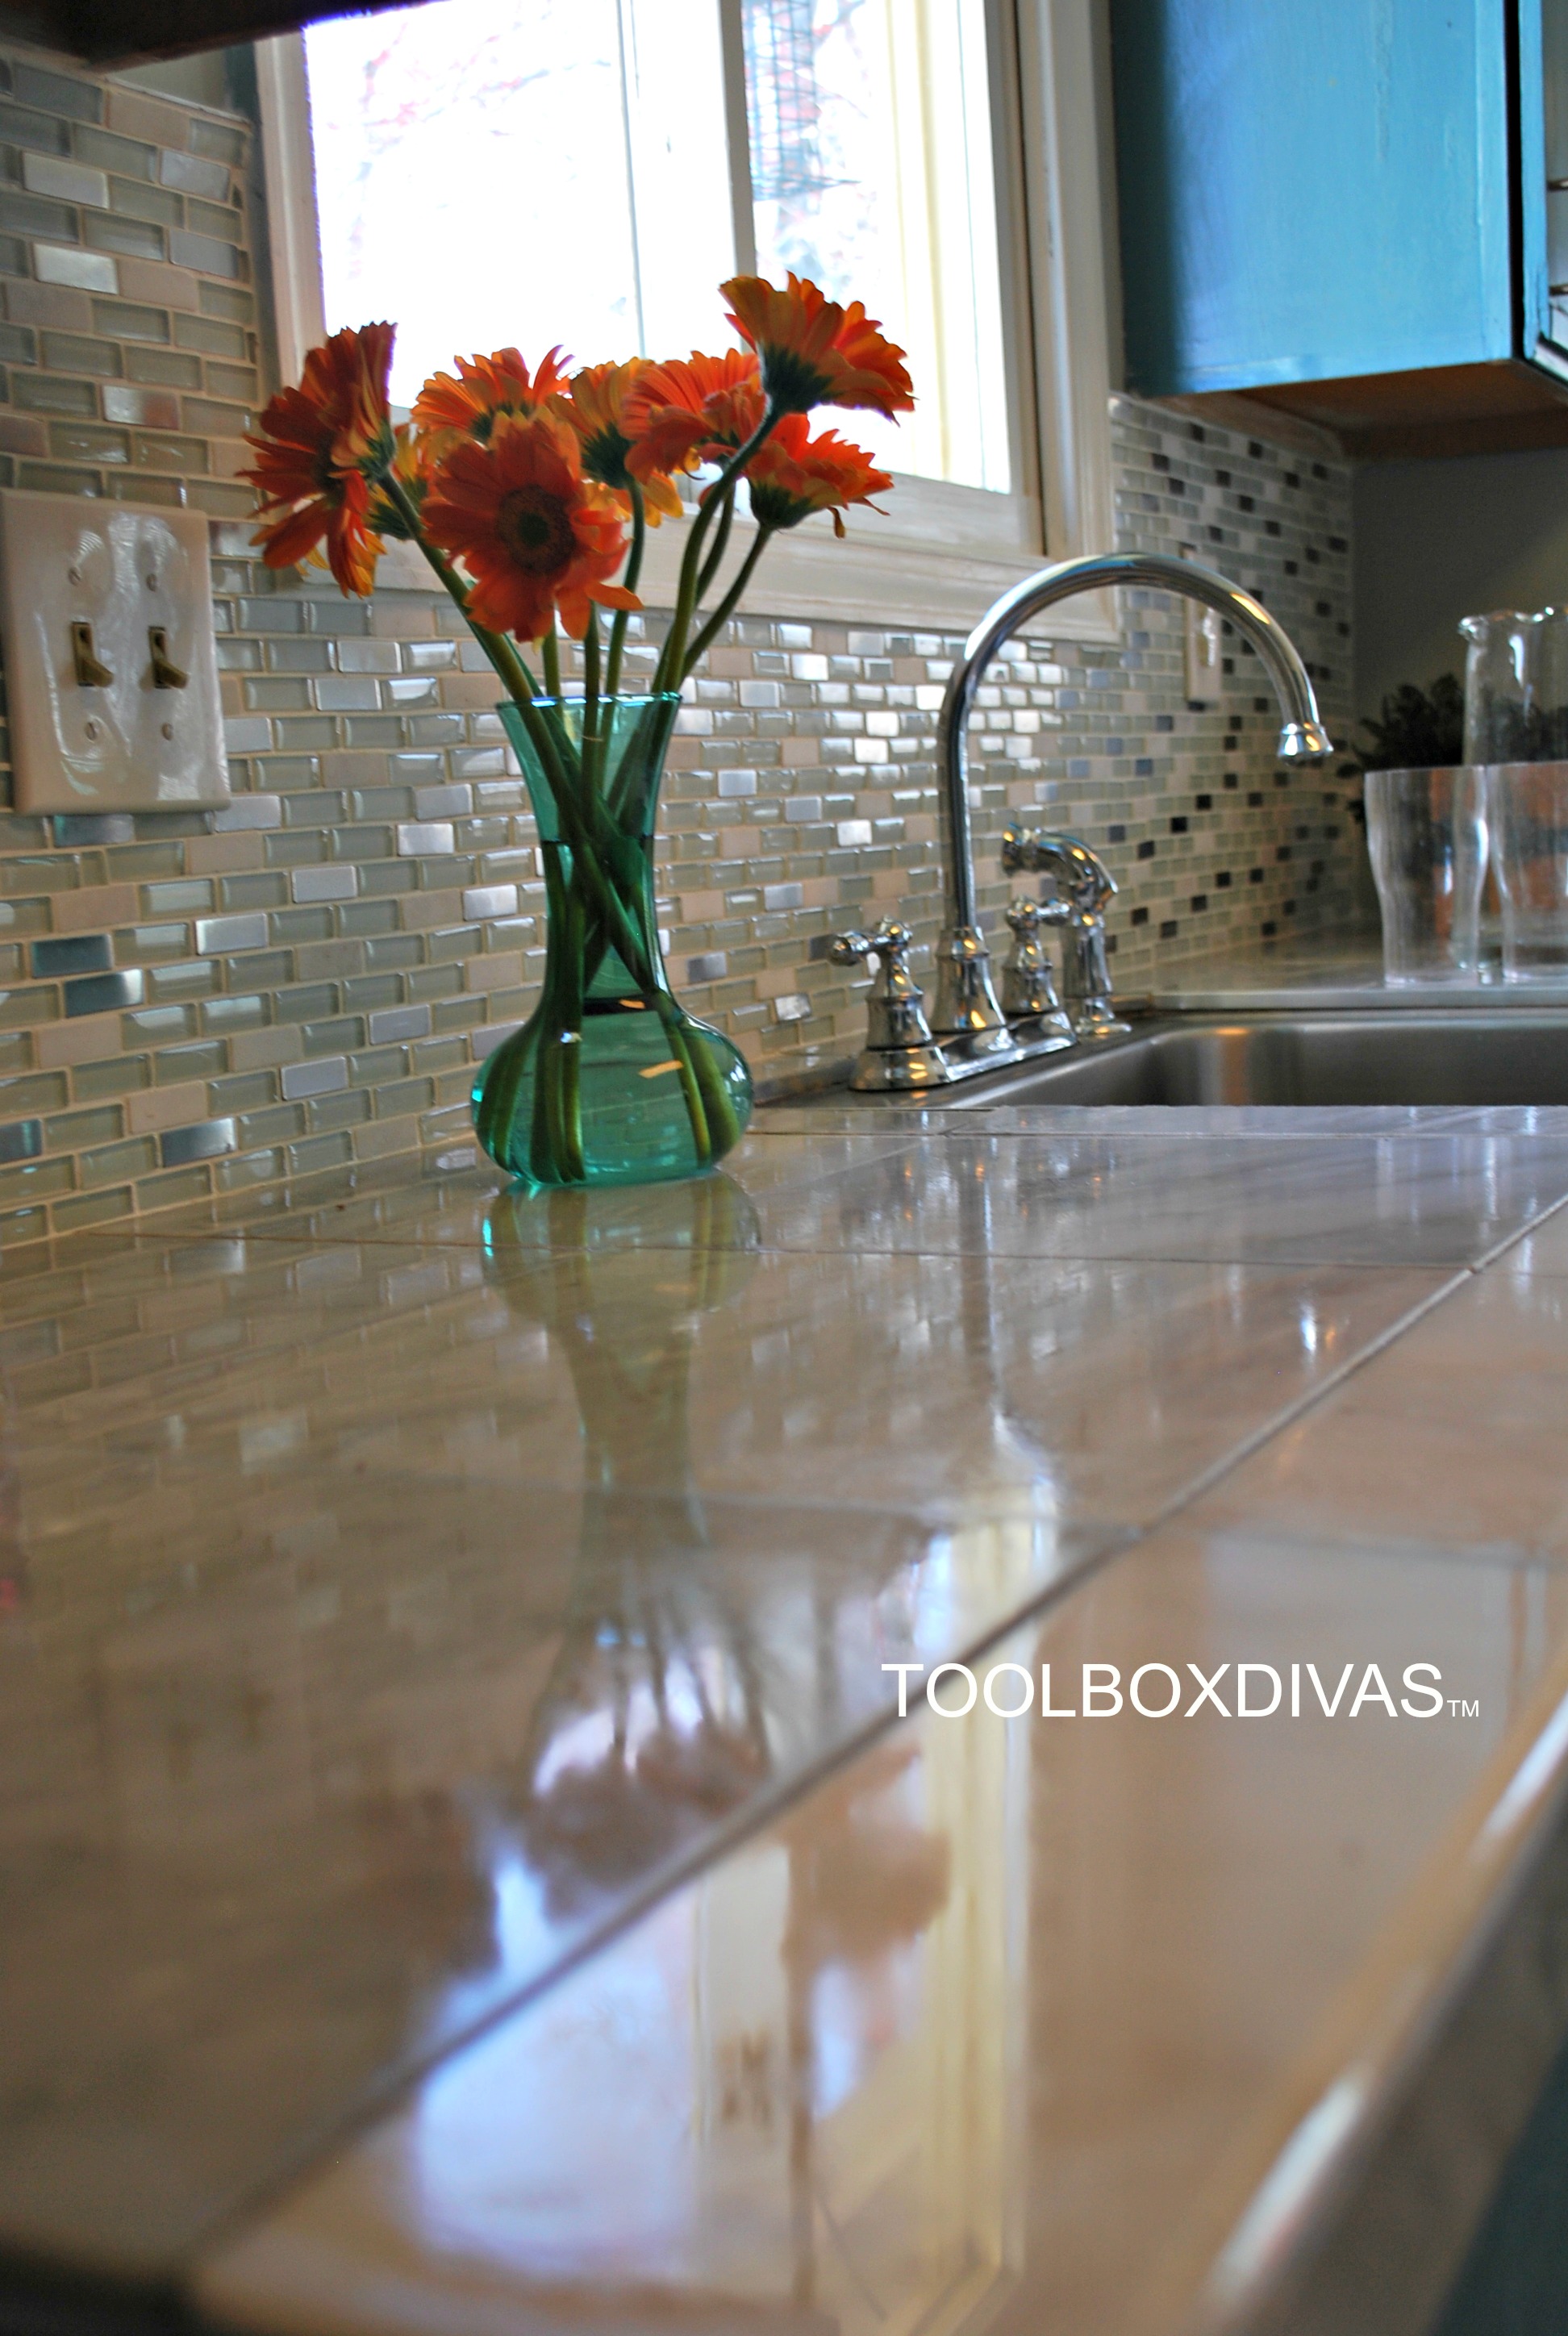 We want the look, but the staggering cost would set you back thousands. So what do you do? One of the most effective design options is use of tile. Tiling the counter is a n easy and simple procedure that anyone can handle with the right equipment. In this tutorial we will show you how to tile over a laminate countertops without having to remove any plumbing or the kitchen sink, creating a tiled undermount sink all at a fraction of the cost.
Tools and Materials
In order to save time and stress, here is a complete list of tools and materials needed for the job.
- Schluter tile edging trim
- Schluter-Ditra Membrane – Waterproof membrane
- 4- Schluter Rondec Sink Corner
- Notched trowel
- Thin-set mortar (adhesive)
- Sponge
- Bucket
- Tile saw (I used a Ryobi tabletop wet saw)
- Hand-Held Tile Cutter with Carbide Scoring Wheel
- Rubber Float
- Grout
- Caulk
- Level
- Diamond Tile Circular Saw Blade
- Tile of choice ( In my case it was Marble floor tile and Base board tile for the edges.
Prepare the Countertop
- Its weird to write this..But clean off the counter-tops. Remove any vinyl contact paper as in my case.
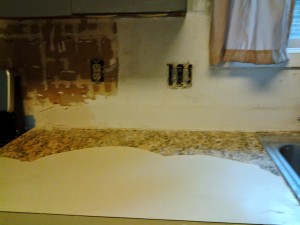
I had to remove the faux granite vinyl contact paper. - Using a 80 grit sandpaper, sand over the laminate. This will ensure adhesion.
- Once done wipe off any dust.
- And on a side note: Prepare a bucket of warm soapy water. You don’t want anything going down the kitchen drain.
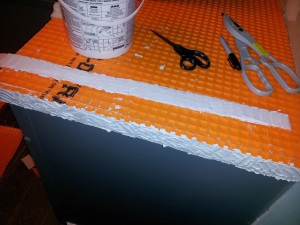
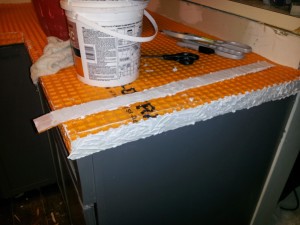
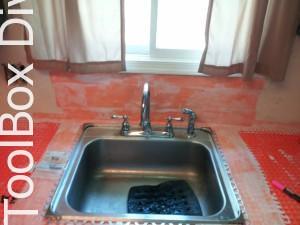
Install the waterproof membrane
- Layout the DITRA. You want to precut and layout the DITRA to eliminate waste and to ensure the membrane is laid out as flat as possible. The membrane can be cut using a utility knife or heavy duty utility scissors. I myself prefer scissors.
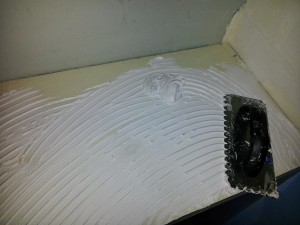
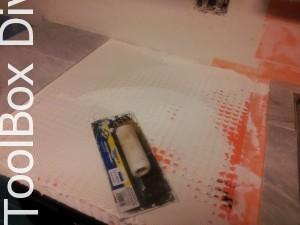
- Apply the thin-set on the countertop in a V or W motion with a trowel forming a thin layer. (I say thin layer but it should be thick enough to allow adhesion.) Do this is sections as you apply the Ditra.
- Carefully place the DITA over the adhesive. Use a flat blade to spread the membrane well, ensuring it is air tight.
- Once the Ditra is adhered you can start tiling. Drying time various depending on the thin-set used. But give it a few hours at least. Or better yet come back the next day.
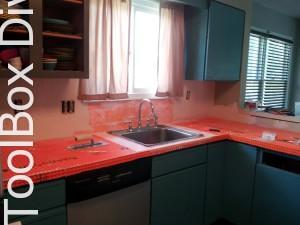
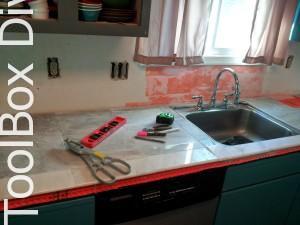
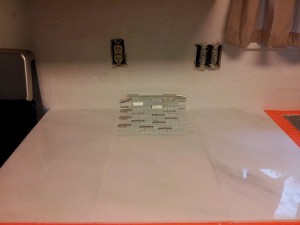
Dry Layout
- It’s best to pre-cut and do a dry layout of the tiles prior to adhering it and just jumping in and start tiling. This again eliminates waste and reducing the likelihood of awkward shapes tile in the middle of the counter. The pattern in which you lay out your tiles is up to you. I went with a standard square brick pattern.
- That being said you should start from the center of the counter space. This is so you will reduce your smaller pieces to the corners and edges of the counter.
- To create a rounded edge I used marble Base board tile.
-
Dry set of tiles 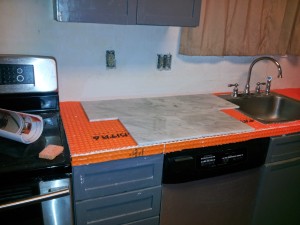
Dry set of tiles 
Dry set of tiles
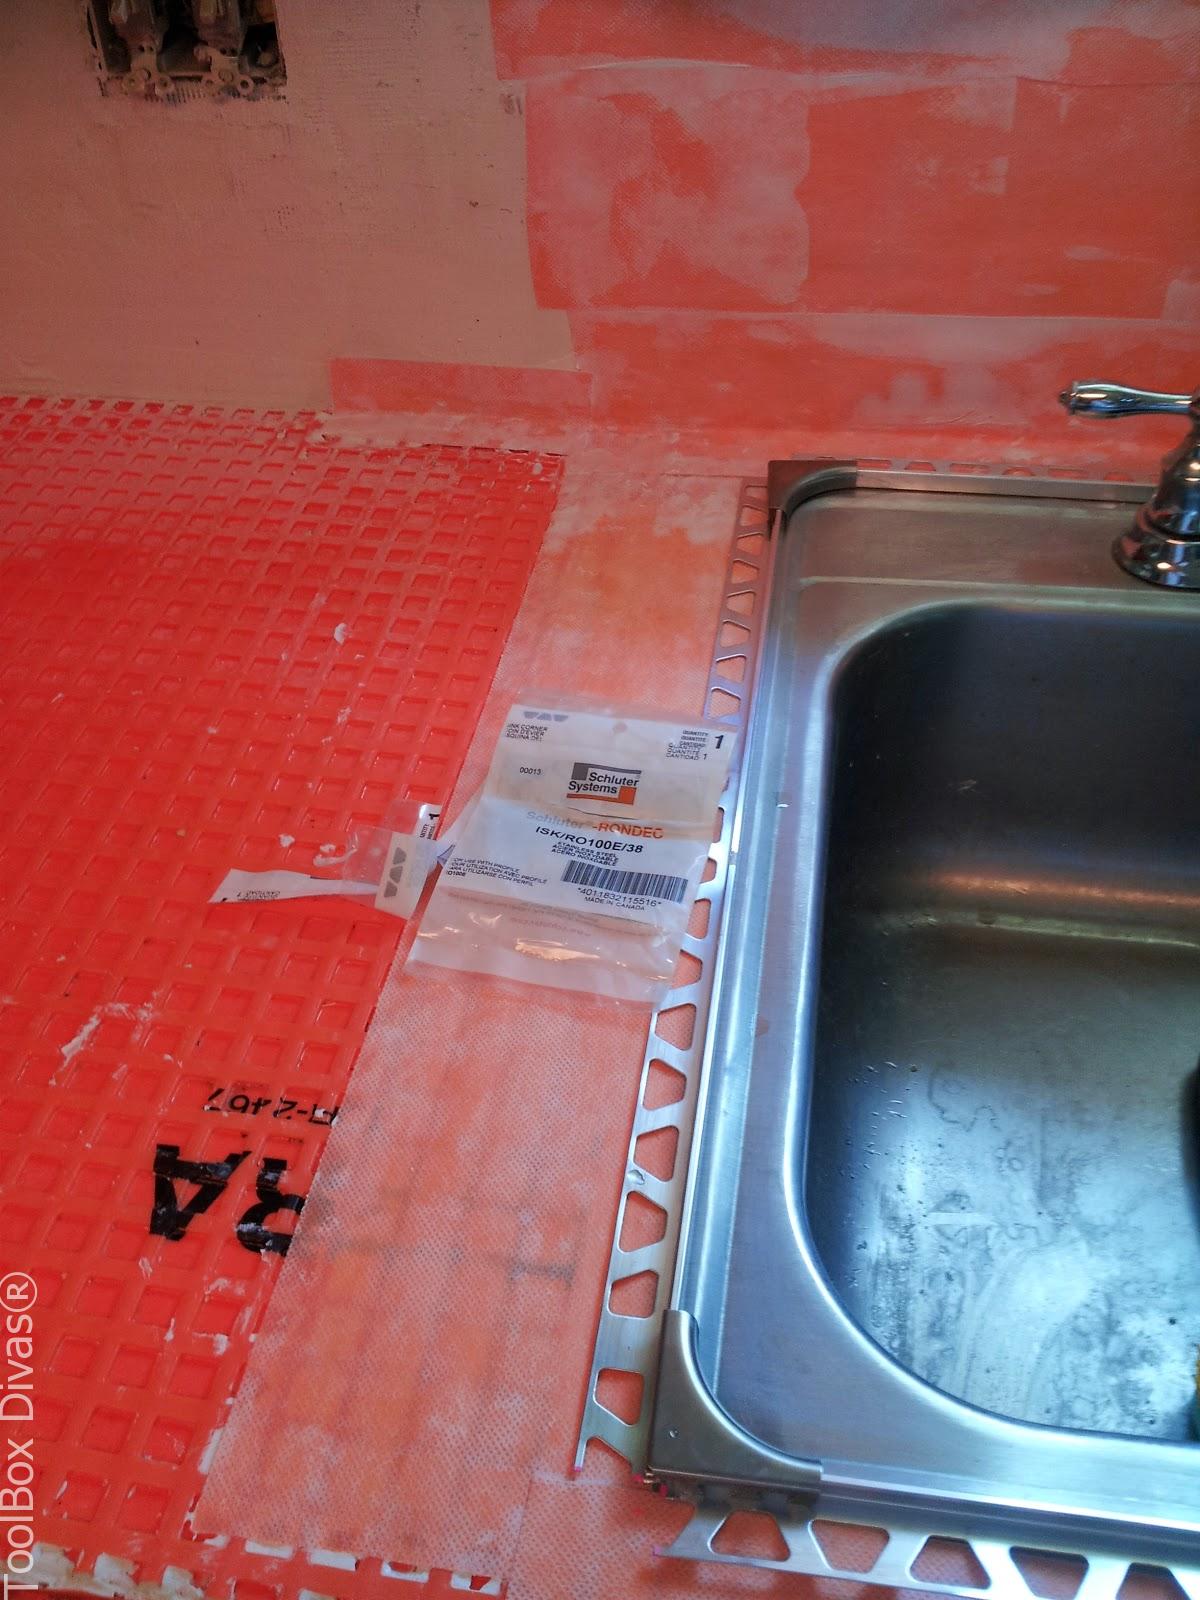
Creating the Under-mount Sink
- Cut the Schluter tile edging trim to the size of the sink.
- The trim should match the thickness of the tile.
- Adjoin the trim with the sink corner pieces (Schluter Rondec Sink Corner).
- The trim and corner pieces come in various colors and profiles.
 Tiling
- Apply the base layer of the mortar on the DITRA in a V or W pattern.
- Then “butter” the back of the tile.
- Do this in sections. You do not want to simply apply the thin-set every where and start laying the tile after. It will start to dry and not adhere properly.
- After laying out the tile ensure that the tile is level by using a level. You may have to wiggle the tile in place to evenly set the tile in place.
- It was helpful for me to start with the edge baseboard tile and work my way back towards the wall. The tile is 3/4″ thick. So you want the edge to stick out 3/4″ from the counter. This will allow you to evenly butt the side trim tile up against the 12×12 tile encasing the counter evenly with no sharp edges.
- OK for some, you may want to use spaces like a penny or the ones you can find in your local hardware store. I wanted to have as small of a grout line as I could achieve. So i didn’t use spacers. Before to use the size notched trowel that pairs with the desired spacing. 3/8″ spacing with 3/8″ notched trowel.
- To complete the undermount look apply thin-set to the Schluter tile edging trim and place the tile into the trim edging. Remember the thickness of the tile should match the thickness of the profile. In my case the tile was 3/4″ so the trim supported 3/4″ tile.
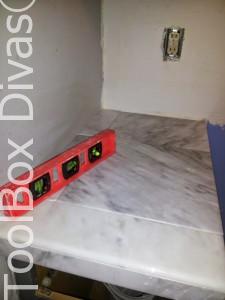
Apply Grout
- Once Tile is set you can proceed with grouting. The color you use is totally up to you. I went with a dark gray grout.
- It’s imperative that you keep your sponge and bucket filled with warm soapy water on hand especially during this stage.
- Mix your grout to a peanut butter texture in a bucket.
- Apply grout forcefully to fill the joints to the bottom. Use a float to force the grout in.
- Clear the excess grout on the tiles and clean the surface with a damp sponge to ensure a neat clean look.
Seal and you are done. Marble countertops with out the $3000-$5000 price tag.
Tips I learned if I had to do this again.
This was my first real tile job. I learned A LOT! I made A LOT of mistakes. It happens. It’s simply apart of the process. But I’d like to share a few of the things I’d do differently if I did this again. (BTW I have no intentions on redoing this. My kitchen update was completed to buy time so that I could save money and totally gut my kitchen at some later date in the future, removing the old 1980s cabinets FOR GOOD.) Check out my completed kitchen update.
- OK GO BIG! For this project I used 12×12 tiles. If I could do it again I would have gone with larger 12×24 tiles. I think at the time I liked the color in the 12×12 better. Now I look at it and wish there were fewer grout lines providing a more modern clean look.
If I could do this again. I would have used larger 12×24 tiles. Fewer Grout lines. Cleaner look. - When using a tile saw always empty the water after each use and don’t allow your blade to sit in the water…EVER. One thing you want to avoid is a dull blade. And at $30+ a pop having the get a new blade sucks.
- Plan, plan, plan. I can’t stress this enough. When getting into any DIY project if you fail to plan, plan on over spending and doubling or tripling your completion time. Do a dry layout of your tiles before applying mortar. You don’t want to end up with a tiny piece in a very visible spot. Or that very tiny piece at all for that matter.


Nice! I think it looks very nice & good job. I like the colors & style too plus the budget you did this on. Very , very talented. Julie
Thank you so much Julie! I really appreciate your kind words.
Looks fantastic! About how much did this project cost? Just trying to get an idea. I have similar space in my own kitchen (:
Hi Kelly, Thank you for taking the time out to review my kitchen makeover. I listed a rough cost estimate here https://toolboxdivas.com/2015/04/900-and-1000-hours-later-finally.html
Good luck with your project. I know its going to be beautiful!
I came over from Hometalk. I love what you did and even more I love the budget you did it with. Excellent job! What is the paint color on your cabinets? I LOVE it!
Thank you so much!I used Behr paint called Harbor.
I can’t thank you enough for solving one of my biggest DIY headaches. I love my kitchen but it needs a re-do in the worst way. But overhauling a house on my own means big systems had to come first, so very little left for making things look better. You are a genius and I’m forever in your debt! Thank you!
Aww Thank you so much Sally! I am so happy I was able to provide you with inspiration. I totally know where your coming from. When I first moved in I had so many things that needed my attention first, like my HVAC system and hot water heater. It was impossible to conceive totally re-hauling my kitchen. I couldn’t find anything online that really fit what I was looking to achieve. So I am very happy to provide you with something I did not have when I started. Please don’t hesitate to reach out to me should you have a question or need anything. Welcome ToolBox Diva 🙂
If you actually bought an under counter mounting sink would you just sit it in and then do the time on top? Or would I have to mount it under my existing countertop and then lay the tile? I so want to do this!! Tried painting and of course, it is peeling off. So looks 2x as bad right now!
I totally get your frustration. I actually don’t have the answer to that question. I have never installed an under mount sink. That would be a question for a person at Home Depot or Lowe’s to answer. I’m sorry. My sink was a top mounting sink.
Thank you for taking the time to answer me! Love your blog!! Can’t wait to dig through it!!! LOL
You can do an under mount you need to put backer board all the way around the hole. Biggest problem is getting a sink that fits the hole. Building up counters from plywood backer board is not all that hard and would allow an under mount on the sink.
You are amazing! This is the most ingenious idea I have seen in a long time! We are hoping to buy our first home in less than a year and flip it on a budget. This is a beautiful look and I absolutely love your creativity! Thanks so much for sharing!
Wow thank you so much Erin for your very kind words. Buying your first home is probably one of the most exciting times of your life. I remember feeling happy and nervous all at the same time. I wish you all the best.
Could you provide a closer pic of the sink?
Love your project!
Thank you! Yes I will find a closer shot and email it to you
That saves me. Thanks for being so sesbnile!
We’ve been stumbling around the internet and found your blog along the way.
We love your work! What a great corner of the internet 🙂
I know this is an old post but, I’m planning to do the same to my counter around my sink. My question is, did you remove silicone, etc from around the sink and lift it out first, before applying the waterproofing, then drop it back in prior to the edging? Any extra details on the sink portion, I would be so extremely grateful!!
No I didn’t do any of that. I do think if I did it again I might have gone with larger tiles or another route all together like Epoxy to look like Marble or a different contact paper. Because the grout lines drove me insane.
Ok, in the picture it looked like the orange waterproofing was under the sink edges as well.
I enjoyed this post. I’m hoping to do the same to our counters.
I wonder, though, why the grout lines bother you? Is it just the look or does it make cleaning more difficult?
I ask because I certainly don’t want to make cleaning anymore difficult, but our laminate counters from the 80s need go.
The lines became incredibly hard to clean and it drove me nuts to see dirt lines on my counters. If I could do it again, I would opt for epoxy. It’s a really affordable alternative.
Beautiful job. Can you tell me approximately what you spent?
Thank you so much! I believe with the tools it was roughly under $400.
What do you think of 48 x 24 Porcelain Tile?
sounds good
I noticed later you completely remodeled your kitchen. Were you unhappy with the tiled countertops?
The tile was supposed to only be a temporary solution until I had the money to completely redo my kitchen. I desperately needed new cabinets. The old ones were original 1980s laminate and falling apart.