How to Repair Drywall After Removing Tile: Prepare for Tiling
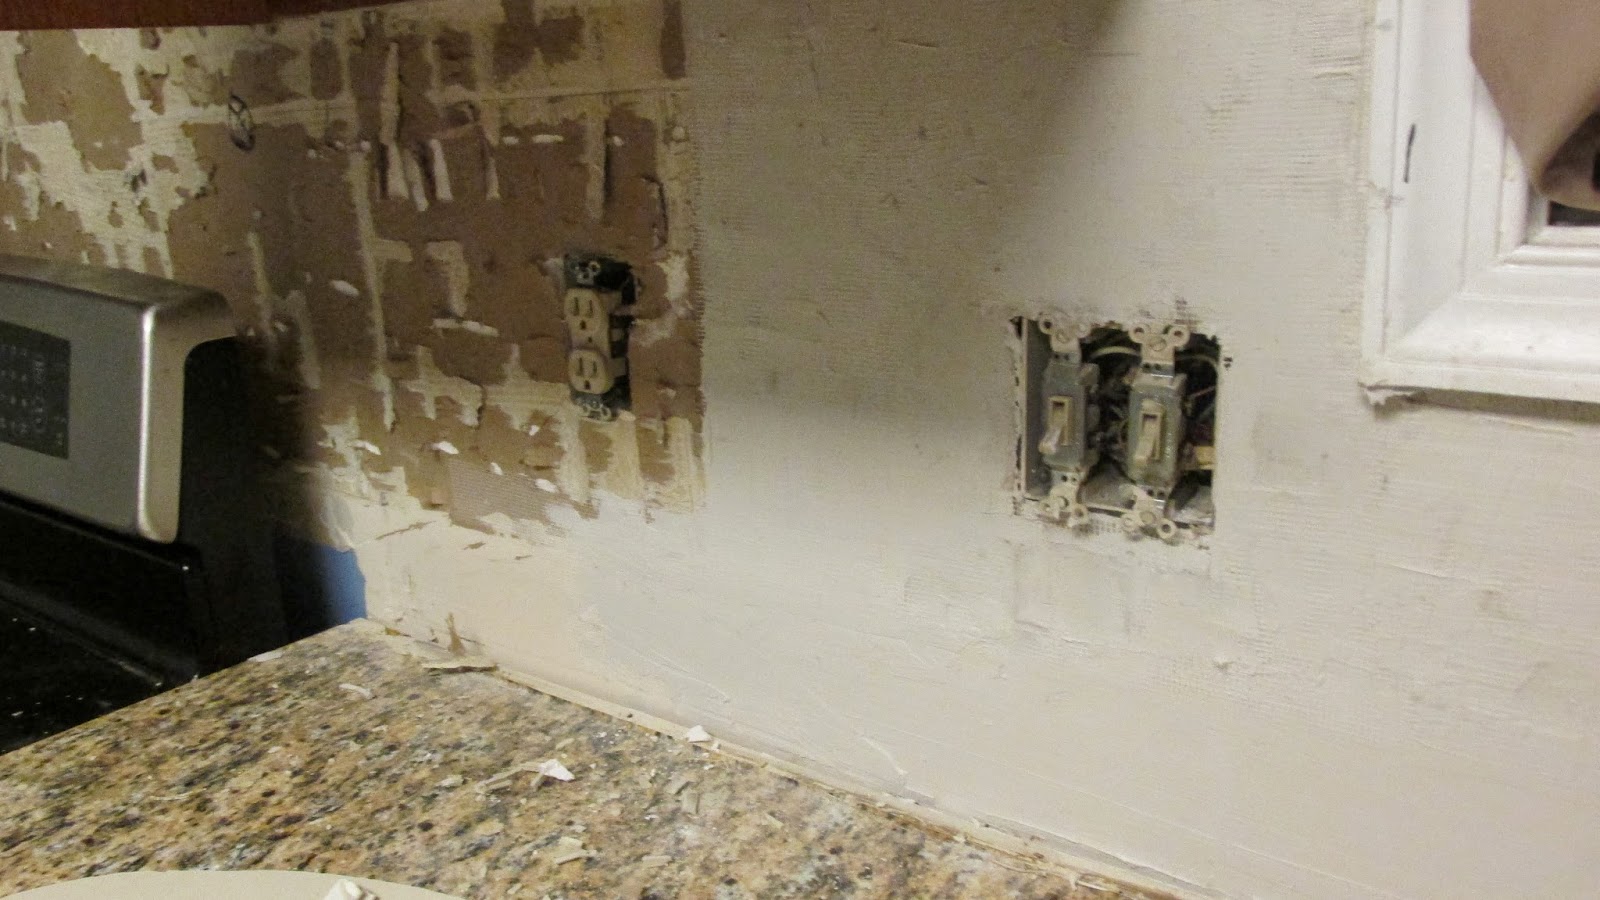
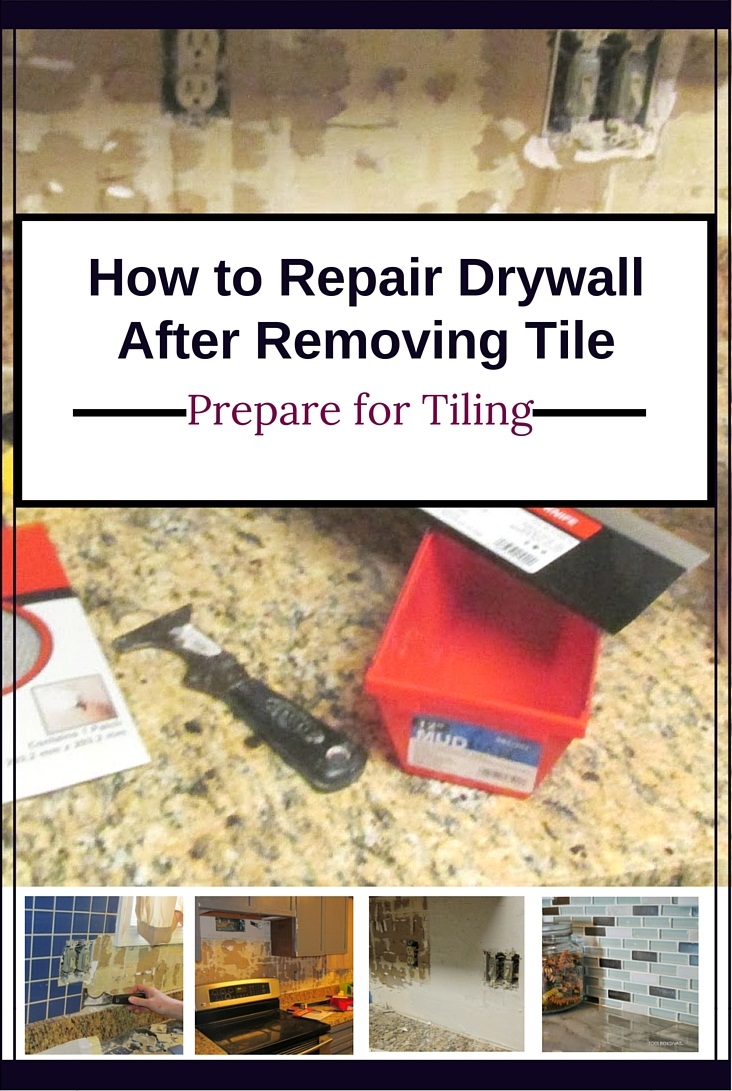 Congratulations! You’ve successfully removed the old, ugly and dated tiles. And if you read my previous entry, you did it without damaging the drywall ;). So now in a perfect world, you’re ready to start tiling. Well, not so fast. Drywall is so delicate. You’re bound to be left with cracks and holes (divots) after removing the old tile. So while you don’t have to reinstall new drywall, before you’re able to apply the new tile, you first have to prep the wall for the new application.
 Things you may need
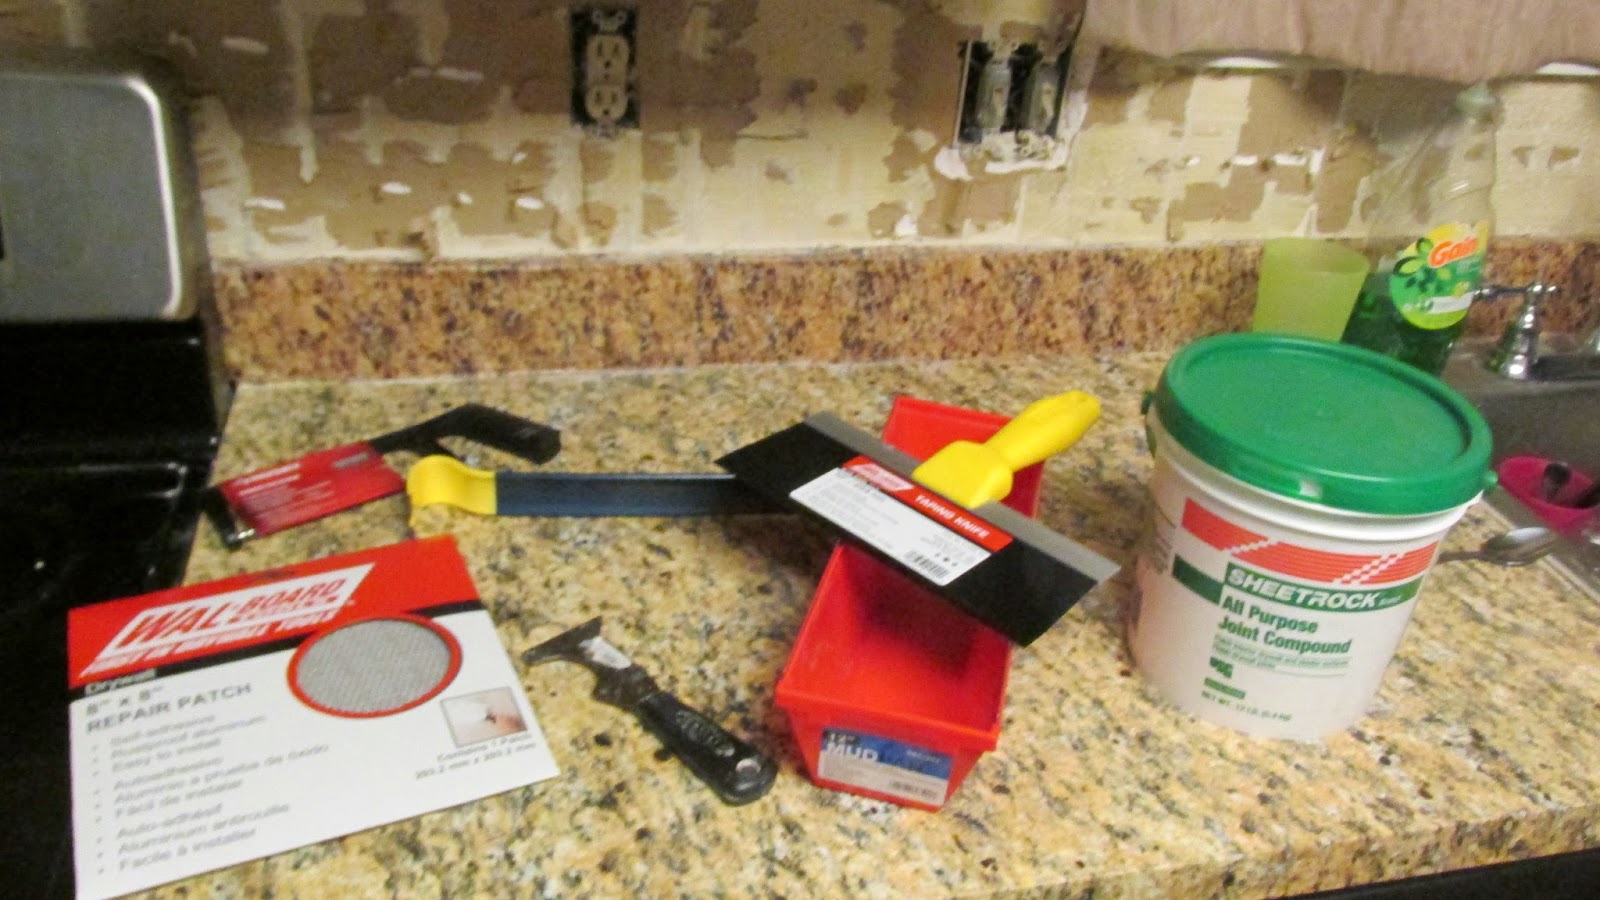
- Putty Knife

- Scraper
- Drywall Sanding Sponge
- A sponge
- Spackle or Joint Compound
- Goggles
- Dust mask
- Gloves
- Taping knife
- Drywall mesh tape (Optional)
- Drywall Repair Self Adhesive Wall Patch
- Drywall Mud Tray
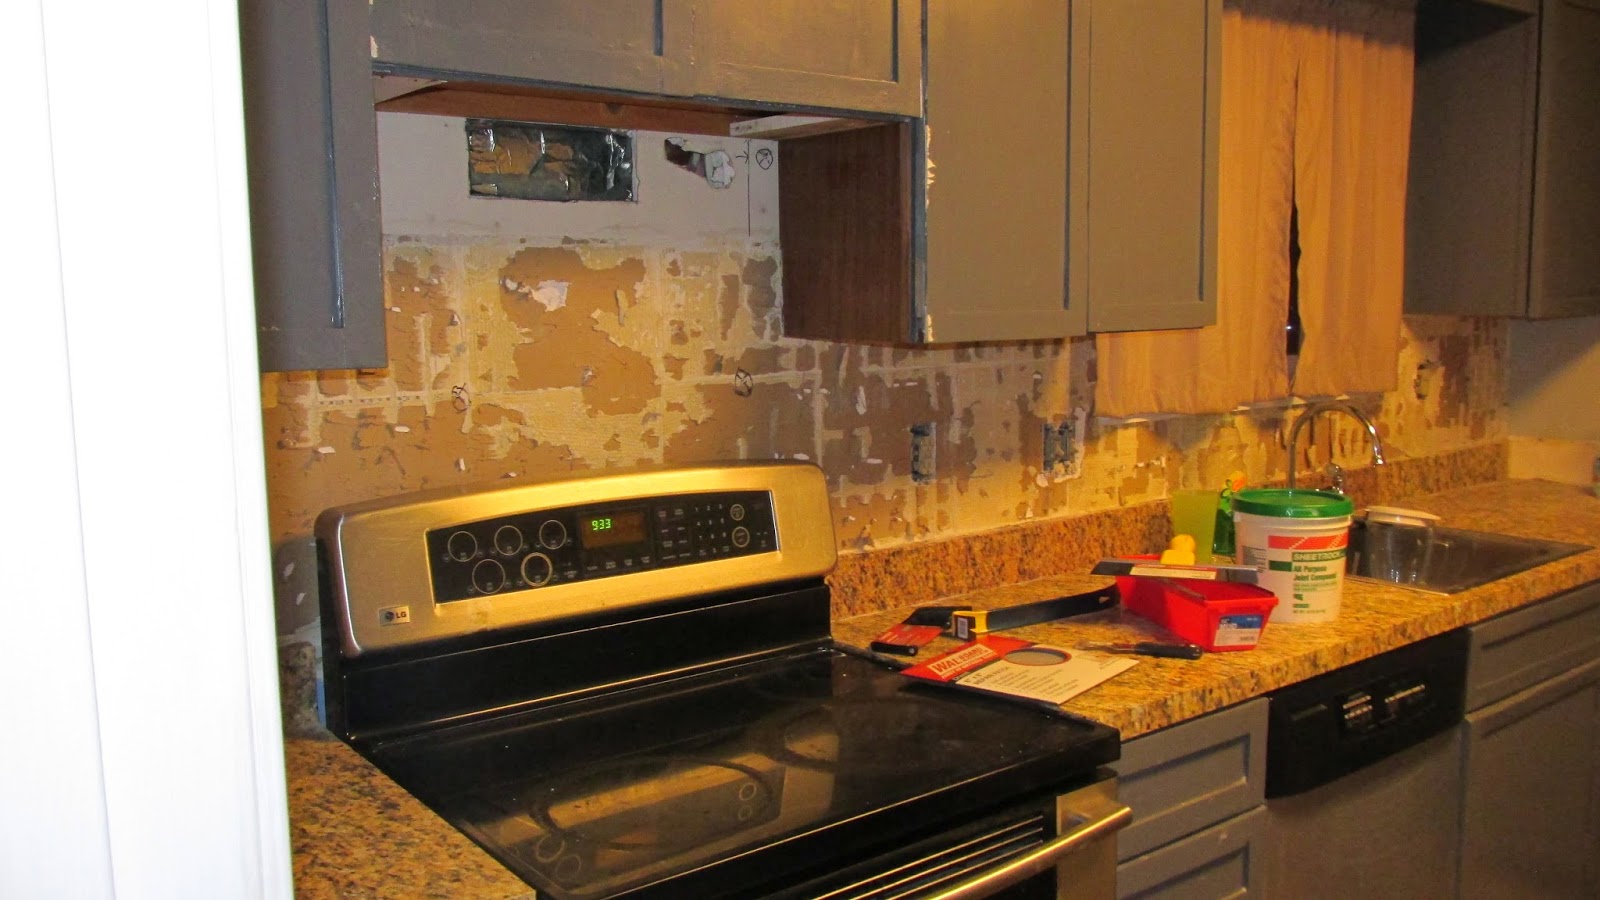
- Start by removing any excess adhesive from the wall. This can be done with a scraper. For additional strength use an adhesive remover.
- Brush away any dust and fallen tile residue/debris.

- Now if your kitchen is anything like my kitchen, once I removed the old tile I found issues in the original drywall that required my immediate attention before I was able to fill any cracks or holes in the wall. There were actual holes in the drywall under the previous tile that the previous owner (original tile installer) covered up with merely tiles. I had to first patch the holes in the wall in order to have a secure backing for my new tile. Luckily none of the holes were large enough that it required me to buy drywall to patch up the holes. Instead I was able to use a Drywall Repair Self Adhesive Wall Patch.
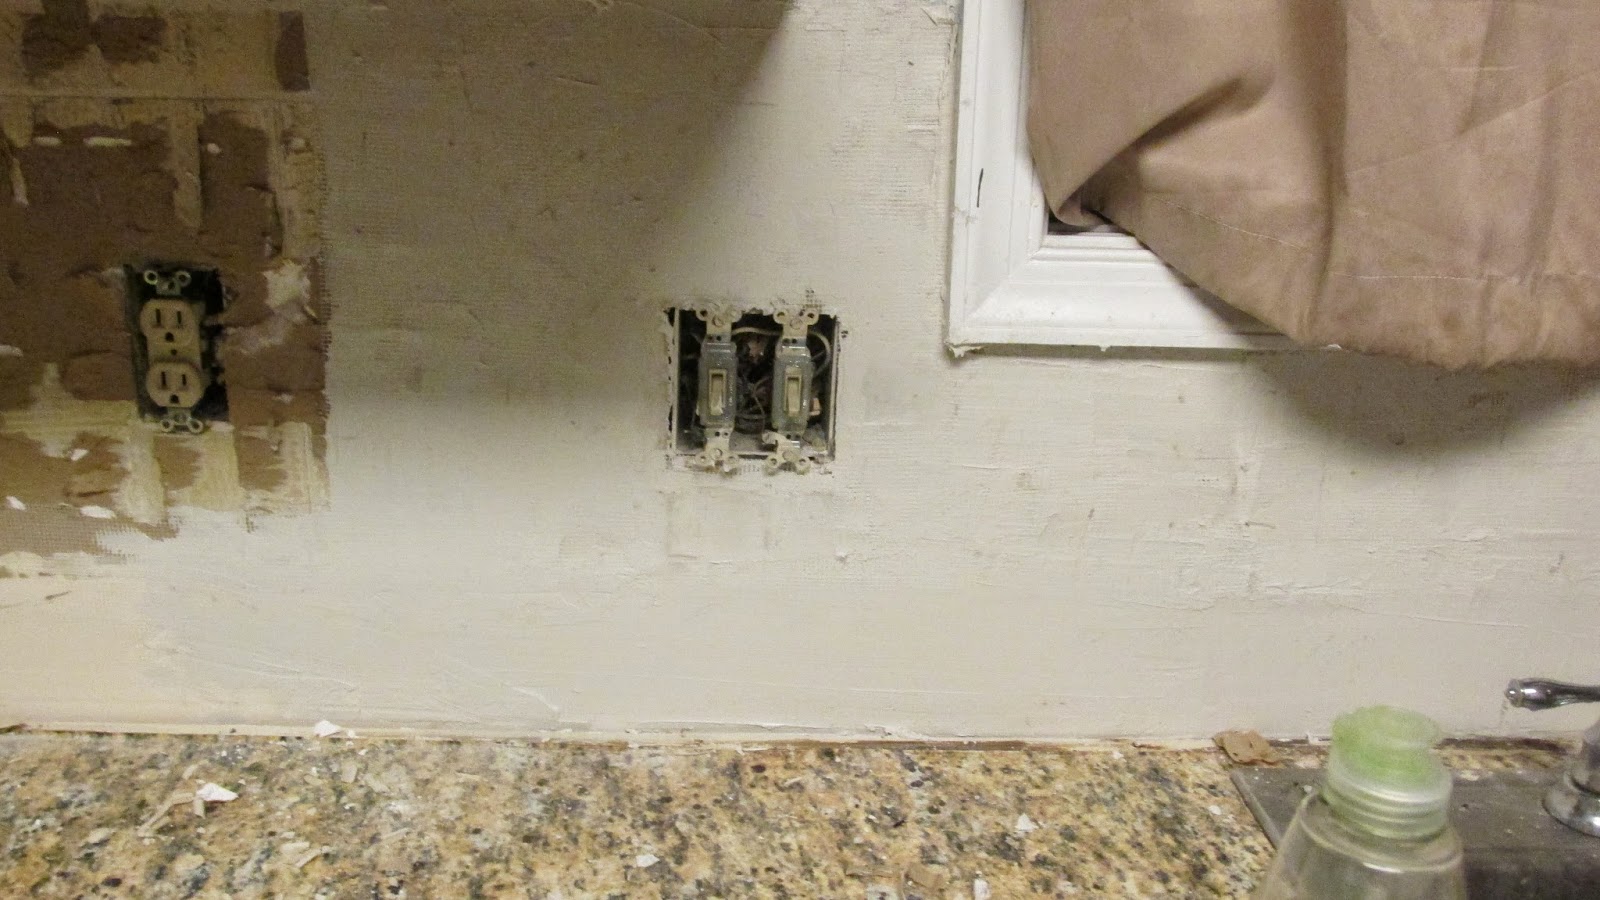
- Fill the cracks and hole/divots with the drywall compound or Spackle. The key to this step is applying the joint compound as smoothly as possible the first go round. This makes the sanding to creating an over all smooth surface for retiling in the long run a heck of a lot easier. Using a taping knife apply the joint compound in a diagonal down then back up motion, applying a thing layer of joint compound. Cover the entire area, ensuring a smooth, even coverage. (TIP: Apply drywall mesh to the wall prior to applying the Spackle or joint compound. This helps create a smoother finish.)
- Allow time for the joint compound/Spackle to dry in accordance with the instructions found on the packaging.
- A second coat may be required of compound.


- Once the Joint Compound is dry (usually 24 hours) sand the rough spots using drywall sanding sponge or drywall sanding paper. Wear a mask and googles during this process. Also ensure adequate ventilation by opening a window.
- Wipe down the wall using a damp sponge to remove any dust. A wet-vac is very useful removing the excess dust and debris. (TIP: Remember to keep your sink covered at all times. Don’t dump any water with possible debris from the old tile and adhesive down the drain. If you do you will stand the risk of creating a larger problem…a HUGE Plumbing problem. So protect your sink and garbage disposal from any dust or debris. I advise keeping a bucket of soapy warm water at hand at all time during this process.)

The link ‘Next:Installing a Tile Back splash’ does not connect or link to another site to show how the new tile goes on after the old tile is removed. I now have a naked back splash wall that has some drywall face paper/glue spots and some bare drywall. Will the glue for the new tile adhere to the bare drywall??
yes it will. I’m sorry for the huge delay on getting that tutorial up. So you have two options for adhering to the wall. You can use a ceramic tile adhesive/matsic like this Ceramic Tile Adhesive – http://www.homedepot.com/p/Custom-Building-Products-AcrylPro-1-Gal-Ceramic-Tile-Adhesive-ARL40001/100015587?cm_mmc=Shopping%7cTHD%7cG%7c0%7cG-BASE-PLA-D23-Tile%7c&gclid=Cj0KEQiAl5u2BRC6yszC1_75v5wBEiQAD-hdzxolTX0VnkObPAIoAXV56GUy7YyIu5amNoAeB8TAX0AaAn7O8P8HAQ&gclsrc=aw.ds
Or you can use a tile mat like this MusselBound 15-sq ft 0.031-in White Plastic Commercial/Residential Tile Membrane. http://www.lowes.com/pd_555605-65158-555605-W_0__?productId=50141955.
I used the tile adhesive because, even though it’s a little messy its cheaper and I feel it ensures a good bond. But I may use the mat in another upcoming project.
But you know what? Thank you! You motivated me to get the tile installation post up.
Thanks for the reply and good luck on completing the site.
i wish i came across this before my bathroom diy, currently have drywall mud on the wall, it is very uneven, have been sanding for day’s still uneven, this weekend, I will be removing the drywall and replacing it, and applying a not so heavy handed amount of the mud, very frustrating,
Oh Man I’m sorry to hear that. Yes, the neater the application, the easier the sanding phase. Don’t beat yourself up about it though. There is an art to drywall installation that very few have mastered. I’ve made mistakes in the past. You want to apply 3 to 4 thin/smooth coats for complete coverage of the drywall tape. Allow the coats to dry in between applications. Also don’t forget to wear a dust mask during the sanding process. The drywall dust is very hazardous. I wish you the best of luck this weekend. I know you can do it. Feel free to message me if you have any questions.
How long does it take to do…taking down tiles….hours..Thank you so much
Hi Linda! That actually is the quickest part of the tiling and retiling process. It took me about an hr or so. It popped off relatively quickly once I got started. Also there were some areas where the old tile didn’t fully adhere to the wall.
Can you use the same method in a tub surround with cement board? What would I use in place of dry wall compound on the cement board?
With a tub and shower I recommend replacing the cement board because chances are when the wall was originally tiled the requirements and products available were very different.
I’d like to recommend using BONDERA ( http://www.Bondera.com ) for such projects – a double-sided peel-back adhesive matte that sticks on the wall and has a 1/4″ grid on the front to keep you plumb, level and square – no overnight dry-time, so you’re ready to grout and be DONE! Huge time and cost savings overall.
Using Bondera, I successfully and beautifully put up the tile backsplash in my kitchen six years ago but now want to change tile. Is it possible to simply remove the old tiles and then brush off any mortar that may have pushed through the tiles and onto the Bondera? Or do I have to remove the old Bondera too? Please help.
Hey Marty You can remove the tile and scrap away the excess mortar. But you may have to repair any scratched or damaged drywall with joint compound. You also want to make sure the application and finished wall is as smooth as possible before reapplying the new tile. For areas that are too badly damaged, I would cut out the drywall and patch it up with a new piece of drywall. I would remove the old Bondera. It’s not meant for reapplication.
do you need to prime the joint compound first so it doesn’t turn back to mush?
Great guide!!
Would you suggest priming the finished skim coat before applying the thinset?
You can if you want but it’s not necessary at all.
How would I PAINT the backsplash area after the tiles have been removed and the glued paper from the tiles is still in some places and other places have just brown paper?
Have the same question as Mary Francis about painting. We removed very old tile, somewhat successfully and have most of the adhesive up, but there are places where the drywall skimmed off and only brown is left.
Would a think skim coat work?
Do I need to apply tile primer before backsplash installation after fixing brown spots of drywall with joint compound? Or will the tile adhesive stick to the joint compound without tile primer?