Yes, You Can Paint Your Bathtub and Tile: Here’s How
Learn how you can easily paint that ugly bathtub and tiled shower wall for under $100.
This post is sponsored by Rust-Oleum.
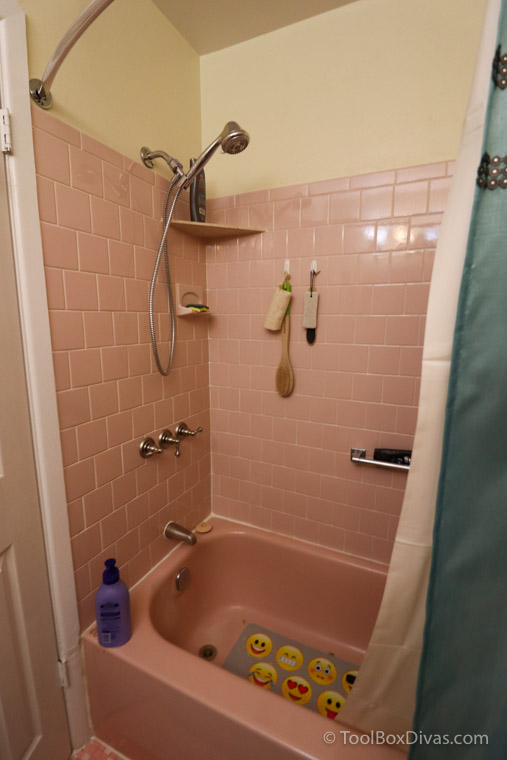
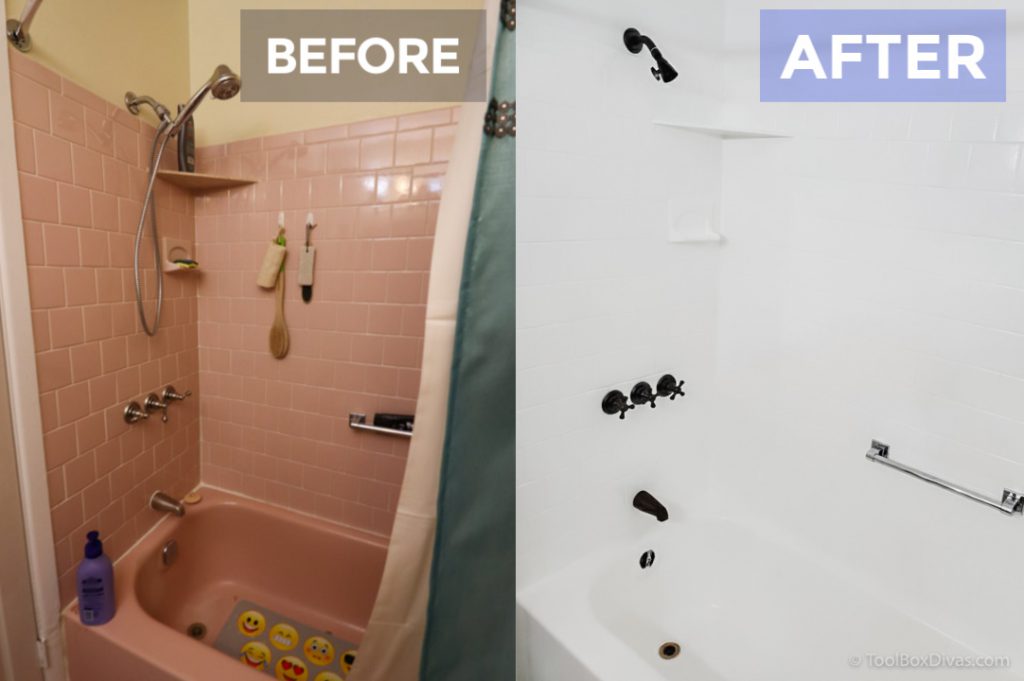
The question you’re probably asking is, “Did you just say ‘paint’ the bathtub and tile? You can do that?” And the answer is YES. For around $100 you can completely transform the tub/shower surround in a weekend. We are going to paint this “salmon” colored bathtub and tiled shower wall in a few easy to follow steps using the Rust-Oleum Specialty 1 qt. White Tub and Tile Refinishing Kit.
Here’s What You’ll Need
- Rust-Oleum Specialty 1 qt. White Tub and Tile Refinishing Kit
- Krud Kutter 32 oz. Original Concentrate Cleaner/Degreaser
- Caulk Remover
- 5 in 1 tool
- Wire Brush
- 400 – 600 wet/dry grit Sandpaper
- Utility Knife
- Roller Brush
- Pack of Foam Brushes
- Respirator
- Safety Glasses
- Gloves
- wax cloth
Ok, Let’s Get Dirty!
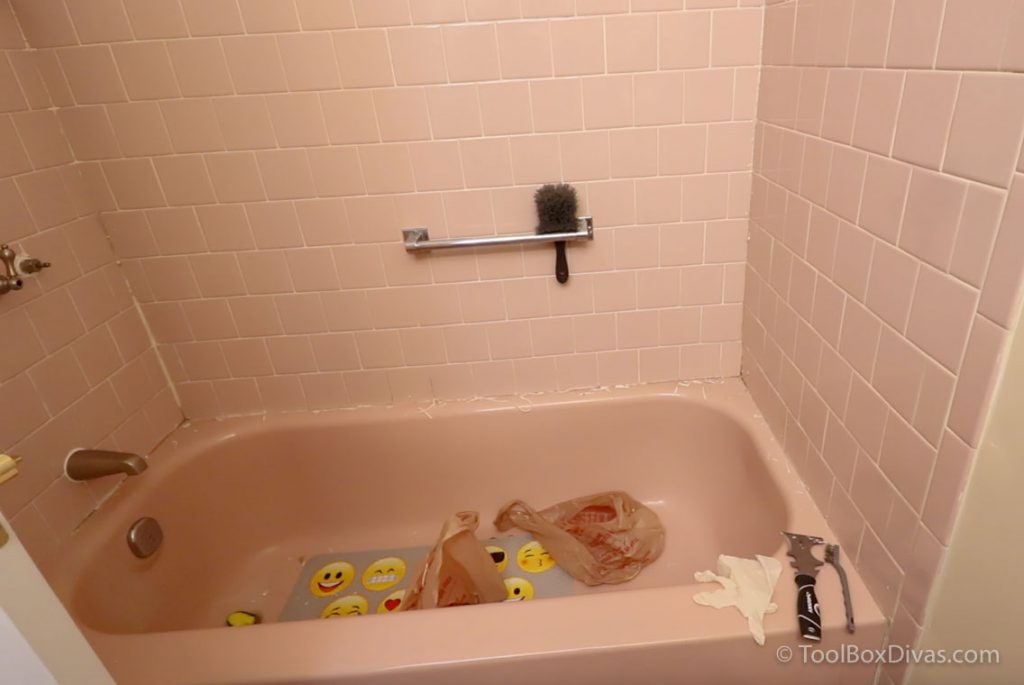
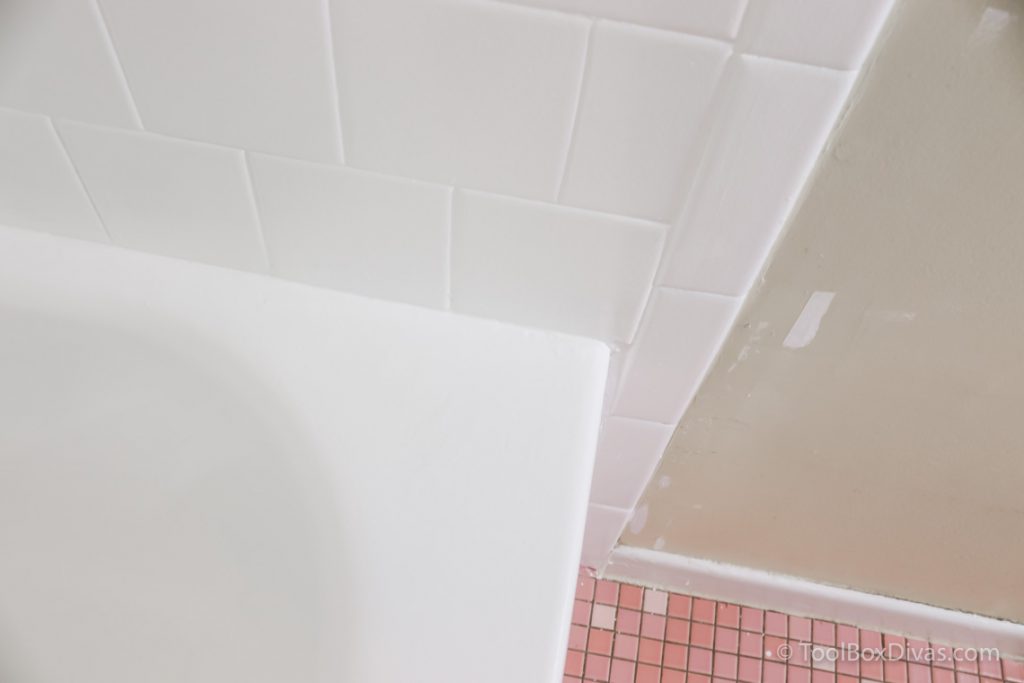
Step 1. Clean and prep the tiles and tub.
I’m working with a cast iron tub and tiles that were originally installed when the house was first built in the 1960s. There were a few gaps and cracks in the grout.
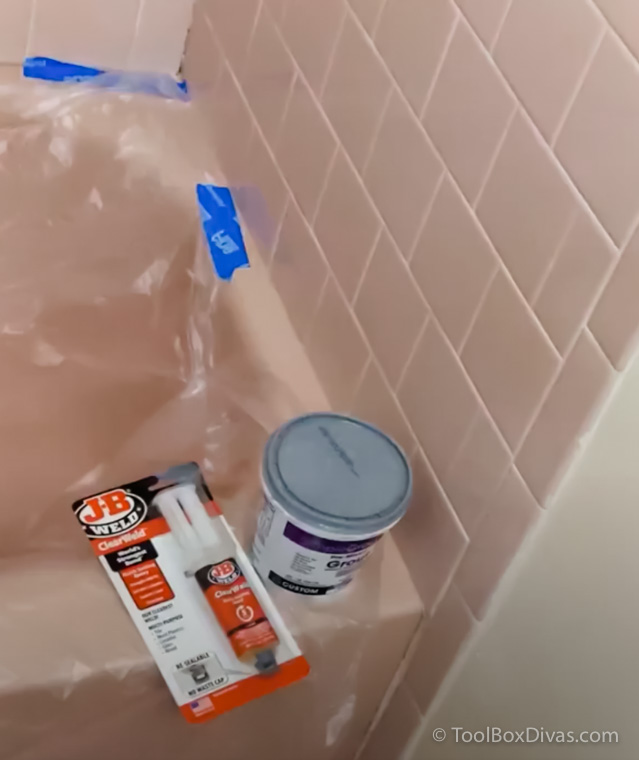
So before you can get started on anything you want to remove and replace any broken tiles. And make any necessary repairs like refilling areas where the grout had fallen out over the years. In this case, I’m repairing the grout using a ready-made mix that I had from a previous project. It doesn’t matter what color grout you use to do the repairs because you’ll be painting everything once you’re done the same color.
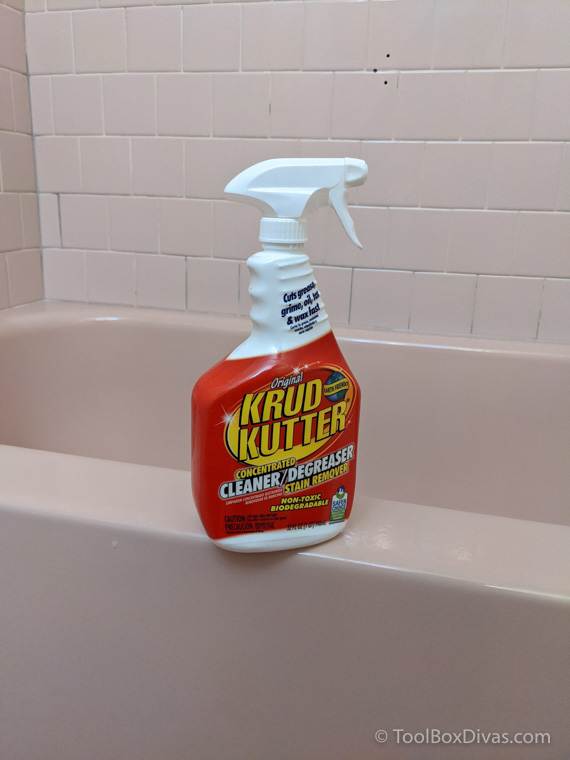
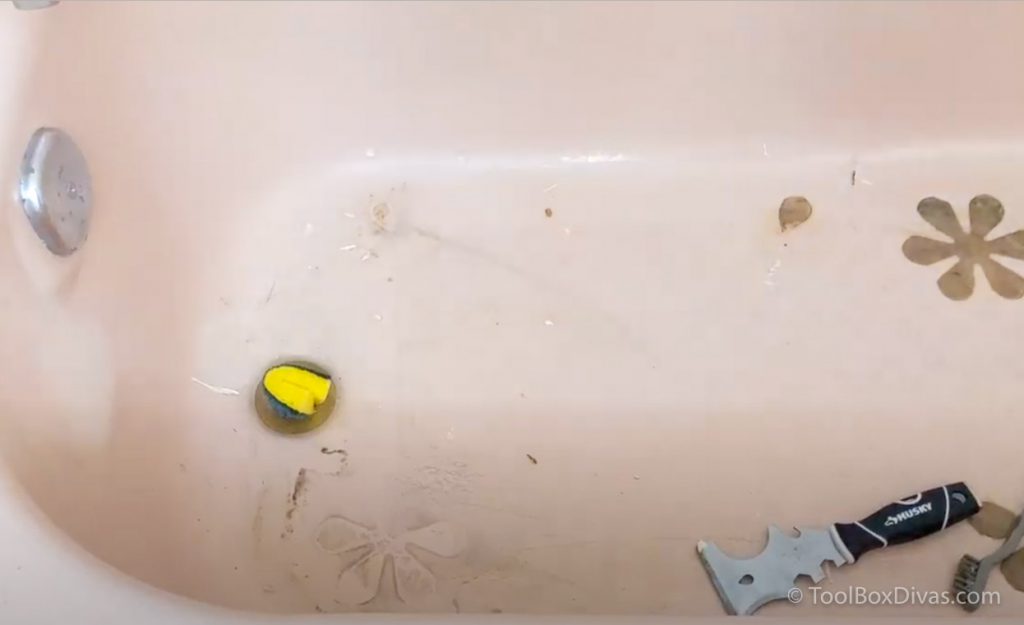
Remove any stuck-on stickers and anti-slip treads from the bottom of the tub. This might take a little elbow grease. I used the Krud Kutter 32 oz. Original Concentrate Cleaner/Degreaser to help loosen up the dirt and grime that had built up over the many years.
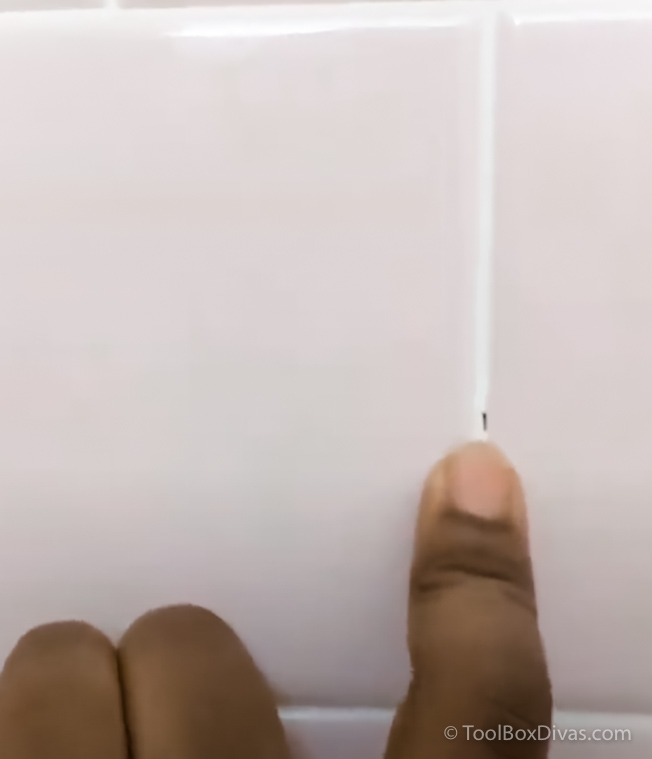
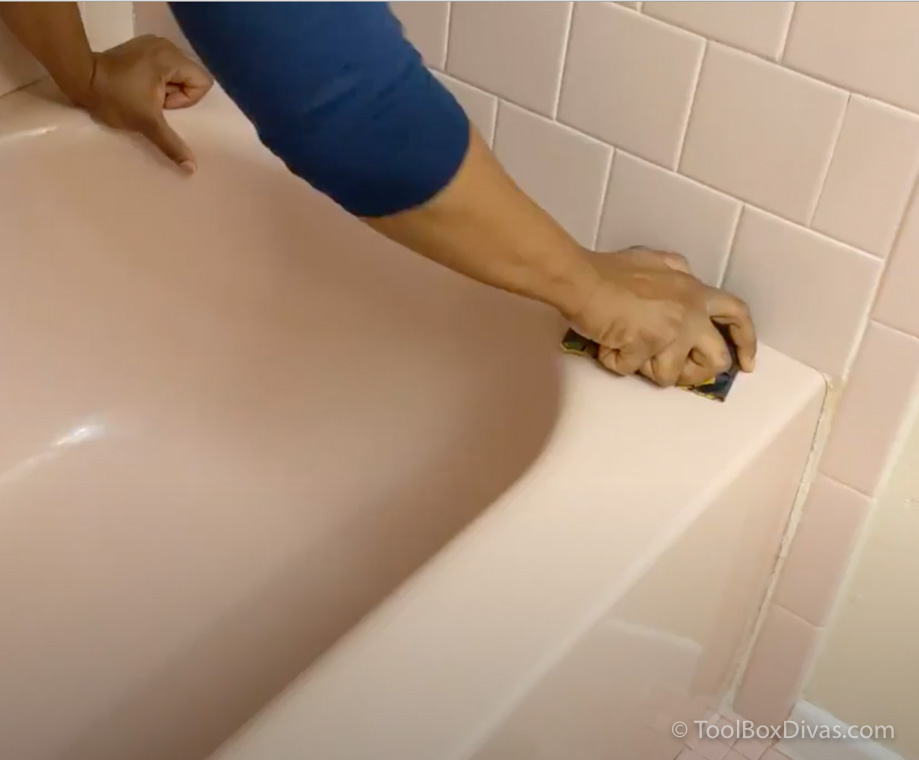
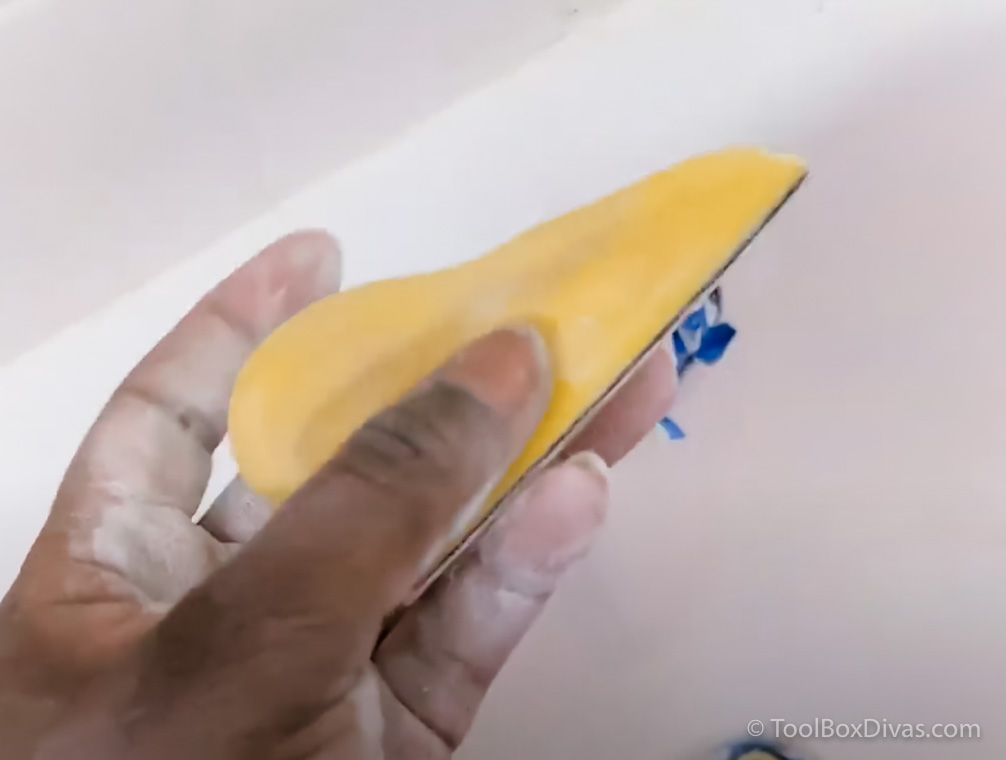
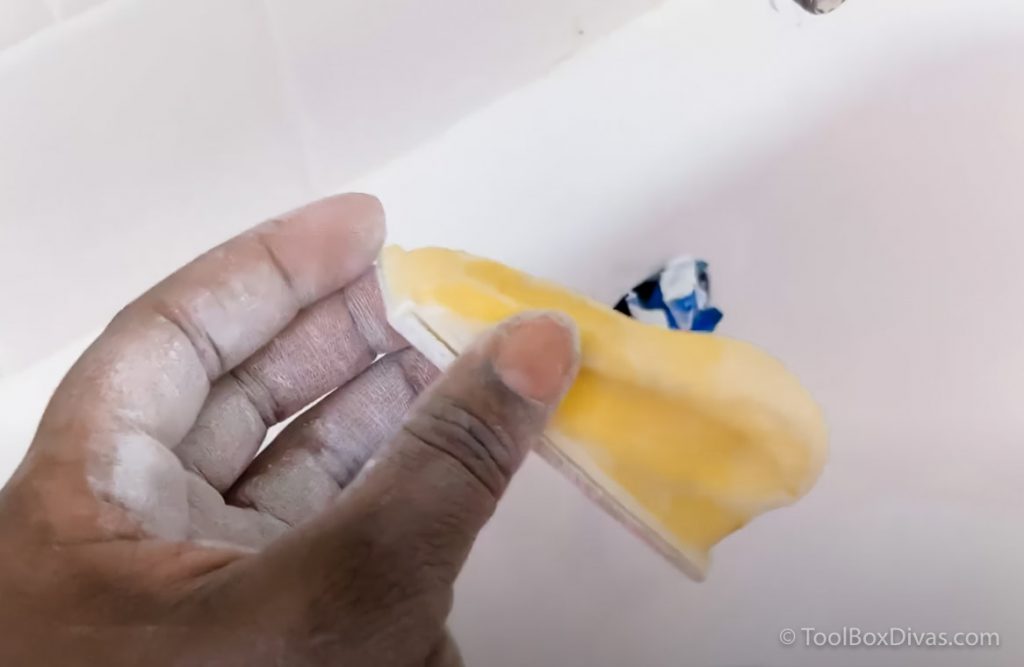
Step 2. Remove all the grout.
Apply a thick line of Caulk Remover to the grout all around the tub and tile surround. Allow it to sit for a few minutes and using a Utility Knife score around the edge of the caulk lines. This will make it easier to remove using a 5 in 1 tool.
Step 3. Sand the surface with a 400 – 600 grit sandpaper.
Once all the caulk is removed sand down the surface of the tub and tile backsplash/ Shower wall thoroughly using a wet/dry 400-600 grit sandpaper. Remove excess dust with a wet/dry vac and a wax cloth to remove tiny particulates.
Step 4. Remove and or tape off the faucets and tile boarder.
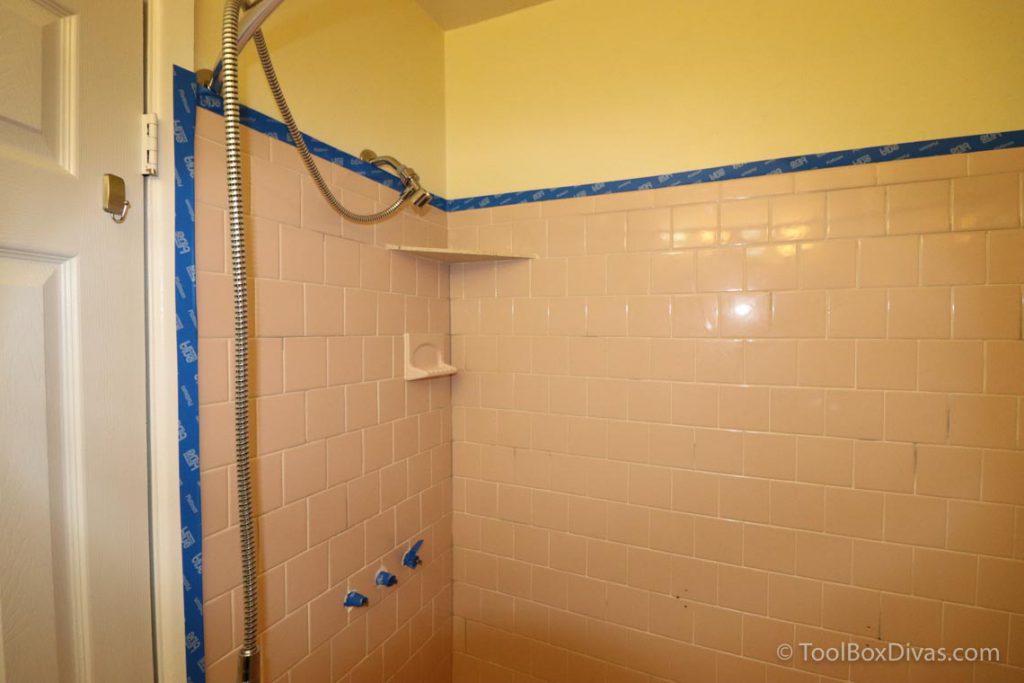
I went ahead and removed the faucets because I didn’t plan on using it once the tub was painted.
Step 5. Mix the A & B compound and stir well.
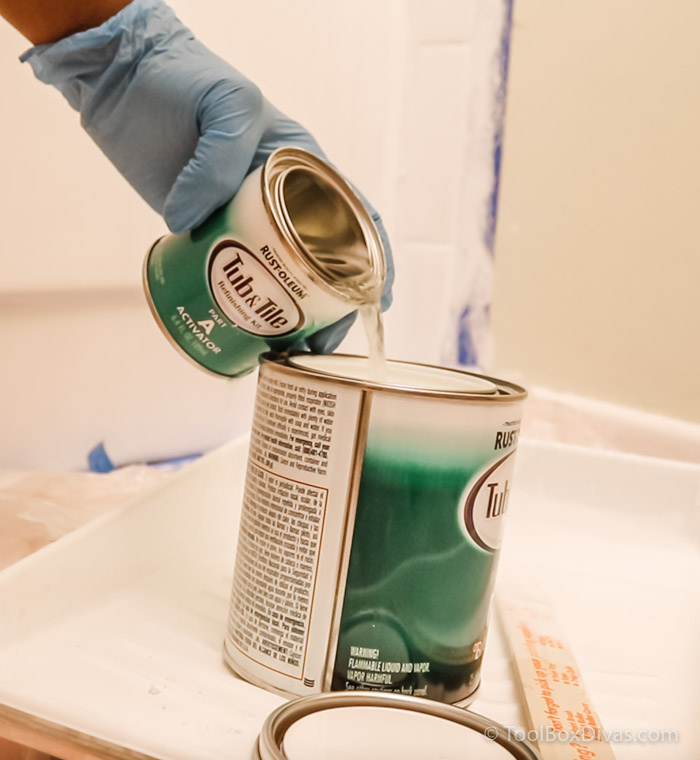
Now that the bathtub and tile are prepped it’s time to mix the 2 part solution. Thoroughly mix part B and then stir in part A. It is very important to wear chemical gloves or latex gloves and a respirator during the entire process of painting the tub and tile. Proper ventilation is also essential. If your bathroom has a window, open it. But if you don’t have a window like me, turn on your exhaust fan and open all windows throughout the house. I also used a high power portable fan to remove the air from the bathroom. You have about 6 hours to use a fully mixed can.
Step 6. Apply the first coat.
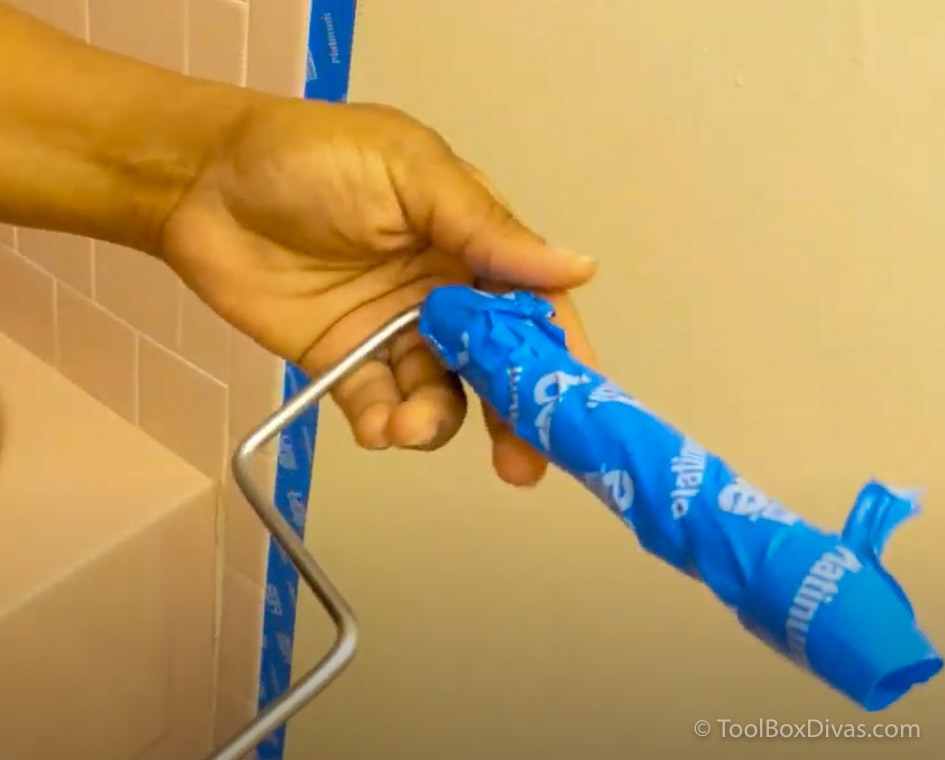
Using a lint free roller apply your first coat. A trick to remove the lint from a new roller is to wrap it with painter’s tape and remove it. Around the curve of the tub basin, I used a foam brush. Have lots of foam brushes on hand because this paint quickly breaks down foam brushes. However, I found no other brush handled the curve of the walls of the tub like a foam brush.
Step 7. Apply the 2nd coat.
Wait 1 hour to apply your second coat. With each coat you will see the color set it more and more. The Rust-Oleum Specialty 1 qt. White Tub and Tile Refinishing paint has self-leveling properties. So any bubbles you see should even out as it dries.
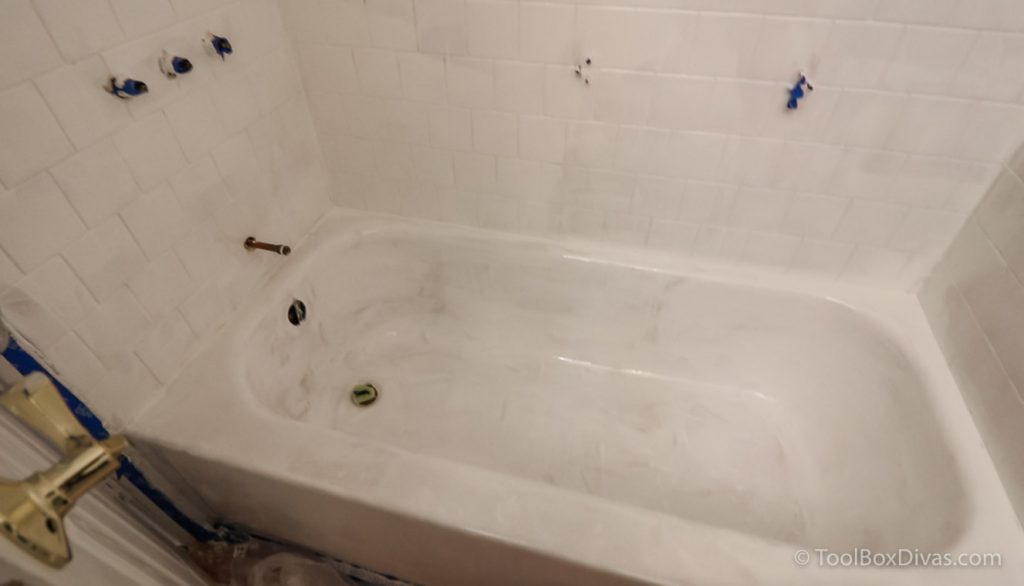
Step 8. Inspect for any issues and lightly sand down any rough spots.
After I completed my 2nd coat I inspected the tile and tub surface. I found a few rough spots from paint dripping and foam brush particulates. Also, there were 2 tiny spots where the paint just wouldn’t adhere.
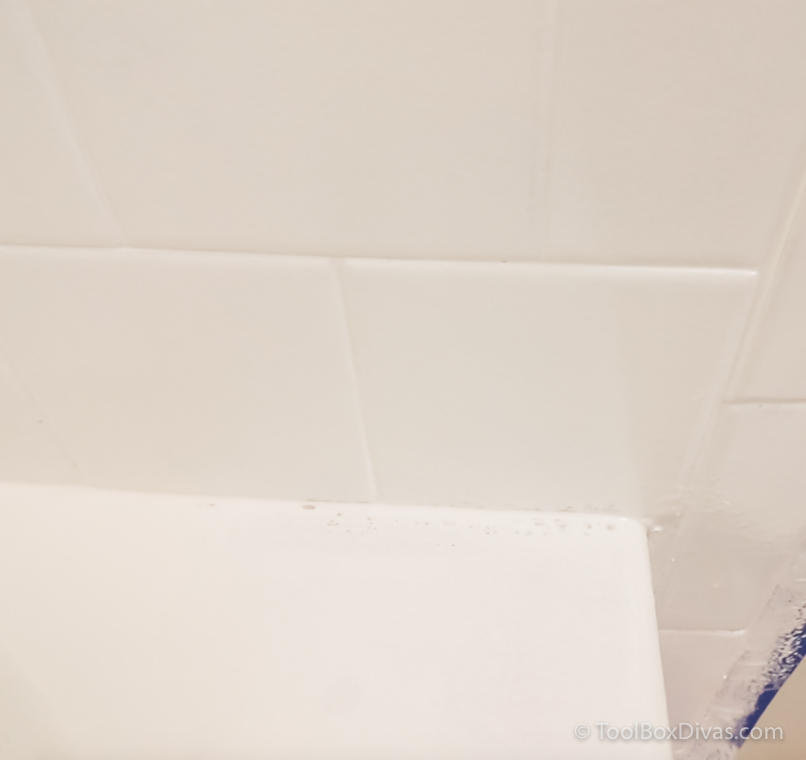
I tried sanding that area with 320 – 400 grit sandpaper and reapply the paint several times. It just wouldn’t stick. Most adhesion issues stem from poor prep. But in this case, I knew for certain I scrubbed the tub and tile down. However, soap scum can be extremely hard to remove from tile walls and tubs (which in some cases you can not even see with your eye). As a result, the paint just bubbled up and wouldn’t naturally self-level.
A cleaner specifically made for soap scum and mineral deposits probably would have prevented this. But we are here now and this is what I did to solve my lack of adhesion problem.
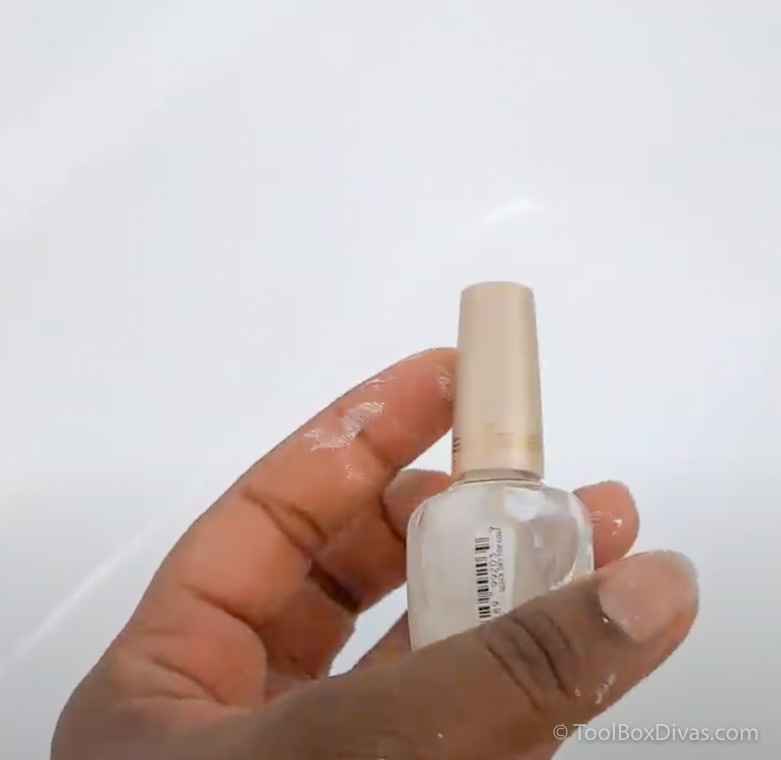
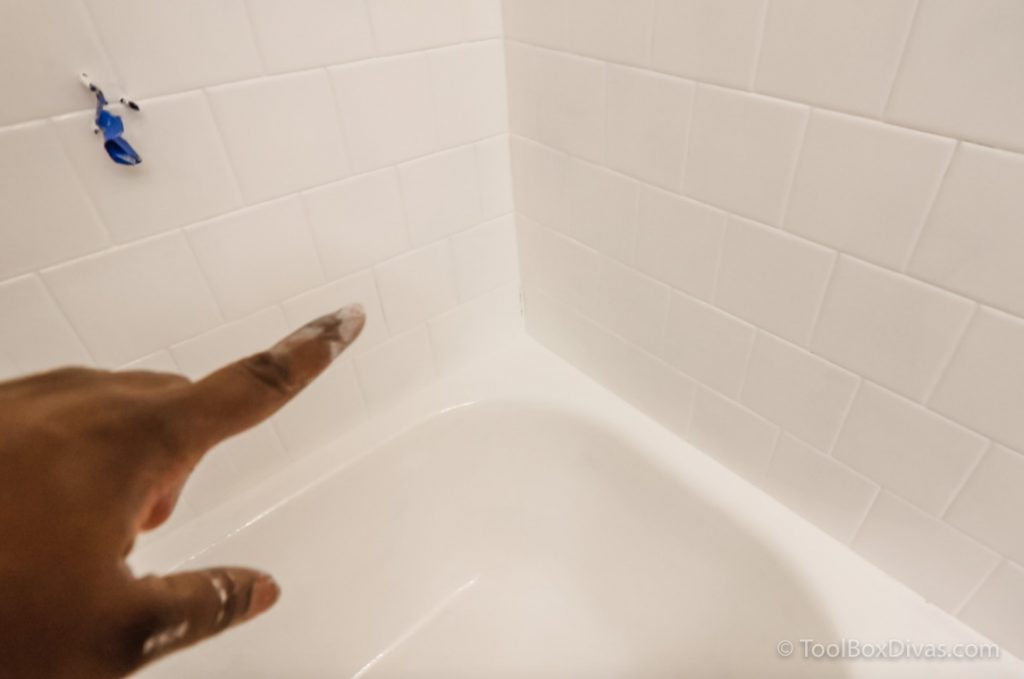
Dealing with Adhesion issues.
(This is not endorsed by Rust-Oleum.) The chemical makeup reminded me in some ways of nail polish. So I thought, what if I applied a top coat to the troubled spots. It could create enough traction that would allow the tub and tile epoxy to stick. So I sanded (by hand ) those spots, applied the nail polish top coat, allowed it to dry, and reapplied the Rust-Oleum Specialty 1 qt. White Tub and Tile Refinishing paint. Well, I’m happy to announce: IT WORKED!
Step 9. Apply a 3rd & 4th coat if needed.
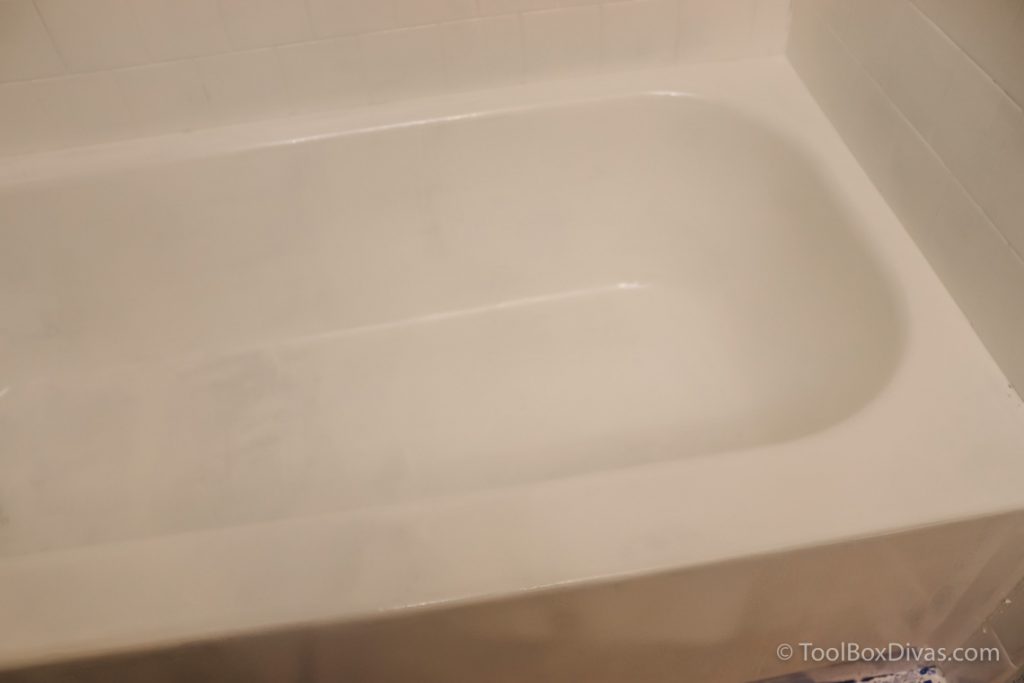
I found that given the bold pink color of the tub and tile I was working with and the size of my tub and shower wall I needed 3 and 1/2 The Rust-Oleum Specialty 1 qt. White Tub and Tile Refinishing Kits to get a nice clean white finish.
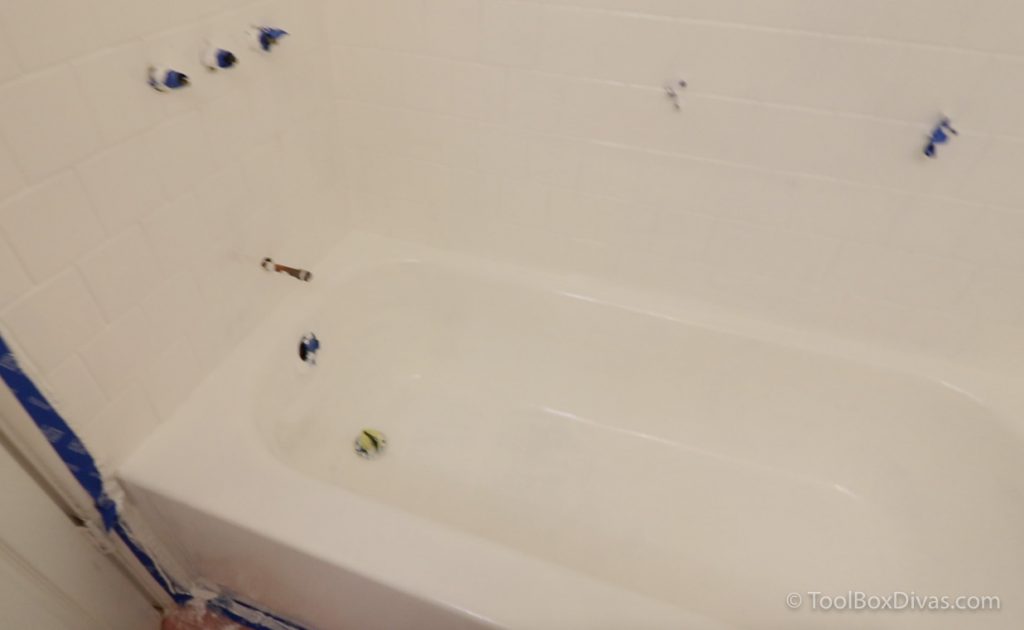
Step 10. Allow tub and tile to cure.
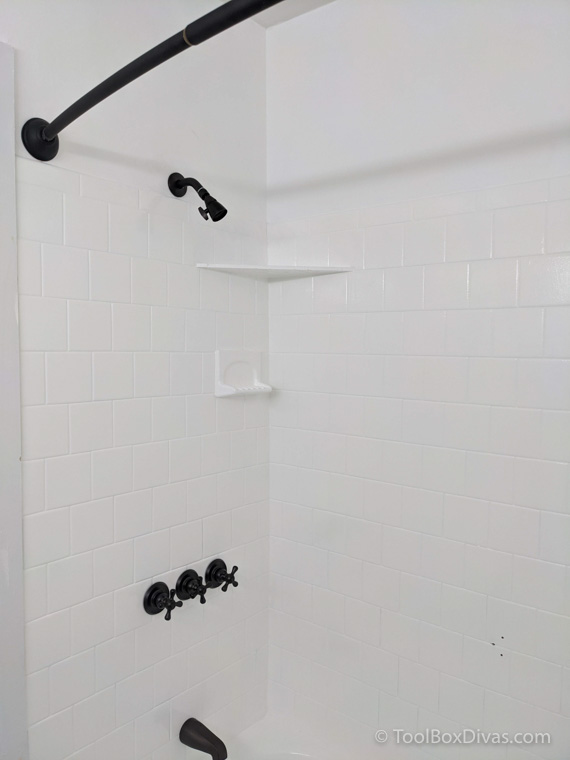
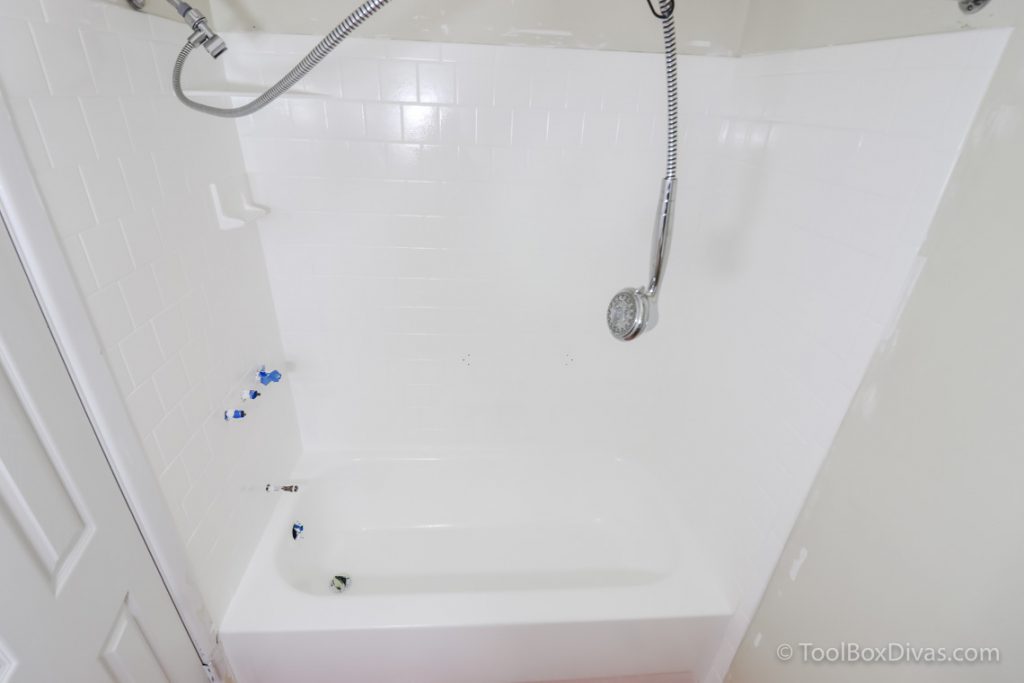
Allow at least 3 days before exposing the paint to water. When you’re done you’ll have a completely different bathroom.
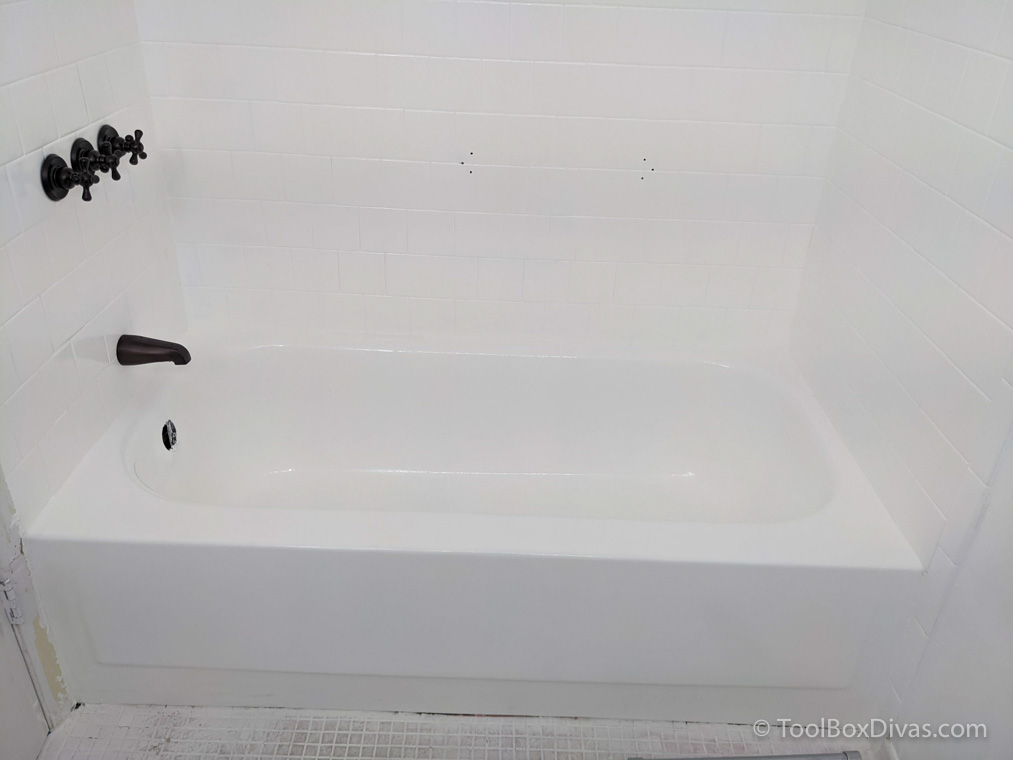
I am in love with how well this turned out. I’m not going to lie, I had my reservations in the beginning. But now, I’m completely sold. So much so, I’m painting the blue bathroom tub upstairs next.
Now the question I have is… How long will the paint last? Well for this bathroom, only time will tell. There is not a recommended life span for the Rust-Oleum Specialty 1 qt. White Tub and Tile Refinishing Kit since use varies. At the end of the day, 5 years down the line, if I see an issue it can always be repainted.
Here’s what I learned (Best Practices)
- OK, the fumes from this product are super strong. So much so, we didn’t stay in the house while the bathroom was being painted. However, I did notice that while the fumes were extremely strong on the 1st floor where the bathroom is located, it wasn’t as bad on the 2nd floor. But it took about 7 days for the smell to subside. So be prepared to at least not sleep on the same level as the bathroom being painted for a few nights.
- Clean the surface with a degreaser and a product that is meant to remove soap scum and mineral build-up. This probably would have prevented my adhesion problem.
- Have a pack 10+ foam brushes. Epoxy deteriorates foam so quickly. So you don’t get as many uses as you’d like before it sticks to the paint.
- Be prepared to throw away the roller brush when you’re done. Don’t even bother trying to clean the brush. Chop it up as part of the overall cost.
- And prepared for how satisfying this will feel once you’ve completed painting the bathtub and tile. You will seriously be in love with this new space.
Pin It. Save It For Later.


Looks like you did a fantastic job! Also looks like a project that has some pretty good challenges. You know, the white looks great but I really liked the tile on your floor; any chance you can save it? Well done.
This was an outstanding read. I usually glance and skim the pictures. You made it look easy and sound easy while still providing the pothole narrative, when necessary. I am usually too nervous to “waste money and fail” but this project and your demonstration of success were encouraging. Thank you for pushing through this year of uncertainty.
Trust in the Lord,
TH
Did you have to re-caulk the bathtub after painting??
Yes once it all cured I recaulked everything
How has the paint held up? I want to paint the pink tiles around my bathtub. Did the paint scratch/wear off at all?
Good job I absolutely love it.! I am going to give lit a try! You saved 100s maybe 1000”s in remodeling cost!
Thank you so much!
Thank you so much for this thorough tutorial! I’m going to be attempting this in our nearly identical bath/shower. I would never had tried without your post. I’m so appreciative you shared this with the world 🙂
~Tara
Ohhh That’s awesome! So glad this provided some inspiration. You got this!!
Hi you did an amazing job! Did you spray paint the shower knobs and shower head black ? Or all new appliances? Did you recaulk everything after?
Thank you so much! The faucet and knobs are all new also we replaced the toilet. I did have to recaulk once I was done.
I love that shower faucet!! Do you remember where you found it?! 🙂
Thank you! I believe I found it on Amazon.
Just found this article on Pinterest! Thank you so much! I believe you have saved me thousands of dollars in remodeling costs 🙌🏻 One question- did you replace the knobs/faucet etc before or after painting?
Thank you!!
Yayy! That’s awesome! Yes, I did replace the faucet and shower knobs after I painted it.
You did an amazing job! This makes me want to do my tub/walls. I would love to see the whole bathroom💕
Looks amazing! Do you by chance have a link to the new black shower knobs you added?
Hello, I noticed that you said you were painting your blue bathtub next, we are buying our 1st home and it has a blue bathtub as well so I’m just wondering if you ended up doing that job and how did it turn out? I would hate to attemot to paint ours and the blue showing up through many paint coats. 😬. Thank you!
How long did you wait for the grout mix to cure before moving on with the process?