Simple Modern Entryway That Makes a Stylish First Impression
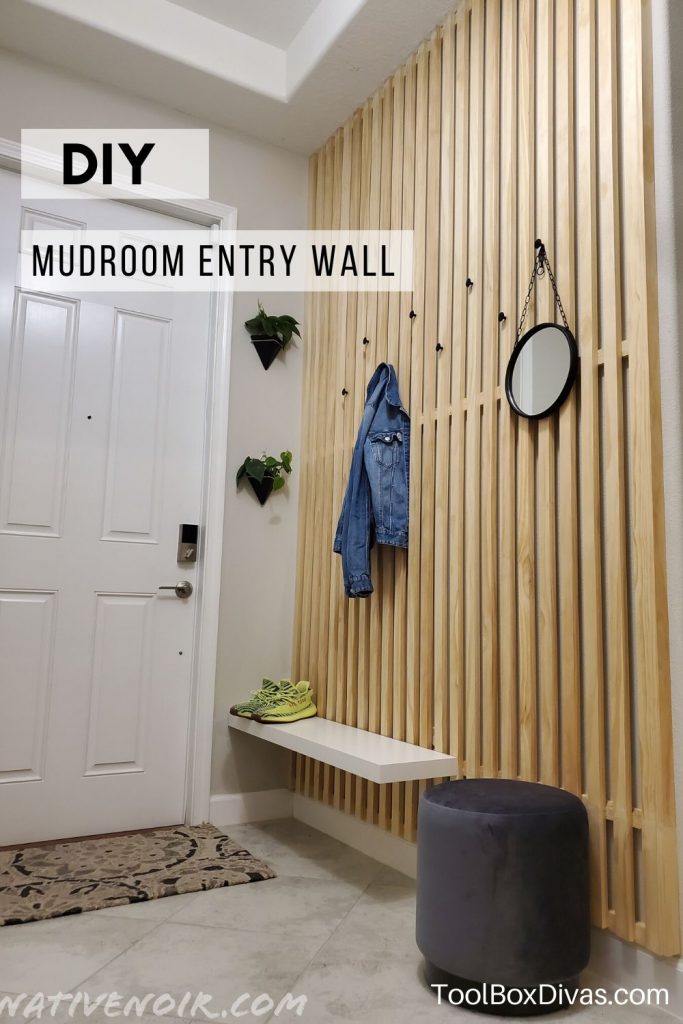
Make a stylish first impression with this simple DIY modern entryway wall. Add a DIY mudroom entry wall using 1x2s. This mudroom wall is a great solution for small spaces or when you don’t have a dedicated mudroom.
We have so many talented people over in our Facebook group and I love to have the opportunity to feature their work here on the blog.
Other collaborations from readers include this Mid Century Modern Desk With Monitor Stand and Free Plans.
When I saw Alishia’s project for her DIY mudroom entry wall, I just knew I had to share it with you all. She agreed to write up her steps to making it and send me over some pictures so you could see how she put it together.
Let’s get to it!
Hi! I’m Alishia and about a year ago my husband and I took a leap of faith and moved hundreds of miles away from our families to start a new life in Florida. Both born and raised in New Jersey, my husband’s job gave us the opportunity to move to Florida.
So we packed our bags and bought our very first home in a newly built community. The house was your run of the mill cookie cutter starter home but we were in love with it. It was the base to what will be our forever home.
In just a year we renovated two rooms and plan to renovate the entire house until every inch of this home screams us. The very first room we tackled was the entry way.
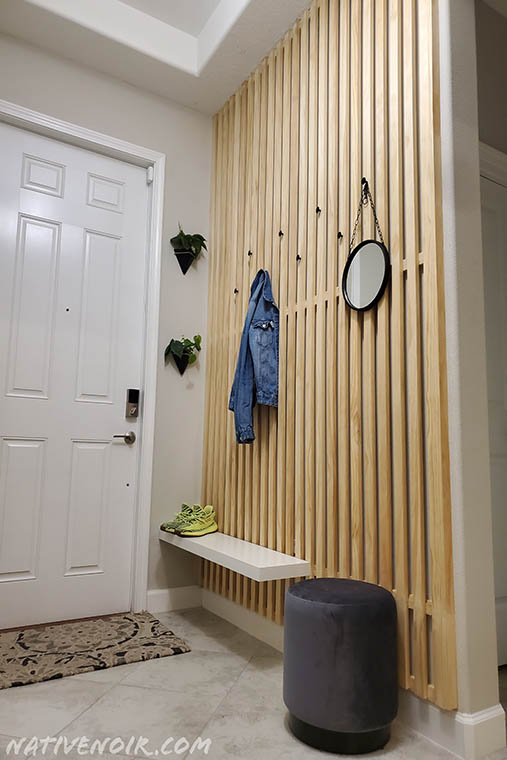
The entry way is the very first thing a guest see’s when entering your house. So I wanted to really incorporate our overall interior design to this small wall. I didn’t want to lose functionality though, so I made sure every inch of that wall would be useful to our regular lives.
Here is what you will need to build your own DIY mudroom entry wall with personality.
Materials:
- 8ft x 1×2 Select Wood Planks, I used about 30 planks for my wall
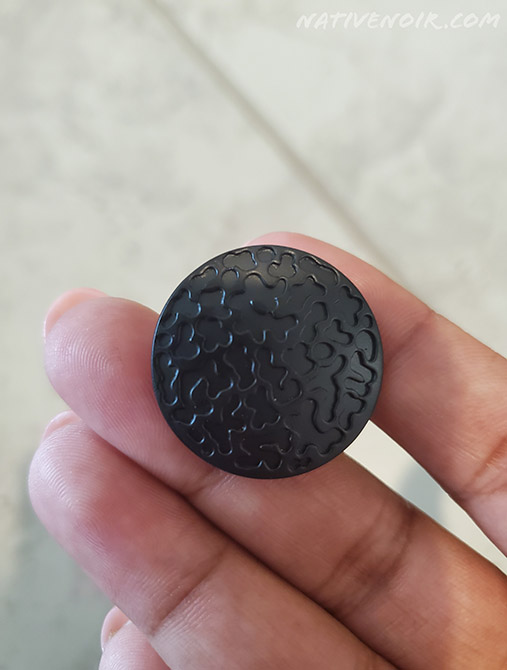
- Liberty Hammercraft 1-1/8 in. (28mm) Black Round Cabinet Knob
- LACK Wall shelf, white (43 ¼ x 10 ¼) from Ikea
- Screws, wood (SPAX #8 x 1-1/2 in. T-Star Drive Flat-Head Partial Thread Yellow Zinc Coated Multi-Material Screw)
- Gorilla 8 oz. Wood Glue
- Wood Putty
Tools:
Let’s build a DIY modern entryway wall!
Step 1.
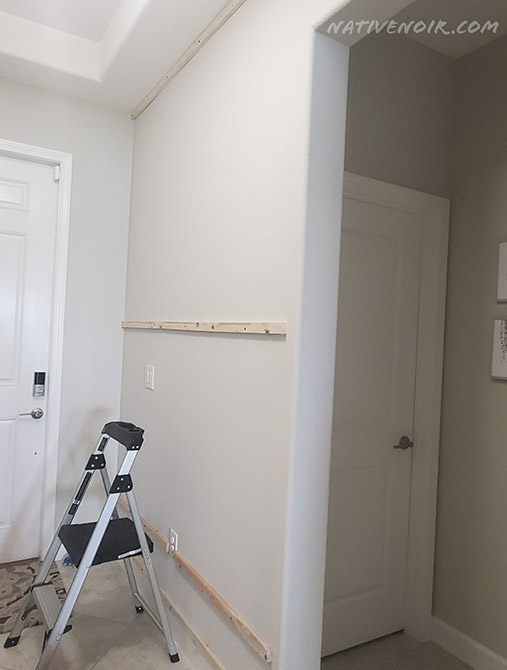
Apply 3 to 4 supporting braces to your wall. I put one at the very top, the middle, and two at the bottom. This is what you will be nailing the planks to. Wood glue them to the wall for an extra strong hold then nail them in.
Step 2.
This is a great time to measure where you would like to place the floating shelf. Once you have figured it out go ahead and screw the metal rod that was included with the shelf to the wall. It shouldn’t interfere with the planks if the spacing is done right.
Step 3.
Before you start to nail the planks, screw your cabinet knobs into 8 planks. Decide how high or low you want each knob and make sure when you go to nail them they are right side up.
Spacing of each knob is also something to consider, I skipped every other plank. Do not do this step last because you won’t have enough room to screw them in after each plank is nailed in.
Step 4.
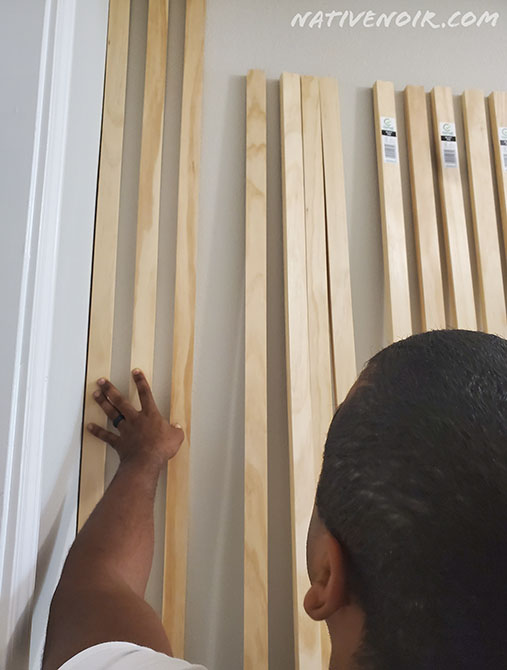
Start at the very end of the wall and line the plank against the corner aligned with the ceiling. I started at the far left to use my wall as a guide to level the planks.
To get an even space between each plank I placed another plank in between each one as a spacer. Start by applying wood glue to the very top of the plank, the middle, and bottom. Align with the braces and nail it to the top brace, middle brace, and first bottom brace. Repeat for each one.
If your wall is as tall as mine you will have noticed the 8ft planks do not reach the ground. No worries, that is why I purchased extra planks. Once we are done reaching the other end of the wall we will begin cutting the remaining foot for each plank.
Step 5.
Once you’ve reached the end of the wall if you have an opening like I do the spacing between the braces and planks will be visible. So I just nailed another plank sideways to hide that. Now if you look from the side you can’t see the spacing.

Step 6.
Now to get a seamless extended plank that will reach the bottom, measure the distance from the end of the plank to the floor or base. This is also where I placed the second bottom brace.
I used a miter saw and cut 1 foot boards from the extra 8ft foot planks I purchased. Repeat step 2 and nail them to the very bottom brace. There will be a small visible gap between each plank, apply wood putty, let dry, and sand down.
Step 7.
Since we already screwed the metal rod for the shelf in step 2, now you can just slide the shelf into the rods. Make sure the shelf is pushed right up against the planks. This will give it a tight hold. And you are all done with a new modern entryway wall that doubles as a mudroom!
DON’T FORGET TO PIN FOR LATER!

My name is Alishia. I am New Jersey native adapting to Florida customs. I am a SAHM and full-time student who loves home improvement and interior design. My husband I are are currently turning our cookie-cutter home into our own work of art. For more of our home projects, join us on Instagram!


Such a unique, stylist, space saving idea. If I had to guess, I’d say your house looks like every newly constructed house in Orlando–those rounded corners and orange peel wall finish!
I think this project is a great idea to give personality to those newly constructed homes. I’m following your progress to see what else you’re doing.
Thank you so much Vicki! Alishia did an amazing job! I too can’t wait to see what else she does with your home.
That’s a really cute idea and practical for a small entry. Will be watching to see what you do next! How do you like Florida?
Looks great! I’ve been so excited to do something similar in my house. Quick question, why did you choose to use the support beams rather than going straight into the drywall with your long horizontal planks?