$900 and 1000 Hours Later: Finally a Kitchen I Can Love!

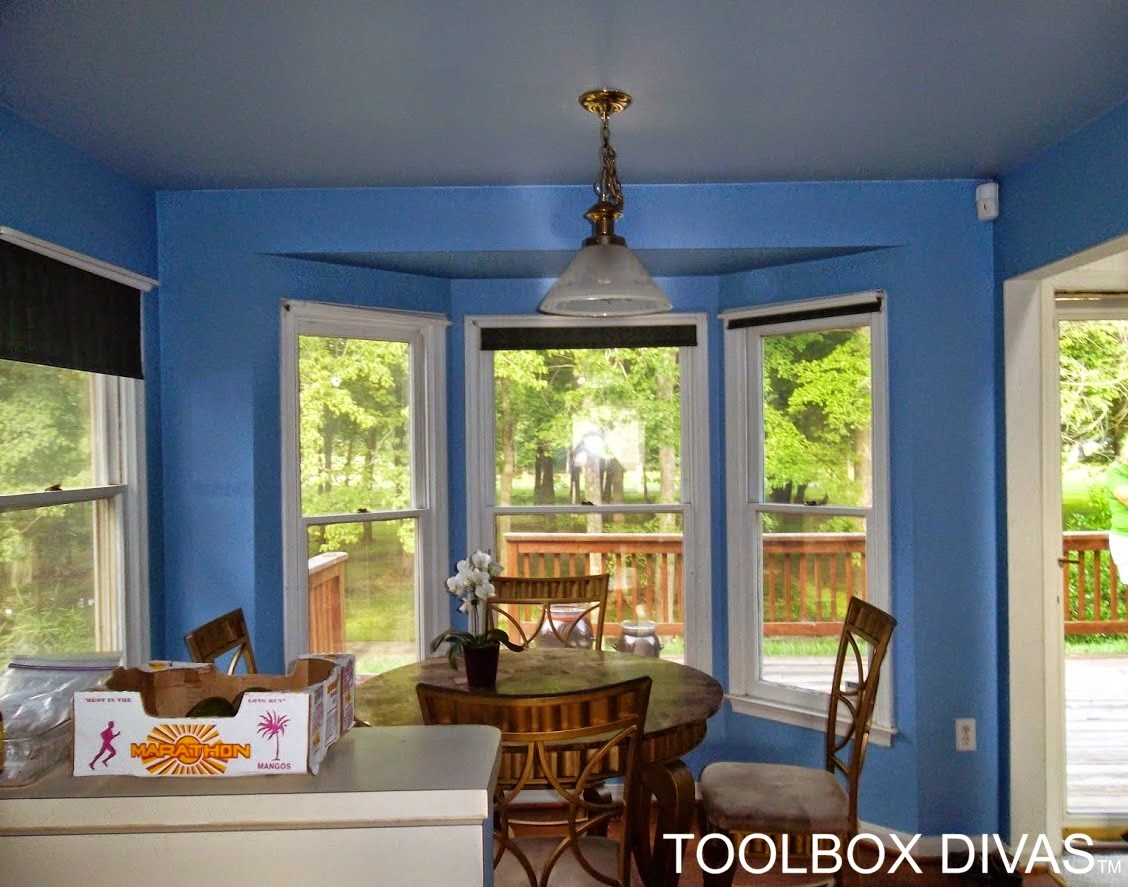
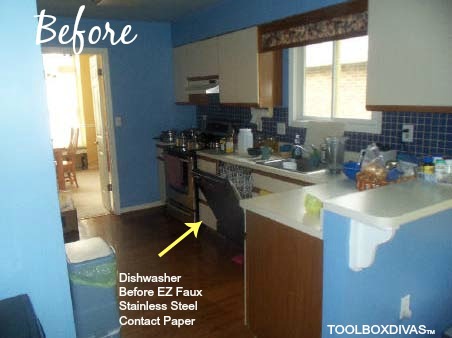
For those of you that have been reading my blog and following along, (Thank you!) you know the challenges I’ve been facing in the kitchen. My kitchen started out as this blue dungeon. I was stuck in a state of “Smurfdom.” I hated my kitchen. It lacked order; functionality, but most of all, it lacked appeal. Lets face it…It was ugly! You can say it. I did. And to top it off, my budget was ugly.
With a limited budget I made a few changes. But something was still off. Ok a lot was still off. The colors and the styles clashed. I painted everything, covered my counter-tops and dishwasher with contact paper. I thought I’d create a little character by adding a shaker style trim to my dated cabinet doors. However, the project totally flopped, leaving me with dysfunctional doors that didn’t close or open properly. In addition the paint was chipping at the door corners.
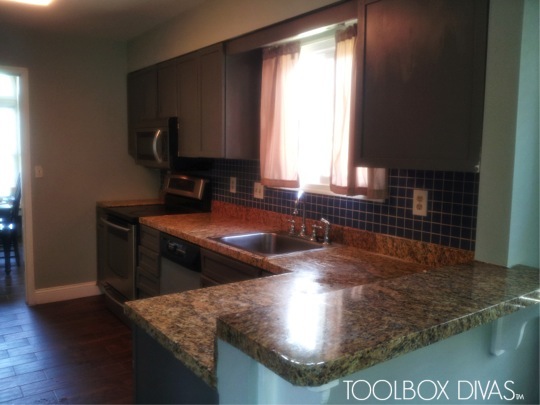
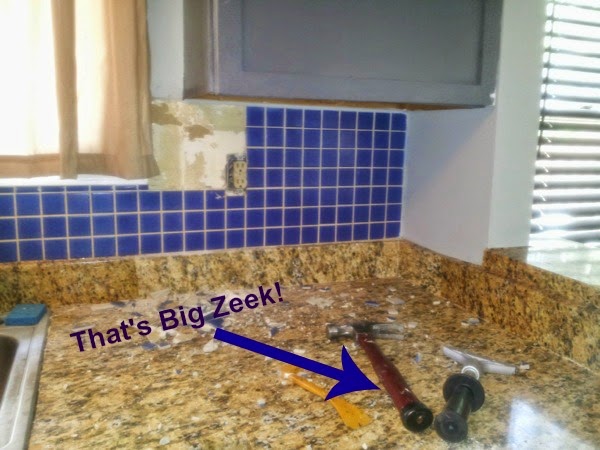
My kitchen was sucking the life out of me. On top of it, that darn blue tile back-splash stood as a giant ceramic mental roadblock….Or TileBlock depending on how you look at it. I couldn’t see past it to come up with a color scheme. I was going insane and miserable whenever I walked into my kitchen. Sure, I could paint that darn blue tile or attempt to cover it with some faux finish or vinyl stick on tile. But that wasn’t enough because I would know that it’s still there, lurking in the background. I needed it gone. But truth be told I was a little scared. What if I can’t finish this? What if I totally screw the wall up? How much is this going to cost? What if I’ve finally met a home improvement challenge I was not equipped to handle? Yea there were a lot of ‘what ifs’ going on. But then it HAPPENED!!! I guess I just snapped. I came home and I took a hammer to that blasted wall with the help of “Big Zeek” of course. And it felt GR-E-A-T! There was no going back and I sure as hell wasn’t looking back. Once the tile came down I had a whole new perspective of my space.
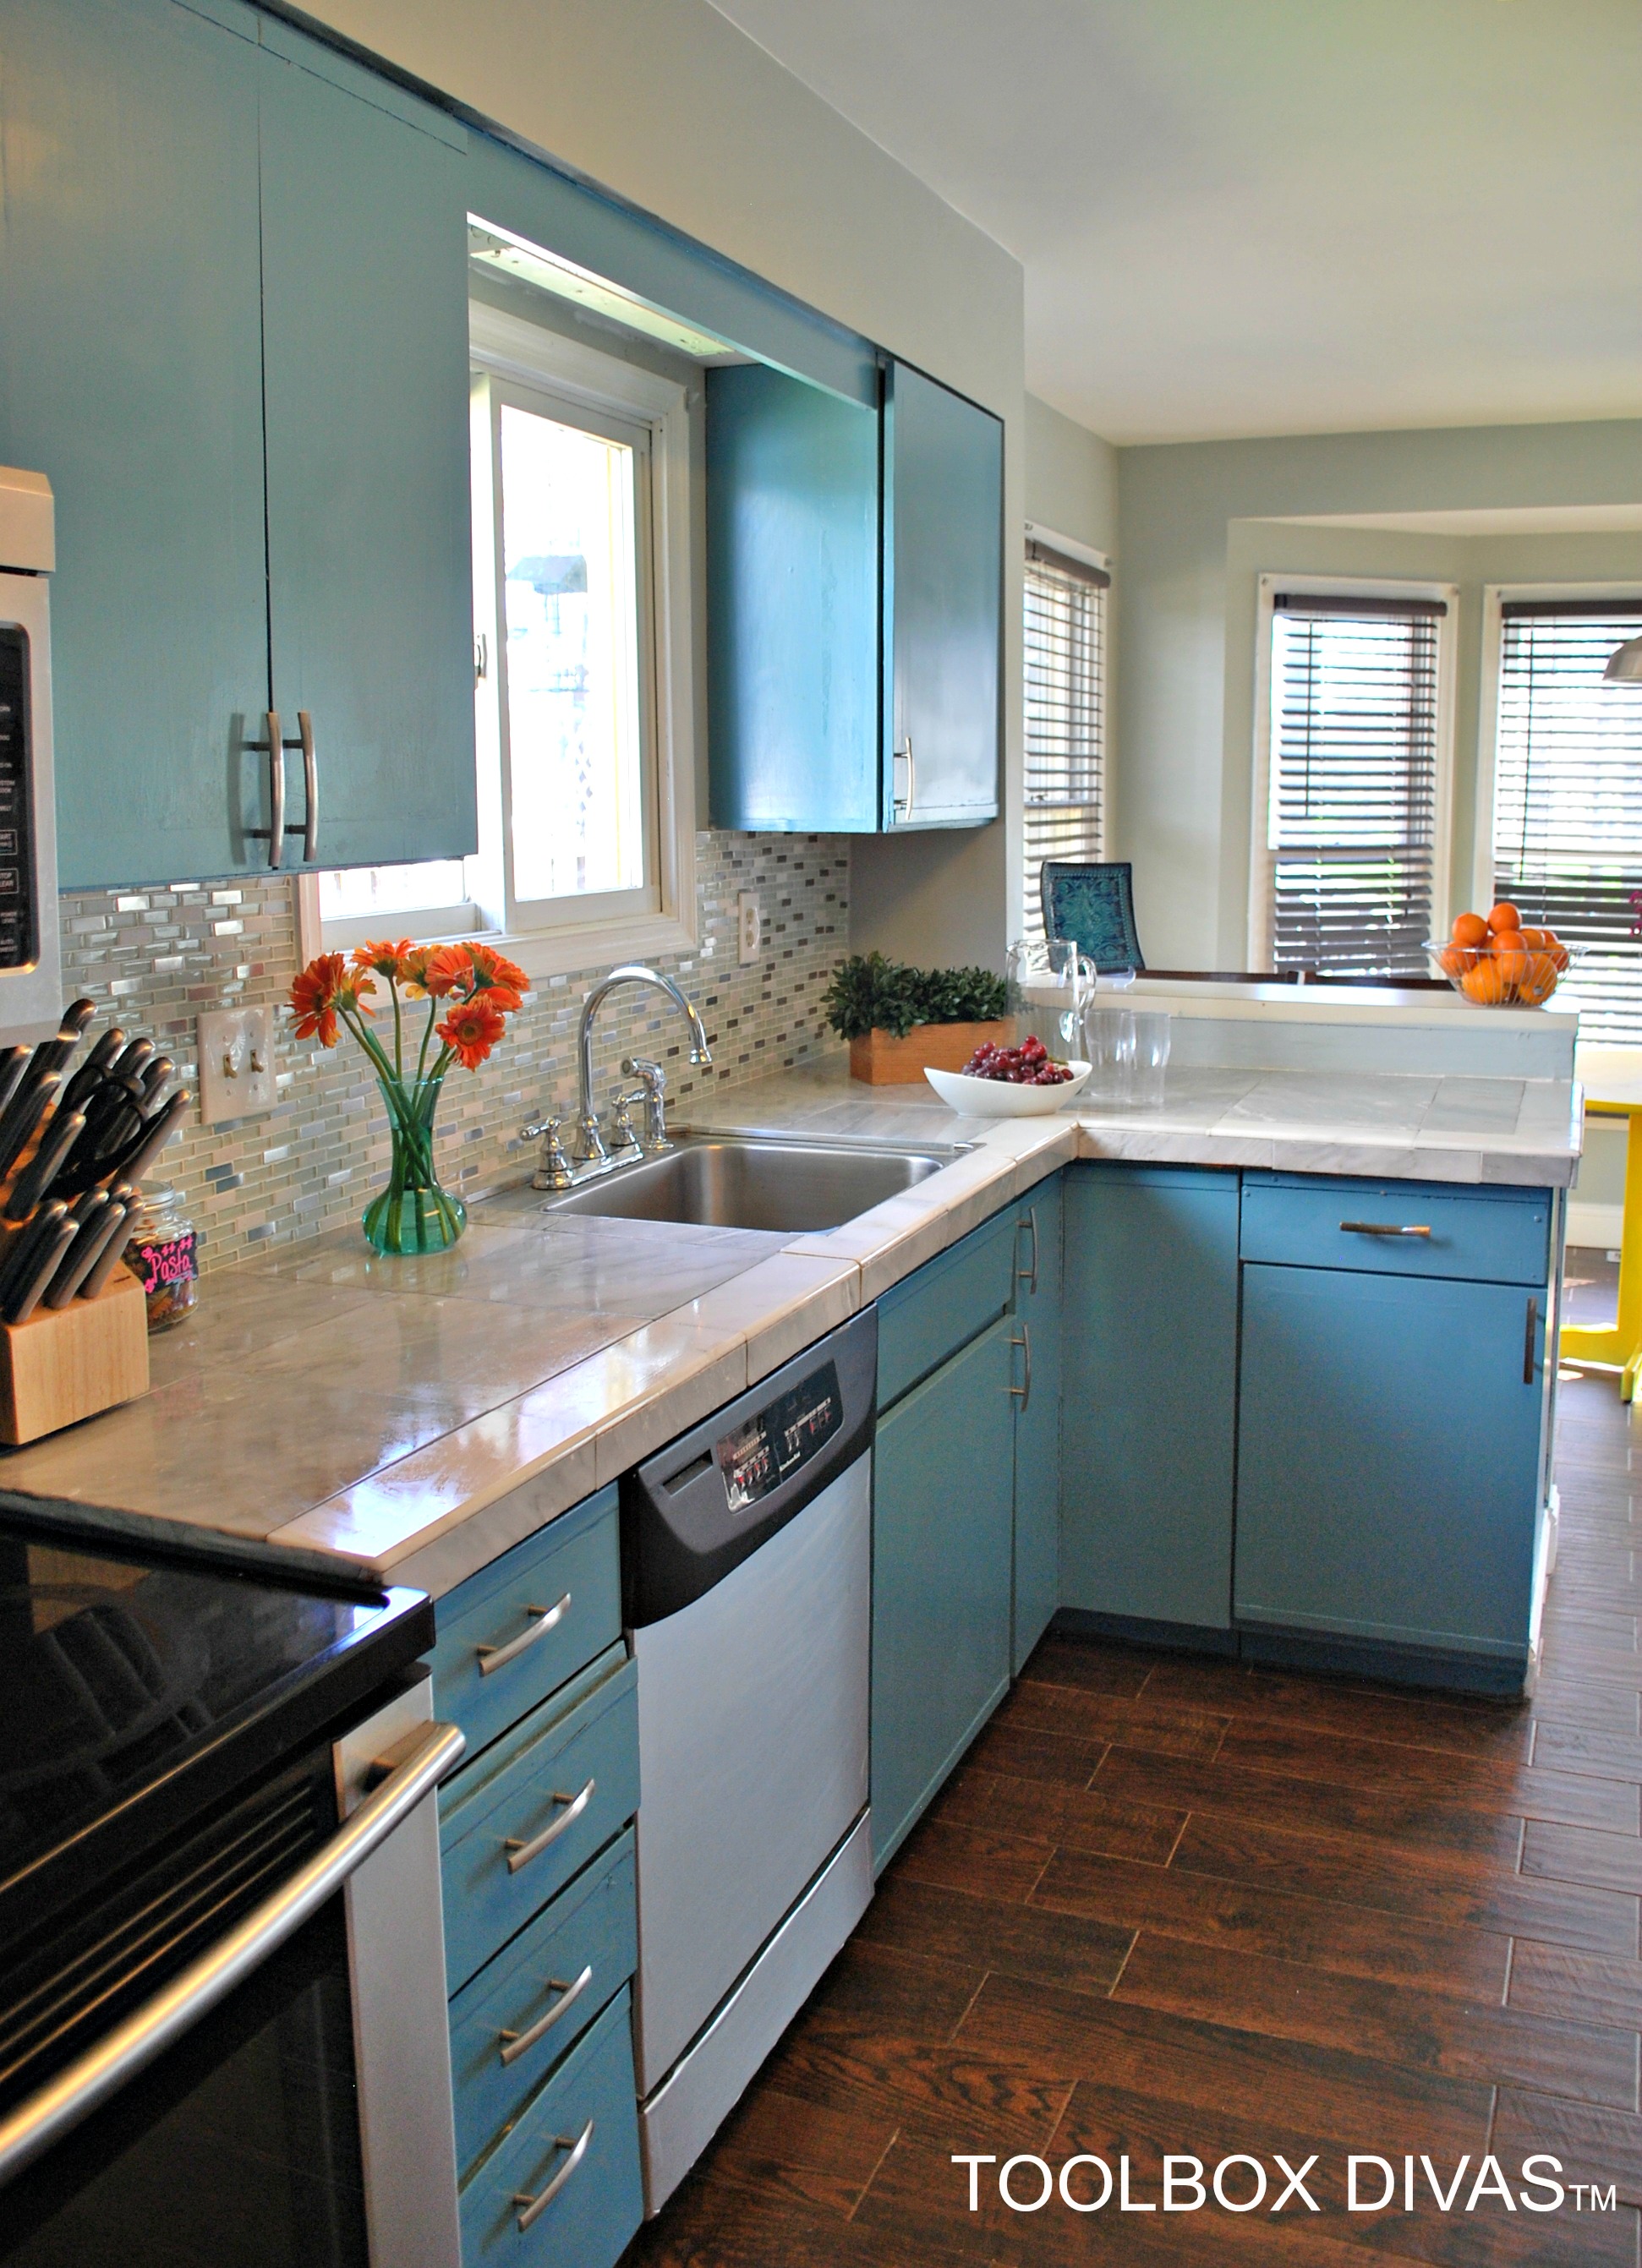
 I wasn’t going to play it safe, choosing to paint my cabinets a sea blue. Ha! It’s funny. Given the state of “blue” depression my old blue kitchen and tile back-splash put me in. Who would have thought I’d paint my cabinets blue. But you know what, it just felt right. I am obsessed with blue…but a particular tone. When you can’t be ’em, join ’em! So I trekked back to Home Depot and picked up some more paint. So I removed the lattice trim from the last cabinet doorFAIL, sanded the old doors down and repainted in the perfect shade of blue for me.
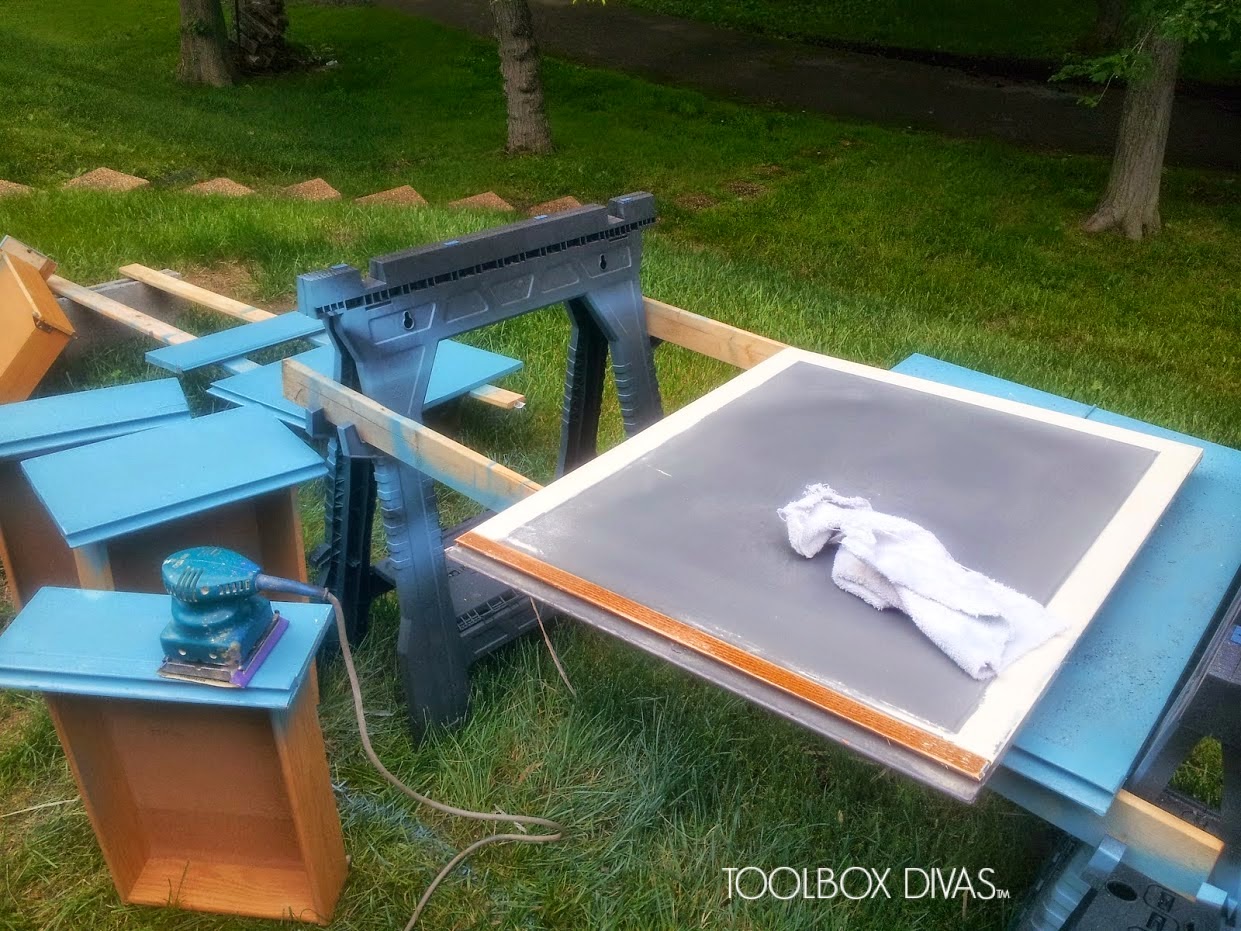 It felt like spring and the feeling of a new beginning…for my kitchen and me.
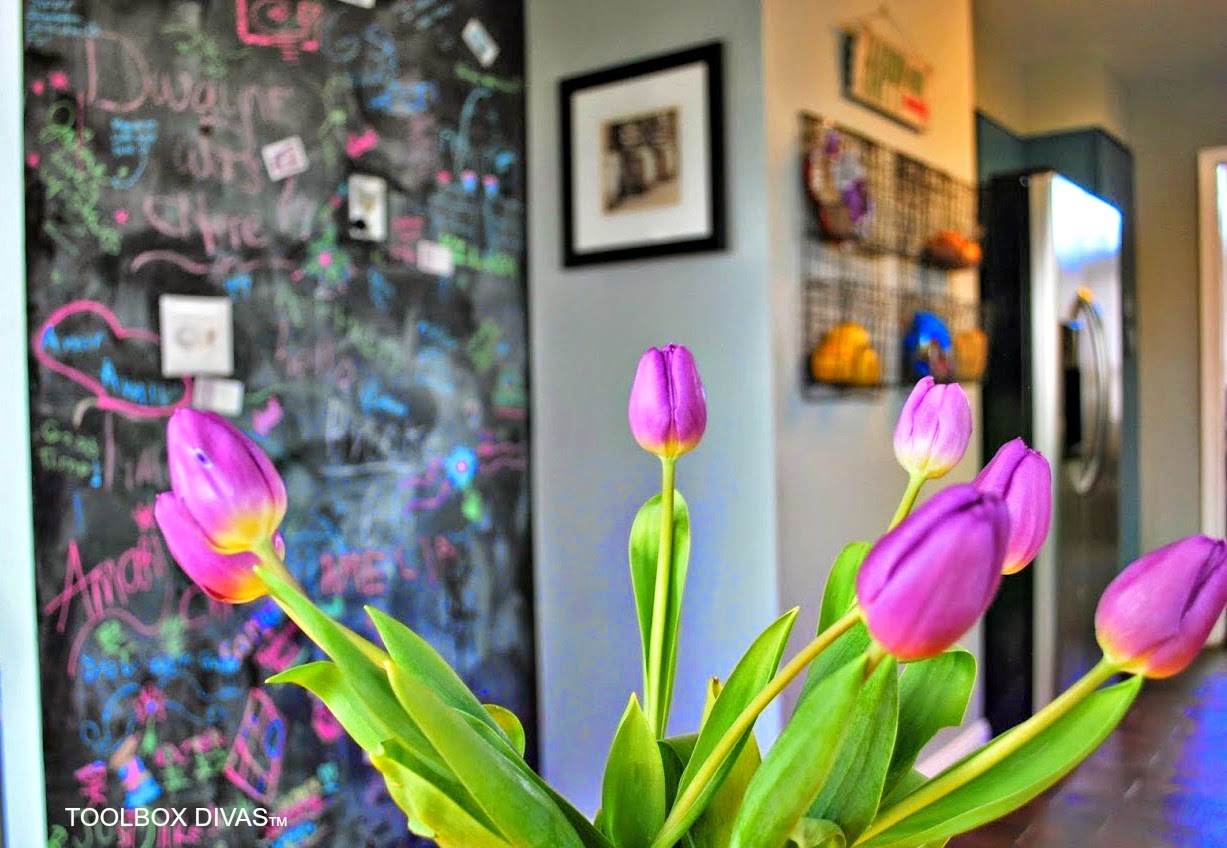
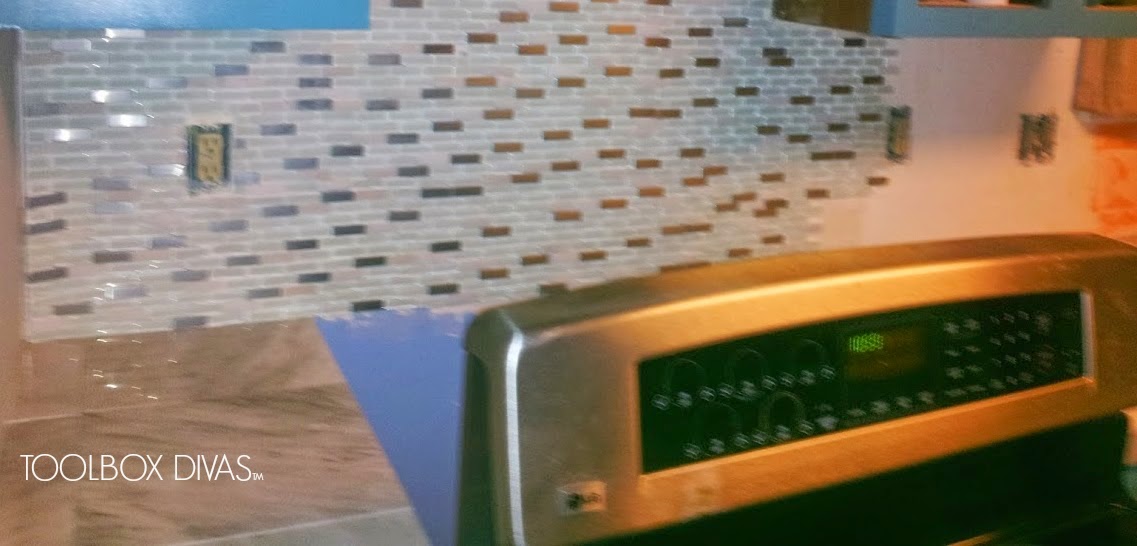
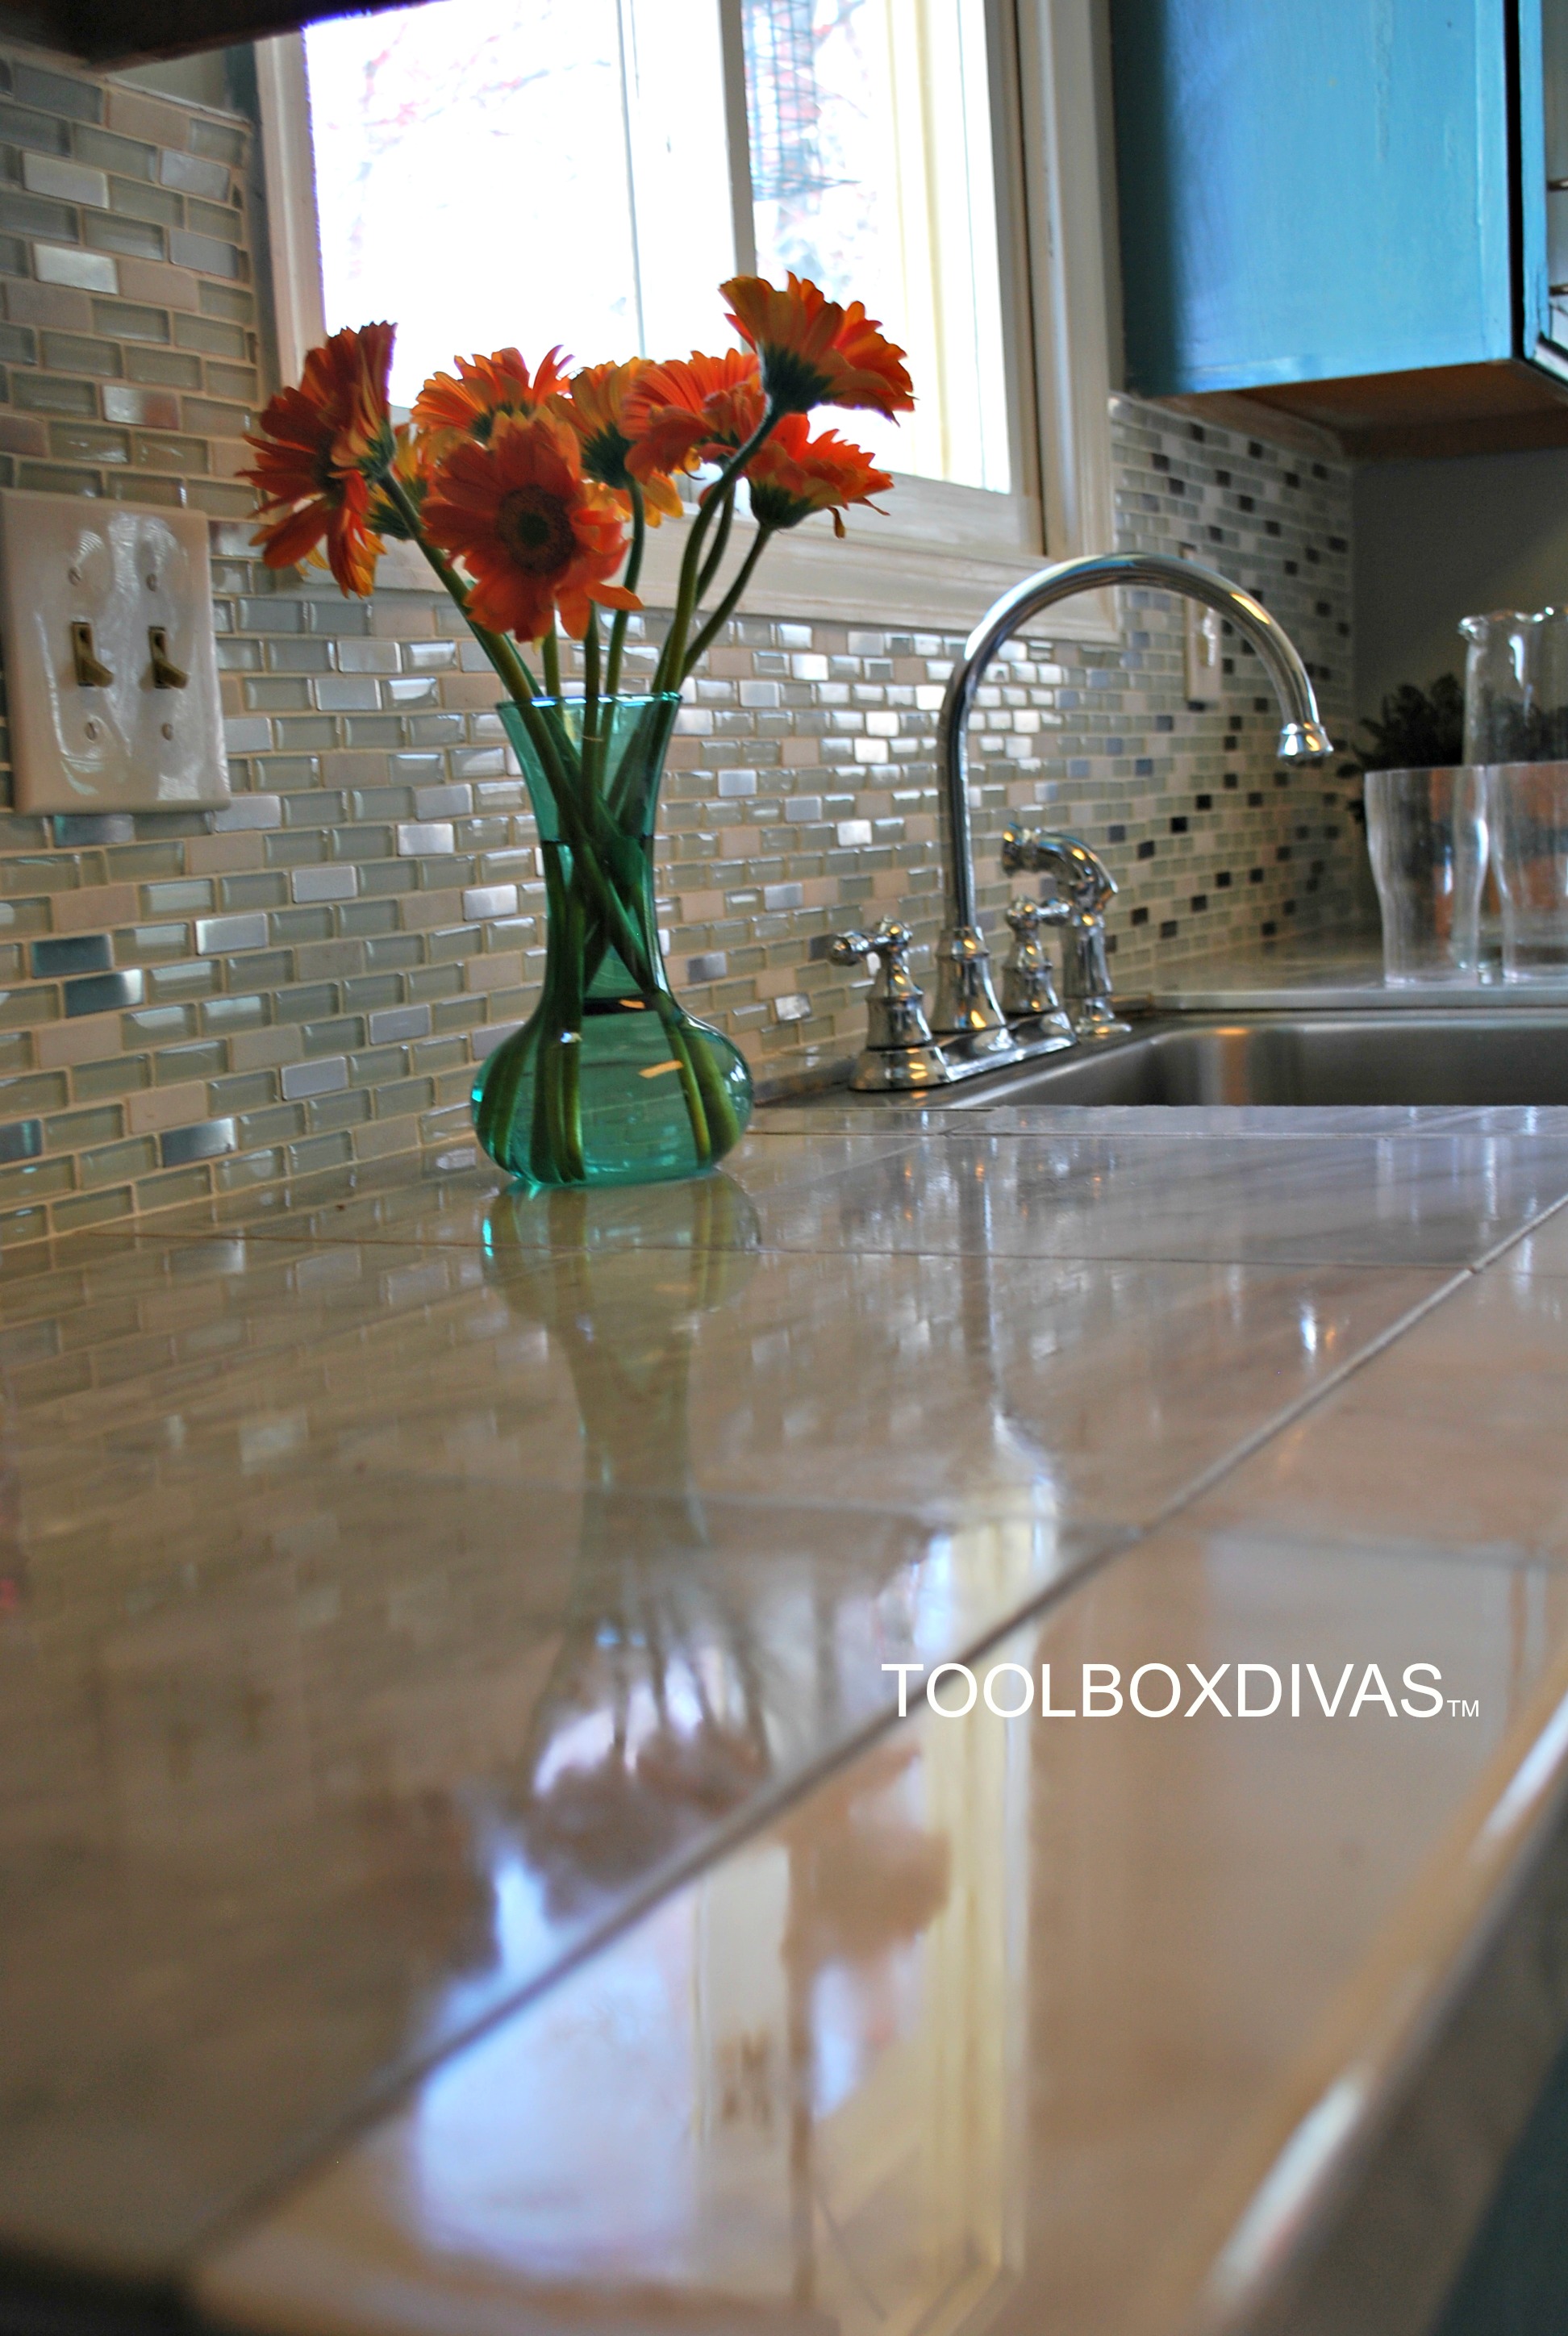
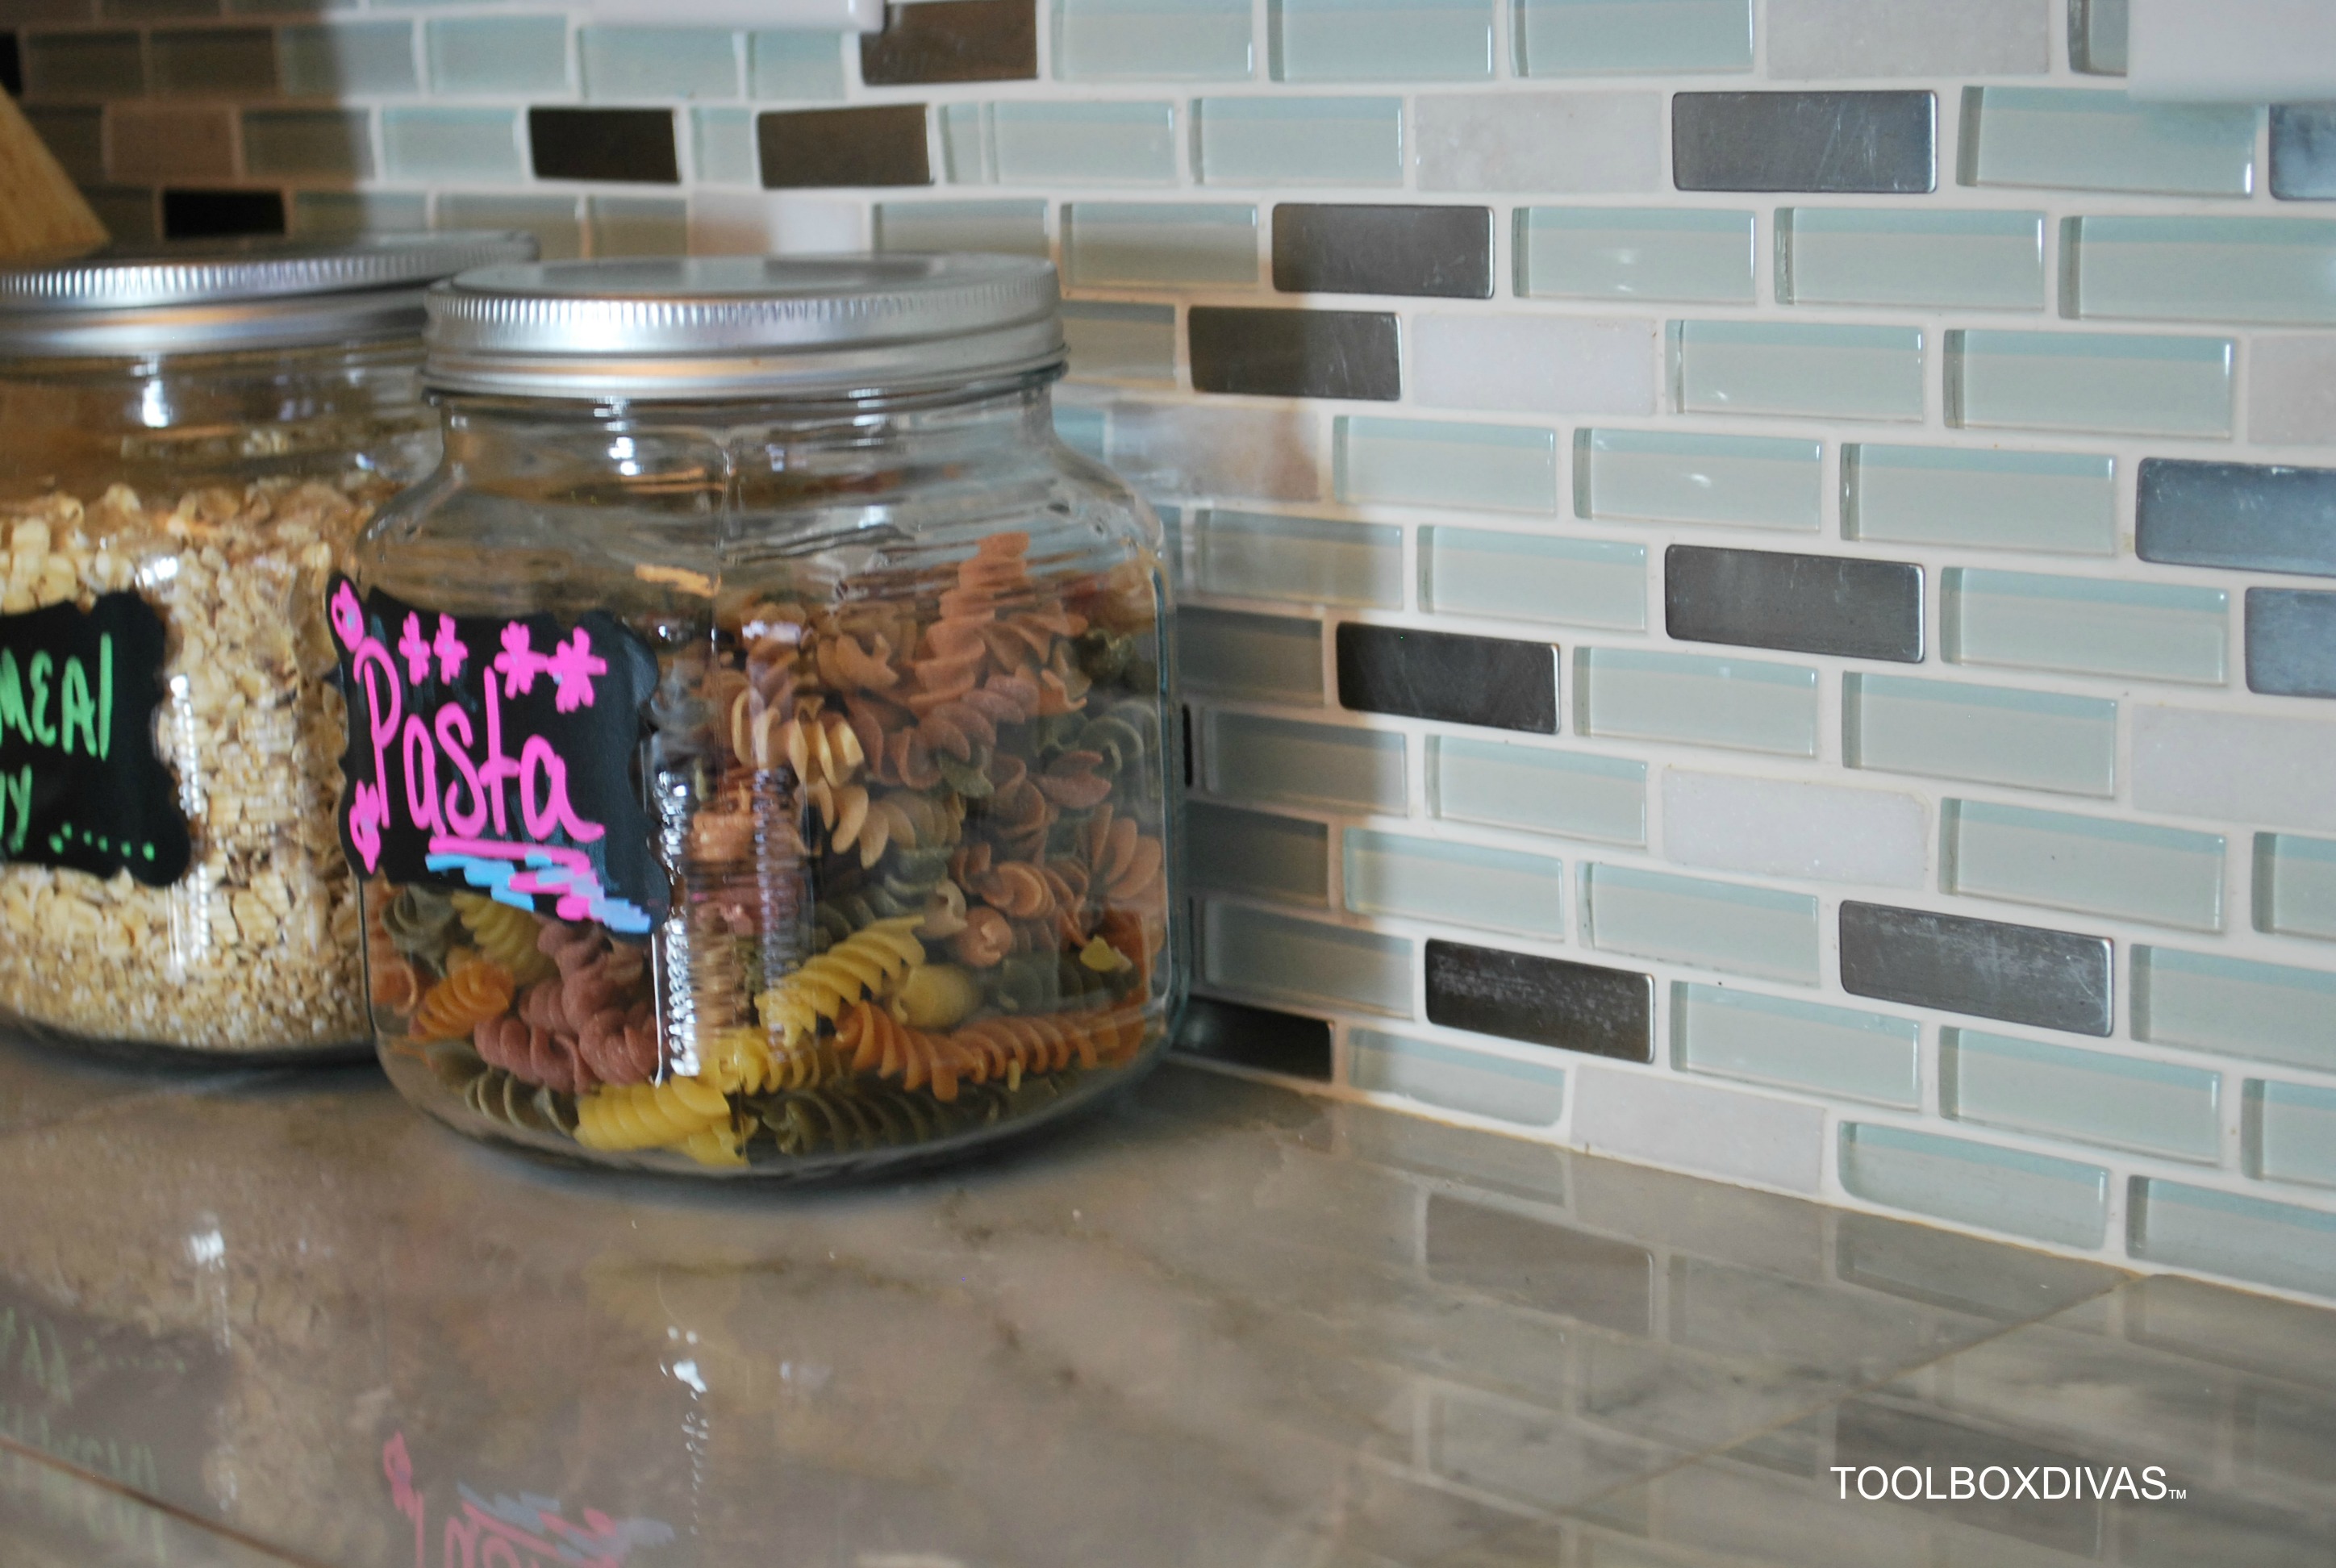
So as it turns out, tiling wasn’t that complicated. I got the hang of it, tiling not only the backsplash but my counter-tops as well. In a perfect world where money was no object I’d want carrera marble countertops but this isn’t a perfect world and money is an object..SOOooo I went with marble tiles for my counters. These days It would appear that tiled countertops are slightly passé but to heck with it. I loved the tiles I found and it was a tiny fraction of the costs of the countertops I’d been checking out in showrooms. And to tell you the truth…I quit like the outcome. For the backsplash I went with a fabulous clearance find mosaic glass tile from Home Depot. Ok so without further delay, I share with you my kitchen.
(WARNING:This is a REAL kitchen that gets REAL use.)


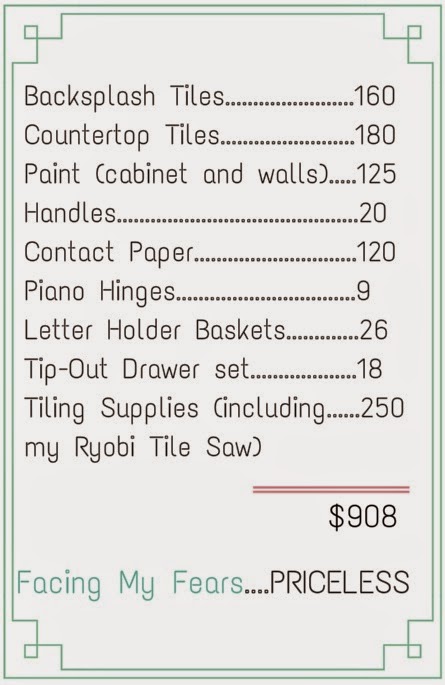
Total cost, including my 1st try….(drum roll please) $908
So you know what that means….
 So if there is anything you should take away from process, it’s don’t be afraid of taking on that which is your biggest headache. Sometimes you have to take down those walls standing in between you and that place where creativity flows. And as always use what you have. Often times you don’t need to go out and make huge purchases to achieve your ultimate goal. Make it work people (In my Tim Gunn voice)!
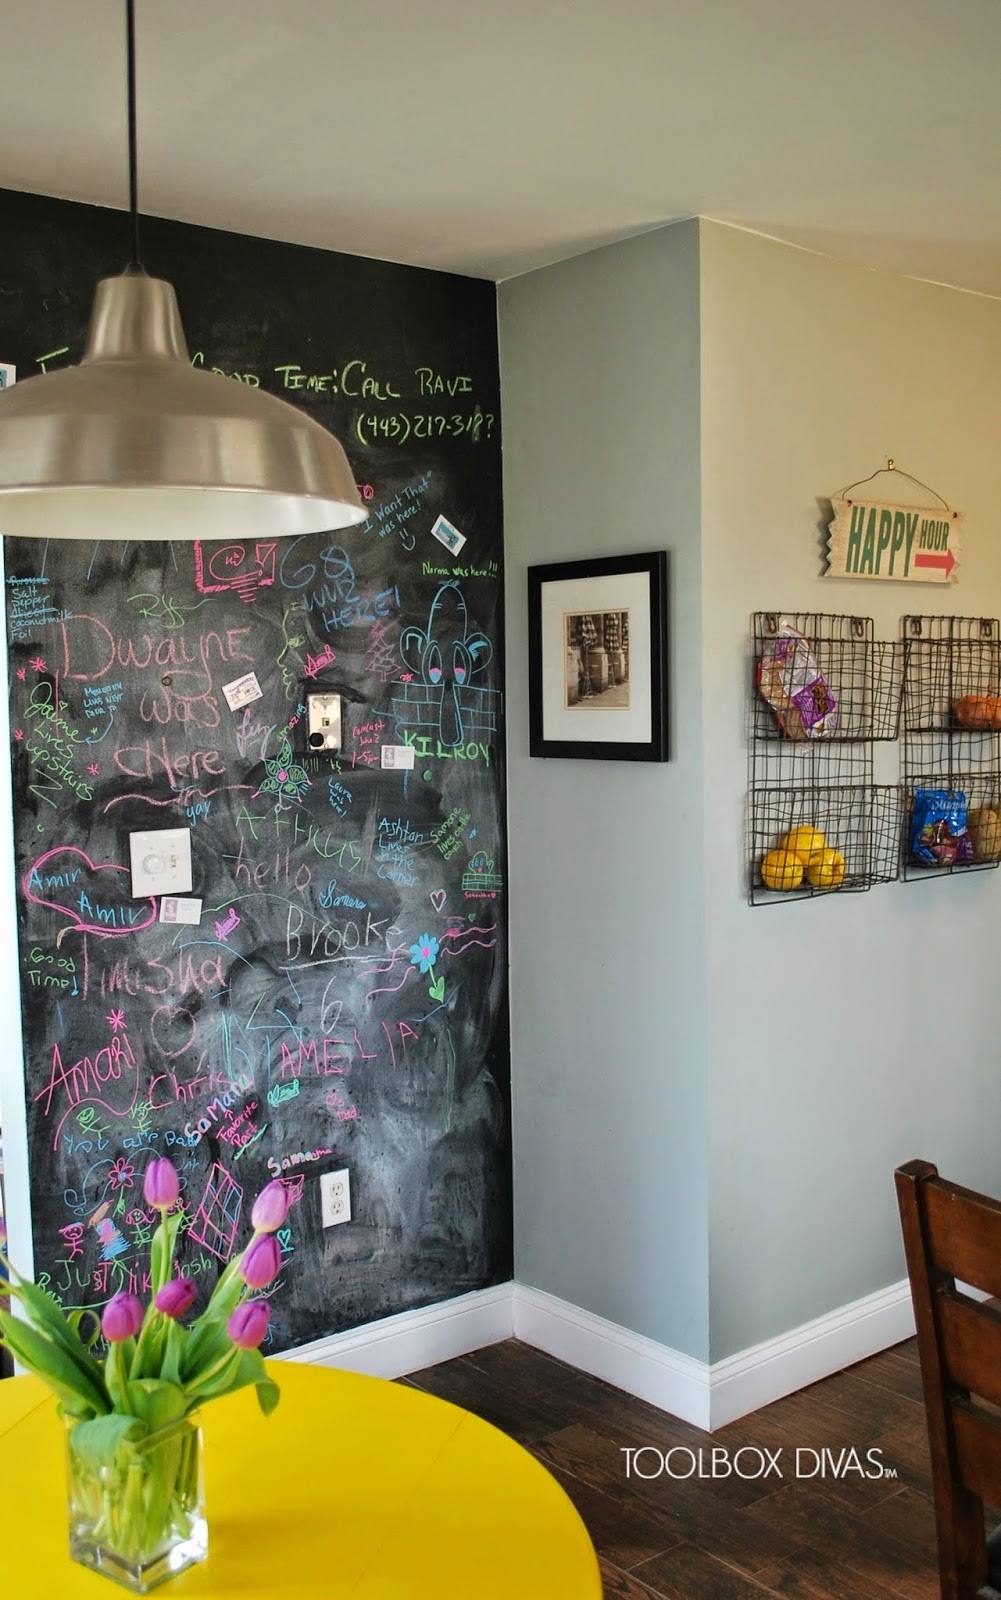

BEHR Premium Plus #710E-3 Rhino – Walls
BEHR Premium Plus #770F-5 Dark Ash Zero VOC Semi-Gloss – Cabinets (Before)
BEHR Premium Plus #520F-5 Harbor Semi-Gloss – Cabinets (Finished)
BEHR Premium Plus Ultra Pure White Semi-Gloss Zero VOC Interior Paint – Trim
BEHR Premium Plus Ultra Pure White Ceiling Paint – Ceiling


Found your post on Google, the headline caught my eye and it had been a good read.
Thank you so much. I’m glad you enjoyed it.
Hi, I think your blog might be having browser compatibility
issues. When I look at your blog in Opera, it looks fine but when opening
in Internet Explorer, it has some overlapping.
I just wanted to give you a quick heads up! Other then that, excellent blog!
Thank you. I was unaware.
Your kitchen looks wonderful. I’m in the middle of removing my old backsplash tiles to replace with a new tile backsplash. After carefully removing my tile, the drywall looks damaged – similar to yours. How did you repair the drywall before installing your tile? I couldn’t that part of your makeover on your blog. I’m curious to hear how you tackled this aspect of your project. Thanks!
Thank you!! Great Question Laura! I have to post how to repair/prep the drywall for installation of tile. But you have a couple of options if your going to retile. You can simply apply mortar to the wall evenly or what I did is I used Joint compound and applied evenly over the entire wall using a trowel. You want to just make sure the wall is smooth. Then once it’s dry you and install the tile with mortar or a a tiling mat. I will post a more detailed tutorial soon. But feel free to email me with any questions at [email protected] ~Timisha
Thanks! I will look forward to that. I am going to have to remove my drywall. As I proceeded, I realized the builders joined two sheets of sheet rock so that the seem ran along the center of the backsplash area, causing instability. In addition, they used 1/4inch sheet rock. This is an outside wall. So, I’ve decided to install hardi-board and will attempt removing the damaged drywall and replacing it with the hardi-board. Wish me luck!
Oh best of luck to you! Please share before and after pics with me once your done. I know it’s going to look outstanding!
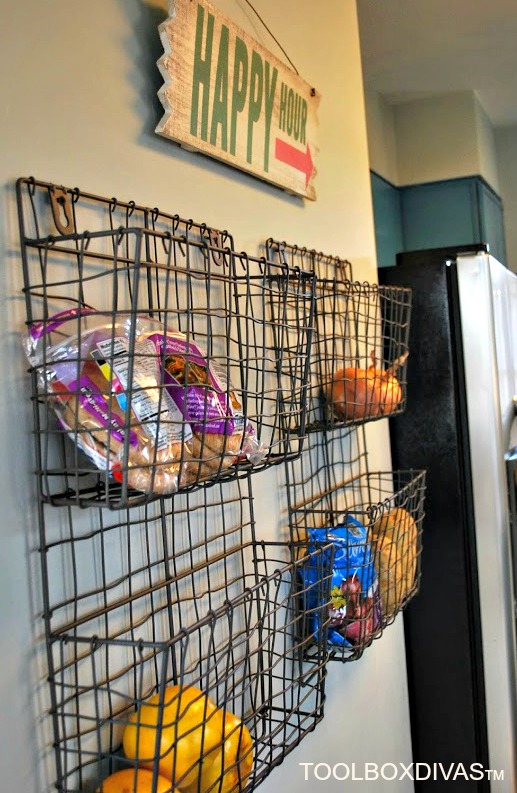
LOVE the blue! Such a beautiful kitchen. Where did you get those letter holder baskets??
Thank you so much! I found those letter holders at homegoods. I saw them and immediately knew I what I could use them for. If you think about it, most mail is digital now, so the purpose of letter holders is slightly different now.
Love your color choices, and the fact that you simply started bashing that tile and getting the remodel going. I did that once myself… not a kitchen, but a dining room and sitting room in a home we owned some years ago. My husband came home and I had torn up carpeting and started to strip wallpaper. He had no choice but to join me in my remodel adventure. LOL Sometimes a girl just can’t take it anymore and has to get the ball rolling.
Way to go Diane! Absolutely! After a while you just get fed up walking into a room that you just can’t stand to be in. And I bet it felt great when you had completed your dining and sitting rooms. I’m so proud of you! Please share pics!
You have the exact same cabinets we do in our “new” house. We are dying for new ones but need to do it on a very limited budget. What did you do to update them? They really look fantastic!!
Thank you so much Tara! I’ll tell you those cabinets had me stumped for so long. I wanted to just smash them but reality kicks in. I sanded down the doors with an abrasive sanding paper and then a smoother finishing paper. Then using a paint sprayer I found on Amazon for about $50 I spray painted the doors. When I reinstalled the doors I turned them upside down or what ever way I needed to avoid seeing those faux door opening lines. Given that you have the same cabinets I know you know what I’m referring to. I don’t know the term for those faux wood pulls. For the drawers well I just had to leave for now. But I will so make new drawer fronts. It’s on my list. When I do will be sure to put up a tutorial. But my next project is my dining room.
I also installed door knobs I found in a 10 pack from Lowe’s.
I presume you used some sort of electric sander on the doors? I am so barely into DIY at this point that I am not sure where to start with tools but something has gotta be done with the cupboards! And we have so many of them since it’s a large oddly shaped kitchen.
I did use a power sander but you don’t need one. It’s perfectly understandable Tara to not have all of the tools. I built my workshop over YEARs….and “boring” from my dad (Hahaha). Don’t feel like you need to go out and purchase all these tools. It’s not necessary nor cost effective for the average person. You can use a basic hand sander, like a sanding sponge. You can pick up one from Home depot for about $4.67 / each. So that and your basic paint supplies (brush (smooth finish), paint tray, painters tape, drop cloth or plastic and screwdriver for the hinges will get you started. As far as basic tools, you can start with an all inclusive kit from Walmart or lowes or Home depot. Like this one for under $18 from Walmart (http://www.walmart.com/ip/WorkPro-54pc-Lady-Tool-Set-Lavender/39590569?action=product_interest&action_type=title&item_id=39590569&placement_id=irs-106-t1&strategy=PWVUB&visitor_id&category=&client_guid=c817f310-ea16-4275-902b-f2a3142652d7&customer_id_enc&config_id=106&parent_item_id=12960921&parent_anchor_item_id=12960921&guid=ea12b86e-9e5f-4f0a-9518-05ce54a10234&bucket_id=irsbucketdefault&beacon_version=1.0.1&findingMethod=p13n). Also take your time. DIY doesn’t happen in 1 day. Truth be told it took me a couple of weeks to finish painting everything because I have to go to work. So although, you may feel like I want it now (like most homeowners 🙂 ) It will probably take a few weekends to get everything you want accomplished. So take your time. You’ll have lots of time when your done to enjoy your completed work, particularly if its done right. I have faith you’ll get it done.
When I think I need a tool but suspect I won’t need it long-term, I rent it. It’s pretty affordable as long as you are willing to attack your project right away and don’t have to keep the tool for long.
That’s Great! If the tool is a little bit pricey and the cost of renting it doesn’t out way the purchase I definitely recommend renting. In some cities you do have the opportunity of checking the tool out from your local tool library. Here is some information on tool libraries https://toolboxdivas.com/2014/12/3-reasons-to-discover-your-local-tool.html
great renno.! Would you share the source for the countertop tile? I especially like the blocky white tile that borders the countertop. Thank you,
M
Thank you so much Monique. I used marble flooring tile from Home depot. I’ll admit though, if I had to do it again I’d go with the larger 12×24 size marble tiles, fewer tile lines. For the counters I used Greecian White 12 in. x 12 in. Polished Marble Floor and Wall Tile. I trimmed the edges with Greecian White 4 in. x 12 in. Polished Marble Base Board Wall Tile. I will have a counter tiling tutorial up on the blog soon. I hope you subscribe so I can share with you more tips and details on my remodel. 🙂
As someone who remodels with budgets in the hundreds instead of the thousands of dollars, I salute you, Timisha. What an impressive job. You are a genius for thinking of turning those cabinet doors upside down! I’ve had my eye on a condo that has those kind of cabinets and I keep thinking “what would I do with them?” I was thinking maybe some kind of washi tape on the edges or something. Your solution makes the offensive part recede into the distance. I like your countertop solution, too. Marble without the prohibitive cost. I did a white ceramic tile counter years ago and I HATED it because the white grout wouldn’t stay white and there was so much of it. You minimized those problems by using gray and far bigger tiles than I used. Again, genius! I like your breakfast area, too. Very family-friendly. Congratulations.
Thank you so much! Congratulations on pursuing the purchase of a new home. I’ll be honest with you, that kitchen almost prevented me from buying my house. It had almost everything I wanted but initially I had the same thoughts as you. Now I look back at it and I’ve very happy I went with it. We are working with the same renovation budget. I always say anyone can design or remodel a room when you have a sizable budget, but its those that can do it on a dime that are my true design inspiration. I commend you on getting in there and not being afraid to get a little dirty! The thing about remodeling, particularly when your doing the project yourself, you always find ways to do it better or differently the next time. No two projects are alike, no matter how many times you do it. So I can’t wait to see what you end up doing with your new home! I know it’s going to be awesome!! SO please come back, share and inspire other ToolBox Divas!
You are amazing! i’m loving every detail in your Kitchen as well as your back yard renovation. great job. it is beautiful.
Hattie I just want to say thank you from the bottom of my heart for your very kind words!
New to your blog and just subscd. Took forever to comment!
Thank you so much and Welcome to ToolBox Divas! Never hesitate to reach out if you need anything. If you’d like to see a particular post, or have a question about a previous post I’m here to assist you. And please share all DIY accomplishments. [email protected]
I love this backsplash! I have beadboard that I stuck cheap copper and chrome tiles onto. Can I put glass tiles onto the beadboard after removing the cheap tiles or do I have to remove the beadboard as well?
Thank you Merlene! I recommend removing the beadboard to have a smooth surface.
I love the idea of using marble tile on the countertops! They look good for way less. I am thinking about using a porclein tile because of less maintenance, but have read about how hard it is too clean grout. How has the upkeep been with grout?
Thank you Dakota.If I did this all over again I’d opt for larger tiles to reduce the number of grout lines. But honestly its easily cleaned with bleach.
Your kitchen looks awesome! Great colors – great job!
Thank you so much, Cheryl! I really appreciate it.
What a nice blog! Definitely love it! Thanks for sharing!
Thank you so much!
Hi Timisha!! Hope you are doing well. I am liking your posts as they show your idea and the great work you are doing. You have changed the overall look of the kitchen with a very great budget. The new tiles are looking better than the old blue ones. Also, the kitchen is looking more spacious and organized. And your chalkboard wall sounds great. 🙂 😀
i realy enjoyed reading this post and appreciate your nice work
Thank you so much!